
Loaded Hummus is more than just a dip; it’s a vibrant, flavorful fiesta for your taste buds, a centerpiece that can transform any gathering from ordinary to extraordinary. We all know and love the creamy, comforting embrace of traditional hummus, but what if we told you we could elevate it to an entirely new level? This isn’t your average chickpea spread; it’s an explosion of textures and tastes that will have your guests asking for the recipe before they even finish their first scoop. What makes this particular iteration of Loaded Hummus so utterly irresistible? It’s the perfect harmony of familiar and unexpected, a symphony of ingredients meticulously chosen to complement the smooth base while adding bursts of freshness, richness, and a hint of delightful spice. Get ready to experience hummus like never before, a dish so satisfying and visually appealing, it’s guaranteed to be the star of your next appetizer spread.

Ingredients:
- 29 ounce (or two 15 ounce cans chickpeas, drained and rinsed (See Notes))
- 1/2 cup tahini
- 1/4 cup fresh lemon juice
- 1/4 cup cold water (more or less, as needed)
- 1 -2 medium cloves garlic (roughly chopped)
- 1/2 teaspoon ground cumin
- 1/8 teaspoon cayenne
- 1/2 teaspoon Himalayan salt
- extra virgin olive oil
- feta cheese (crumbled (omit to keep this vegan))
- Kalamata olives
- Castelvetrano olives
- roasted red peppers (diced)
- tomatoes (cut into wedges)
- fresh parsley (chopped)
Preparing Your Loaded Hummus Base
Step 1: Processing the Chickpeas and Tahini
The foundation of any great Loaded Hummus is, of course, the hummus itself. For this, we’ll start by getting our chickpeas ready. If you’re using canned chickpeas, be sure to drain them very well and give them a good rinse under cold running water. This step is crucial for removing any residual liquid that might have a slightly metallic or “canned” taste, ensuring a cleaner flavor profile for your dip. For even smoother hummus, you can opt to remove the skins from the chickpeas, but honestly, it’s a time-consuming step that most people skip, and the texture is still fantastic without it.
In the bowl of a food processor, add the drained and rinsed chickpeas. Next, scoop in the tahini. Tahini, a paste made from ground sesame seeds, is what gives hummus its characteristic creamy texture and nutty depth. Make sure you’re using a good quality tahini for the best results. Add the roughly chopped garlic cloves. Don’t worry about mincing them finely; the food processor will take care of that. Finally, add the ground cumin, the cayenne pepper for a gentle warmth, and the Himalayan salt. Precision with salt is important; you can always add more at the end if needed, but it’s harder to take away.
Step 2: Blending and Emulsifying
Now, it’s time to start processing. Pulse the ingredients a few times to break them down. Then, while the food processor is running, slowly drizzle in the fresh lemon juice. The acidity of the lemon juice not only brightens the flavor but also helps to emulsify the mixture, making it smoother and creamier. After the lemon juice has been incorporated, begin adding the cold water, a tablespoon at a time. You’ll want to continue processing until the hummus reaches your desired consistency. For a super smooth and airy hummus, you might need a little more water. For a slightly thicker dip, use less. The goal is a creamy, homogenous mixture that’s light and spreadable. Scrape down the sides of the food processor bowl as needed to ensure everything is getting incorporated evenly. This process might take several minutes, so be patient. A well-emulsified hummus is the key to a delightful texture.
Assembling Your Loaded Hummus Masterpiece
Step 3: Transferring and Garnishing the Base
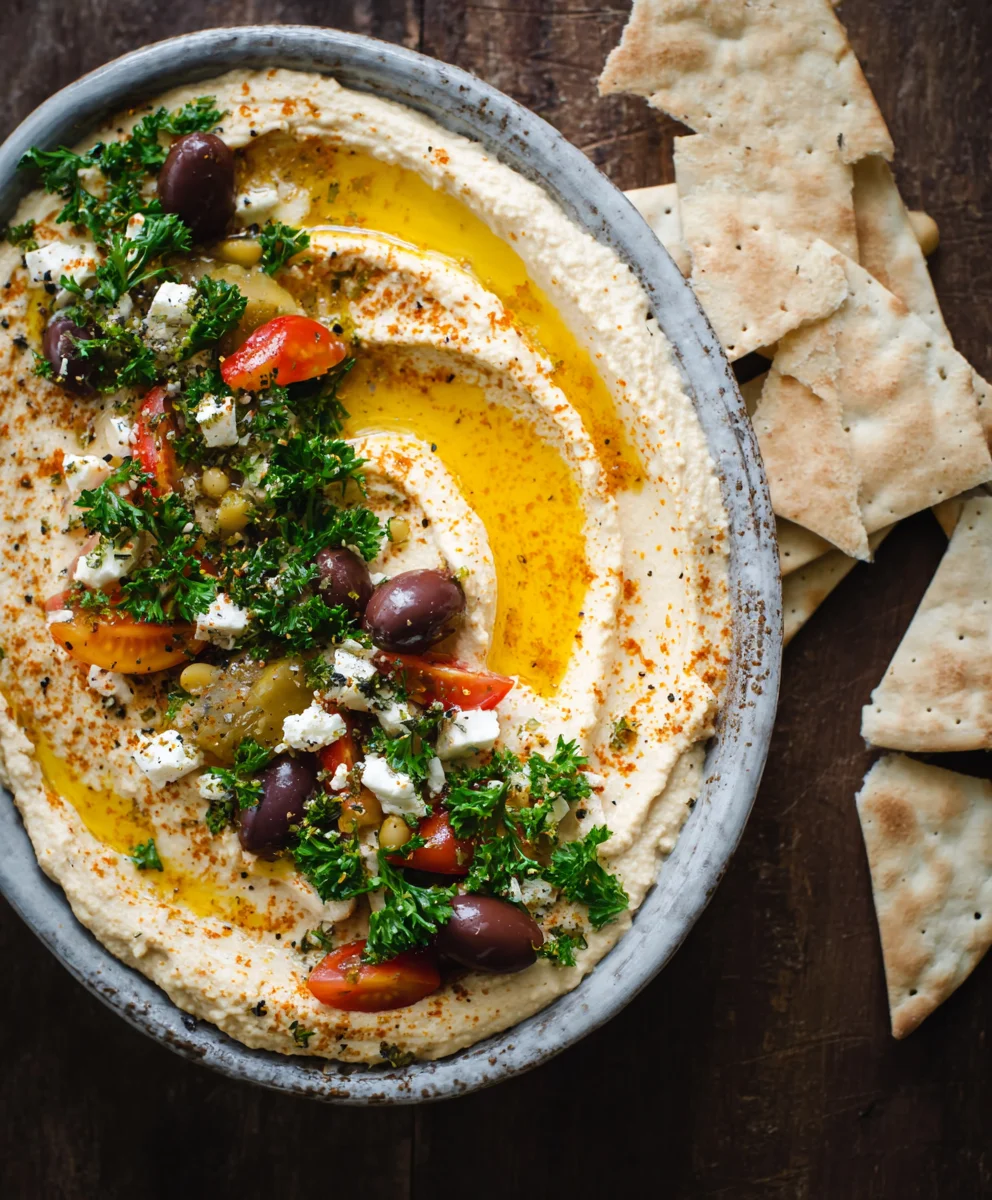
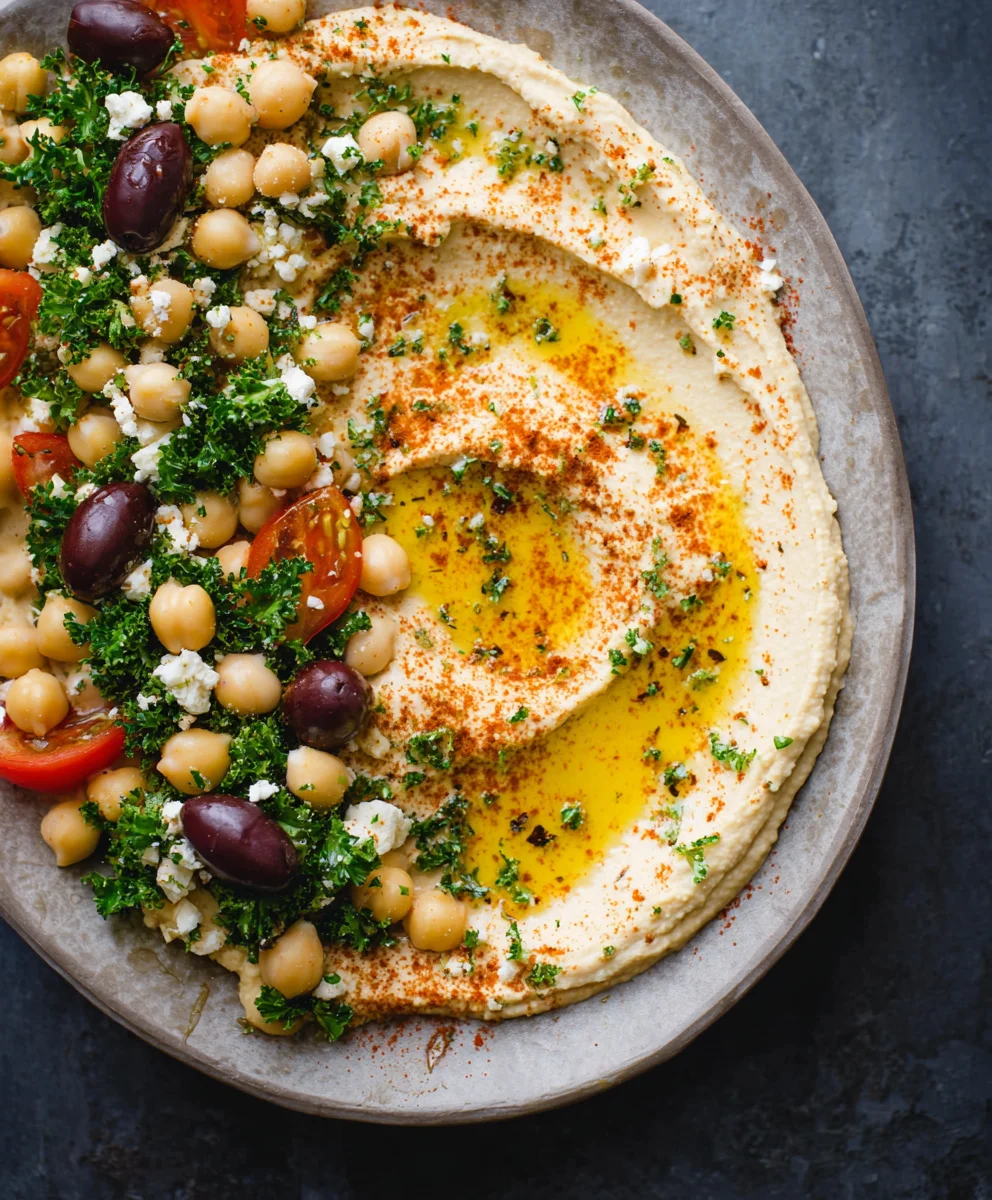
Once your hummus has achieved the perfect creamy consistency, transfer it to a shallow serving bowl or platter. Use a spoon or spatula to spread it out evenly, creating a smooth surface for our delicious toppings. Now, for the “loaded” part! Drizzle a generous amount of good quality extra virgin olive oil over the entire surface of the hummus. The olive oil not only adds a rich flavor but also a beautiful sheen, making your Loaded Hummus visually appealing.
Step 4: Adding the Savory Medley
This is where the magic really happens. We’re going to create a vibrant and flavorful topping. Scatter the crumbled feta cheese evenly over the hummus. If you’re aiming for a vegan version of this Loaded Hummus, simply omit the feta cheese. Next, artfully arrange the Kalamata olives and Castelvetrano olives. The briny, salty Kalamatas will provide a bold punch, while the milder, buttery Castelvetranos offer a delightful contrast. Intersperse the diced roasted red peppers throughout the olives. Their sweet, smoky flavor and vibrant color add another layer of complexity and visual appeal.
Step 5: The Finishing Touches and Serving Suggestions
To complete our Loaded Hummus, add the fresh tomato wedges around the perimeter of the bowl or nestled amongst the other toppings. Their juicy freshness will cut through the richness of the hummus and other ingredients. Finally, sprinkle a generous amount of freshly chopped parsley over everything. The bright, herbaceous notes of the parsley will tie all the flavors together beautifully and add a final burst of freshness.
To serve, provide an assortment of dippers. Pita bread, both warm and toasted, is a classic choice. You can also offer crusty bread, an assortment of fresh vegetables like cucumber slices, carrot sticks, bell pepper strips, and celery sticks for a healthier option. Enjoy your homemade Loaded Hummus as an appetizer, a snack, or even a light meal! The combination of creamy hummus with the salty olives, sweet peppers, creamy feta, and fresh tomatoes is simply irresistible.
Conclusion:
I hope you’ve enjoyed exploring the delightful world of Loaded Hummus! This recipe is a fantastic way to elevate a simple snack into a vibrant and satisfying appetizer or light meal. We’ve covered how to create a creamy, flavorful base and then transform it with a variety of delicious toppings. Remember, the beauty of Loaded Hummus lies in its versatility, so don’t be afraid to experiment and make it your own. Whether you’re hosting a party or just craving something delicious and healthy, this recipe is sure to impress. Give it a try – I promise you won’t be disappointed!
Serving this Loaded Hummus is incredibly flexible. It’s perfect as a centerpiece for a mezze platter, accompanied by warm pita bread, crisp vegetable sticks like carrots, cucumbers, and bell peppers, or even some crunchy pita chips. For a heartier meal, consider serving it alongside grilled chicken or falafel. The possibilities are truly endless!
Feel free to get creative with variations. You can swap out the chickpeas for white beans for a different creamy texture, or infuse your hummus with roasted red peppers or pesto for an extra flavor boost. Don’t shy away from adding different spices like smoked paprika or a pinch of cayenne for a little heat. The foundation of this Loaded Hummus is just the beginning!
Frequently Asked Questions about Loaded Hummus:
Can I make the hummus ahead of time?
Absolutely! You can prepare the basic hummus base a day or two in advance and store it in an airtight container in the refrigerator. Add the toppings just before serving to keep them fresh and vibrant.
What are some good nut-free topping options?
For nut-free variations, consider toppings like Kalamata olives, crumbled feta cheese (if dairy is okay), roasted sunflower seeds, pomegranate seeds, fresh herbs like parsley and mint, or a drizzle of tahini sauce. Roasted chickpeas also make a wonderful, crunchy topping.
How long does Loaded Hummus typically last?
Once assembled with toppings, it’s best enjoyed the same day for optimal freshness and texture. However, if you have leftovers, store them in an airtight container in the refrigerator and consume within 1-2 days, though some toppings might lose their crispness.
Amazing Loaded Hummus Recipe – Easy & Delicious
An easy and delicious recipe for loaded hummus, featuring a creamy hummus base topped with a flavorful medley of olives, roasted red peppers, feta cheese, tomatoes, and fresh parsley.
Ingredients
-
29 ounce (or two 15 ounce cans chickpeas, drained and rinsed)
-
1/2 cup tahini
-
1/4 cup fresh lemon juice
-
1/4 cup cold water (more or less, as needed)
-
1 -2 medium cloves garlic (roughly chopped)
-
1/2 teaspoon ground cumin
-
1/8 teaspoon cayenne
-
1/2 teaspoon Himalayan salt
-
extra virgin olive oil
-
feta cheese (crumbled)
-
Kalamata olives
-
Castelvetrano olives
-
roasted red peppers (diced)
-
tomatoes (cut into wedges)
-
fresh parsley (chopped)
Instructions
-
Step 1
Drain and rinse chickpeas thoroughly. In a food processor, combine chickpeas, tahini, garlic, cumin, cayenne, and salt. -
Step 2
Process the ingredients, then slowly drizzle in the fresh lemon juice while the food processor is running. Gradually add cold water, one tablespoon at a time, until the desired creamy and smooth consistency is reached. Scrape down the sides as needed. -
Step 3
Transfer the hummus to a shallow serving bowl or platter and spread it evenly. -
Step 4
Drizzle a generous amount of extra virgin olive oil over the surface of the hummus. -
Step 5
Scatter crumbled feta cheese (omit for vegan) evenly over the hummus. Artfully arrange Kalamata olives and Castelvetrano olives. Intersperse the diced roasted red peppers. -
Step 6
Add fresh tomato wedges around the perimeter or amongst the toppings. Sprinkle generously with freshly chopped parsley.
Important Information
Nutrition Facts (Per Serving)
It is important to consider this information as approximate and not to use it as definitive health advice.
Allergy Information
Please check ingredients for potential allergens and consult a health professional if in doubt.
Leave a Comment