
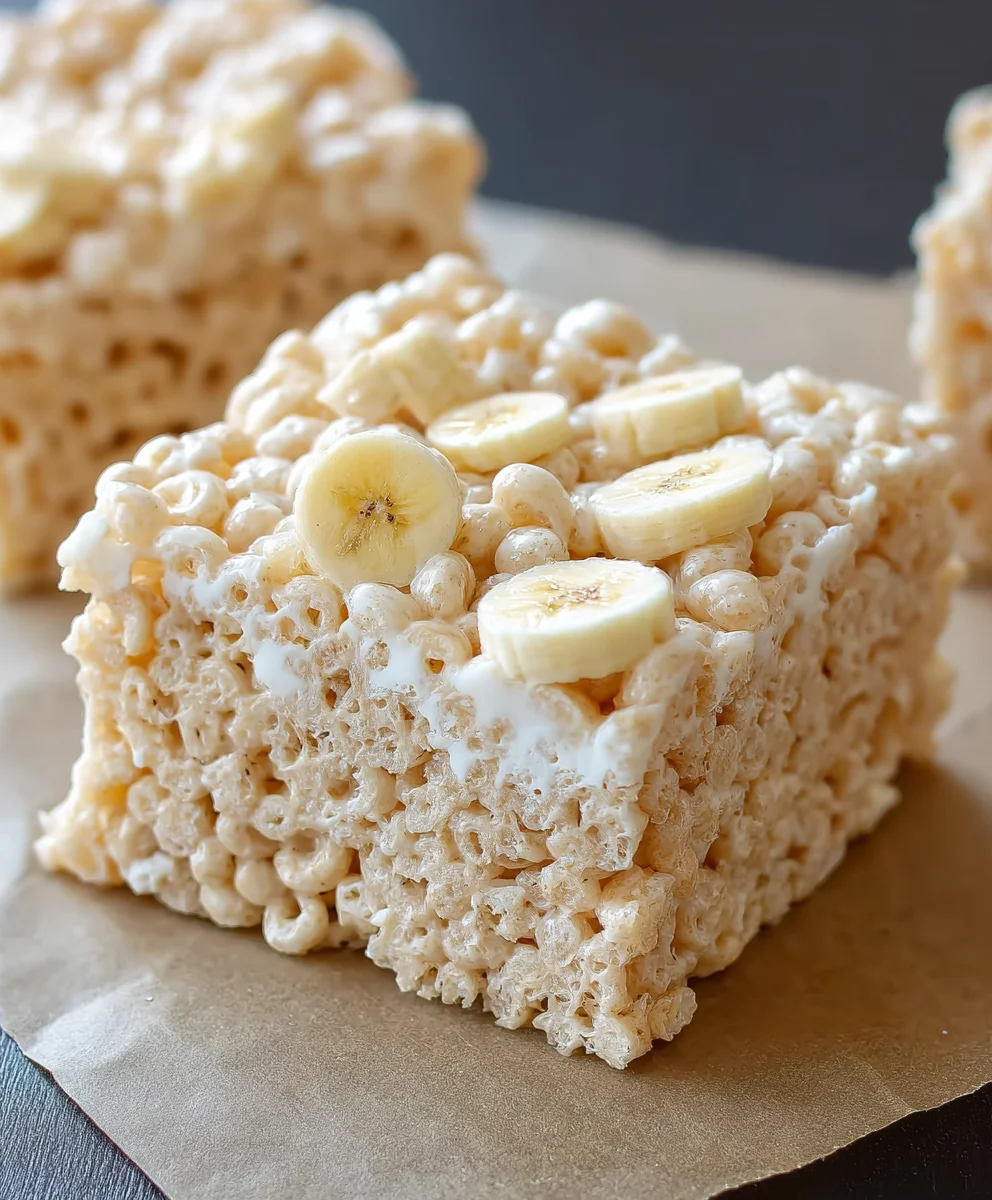
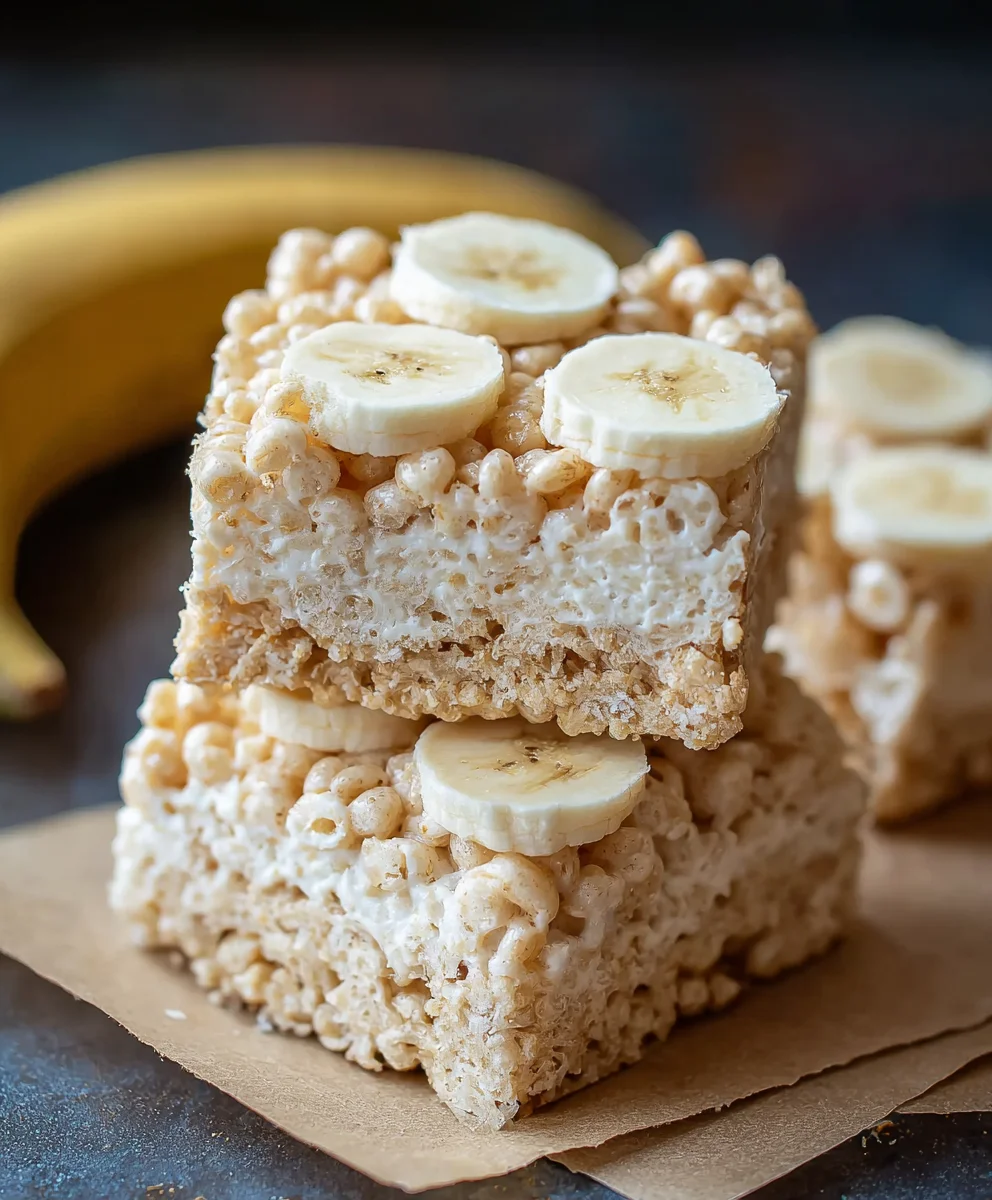
Banana Pudding Rice Krispie Treats aren’t just a dessert; they’re a nostalgic hug in edible form. Imagin extracte the creamy, comforting embrace of your favorite banana pudding, expertly swirled into the irresistible chew of a classic Rice Krispie treat. That’s the magic we’re capturing today! These aren’t your average, everyday squares. They take a beloved childhood staple and elevate it with the sophisticated, yet utterly approachable, flavors of rich banana and sweet pudding. It’s that perfect balance of familiar comfort and exciting new taste that makes these treats so incredibly special. People adore them because they tap into sweet memories while delivering a delightful, surprising flavor profile that’s both playful and sophisticated. Get ready to experience a truly unique and utterly delicious twist on a timeless favorite that will have everyone asking for the recipe!

Ingredients:
- 3 tablespoons butter, melted
- 1 (10 oz) bag marshmallows
- 1 (3.4 oz) box instant banana pudding mix
- 6 cups Rice Krispies cereal
- Crushed Nilla Wafers, for topping (about 1/2 cup, adjust to your preference)
Getting Started: The Foundation
Preparation is Key
Before we dive into creating these delightful Banana Pudding Rice Krispie Treats, a little preparation will make the whole process smoother. First, ensure you have a large mixing bowl ready. This bowl needs to be big enough to comfortably hold all your ingredients as you combine them. Next, it’s crucial to lightly grease this bowl and the spatula or spoon you’ll be using to stir. A little bit of cooking spray or softened butter works wonders to prevent the sticky marshmallow mixture from clingin extractg to everything. You’ll also want to have your baking dish prepared. A 9×13 inch pan is ideal for this recipe. Lightly grease this pan as well, or line it with parchment paper, leaving an overhang on the sides to make lifting the finished treats out much easier. Having everything prepped and ready means you can move swiftly once the marshmallows are melted, as this part of the process is time-sensitive.
Melting the Magic
The Marshmallow Basegin extract4>
Begin by melting the butter in a large saucepan over low heat. It’s important to use low heat to prevent the butter from burning, which can impart an undesirable flavor to your treats. Once the butter is completely melted and shimmering, add the entire bag of marshmallows to the saucepan. Continue to stir the marshmallows gently and constantly over low heat. The goal here is to melt them until they are smooth and creamy, with no lumps remaining. This might take a few minutes, so be patient. Avoid the temptation to turn up the heat; slow and steady wins the race when it comes to perfectly melted marshmallows. Once they are fully melted and smooth, immediately remove the saucepan from the heat.
Infusing the Flavor
The Banana Pudding Element
This is where the magic of the banana pudding comes in, transforming our classic Rice Krispie Treats into something truly special. While the marshmallows are still hot and gooey, but after you’ve removed the saucepan from the heat, it’s time to incorporate the instant banana pudding mix. Sprinkle the entire contents of the 3.4 oz box of instant banana pudding mix evenly over the melted marshmallows. Stir the pudding mix into the marshmallow mixture very thoroughly. You want to ensure that the powder is completely incorporated, distributing that delicious banana flavor and subtle creamy texture throughout. Keep stirring until you no longer see any pockets of dry pudding mix. This step is vital for achieving that distinct banana pudding taste in every bite of your treats.
Combining and Shapigin extract/h3>
Bringing It All Together
Now, with your marshmallow-pudding mixture ready, it’s time to add the Rice Krispies cereal. Pour the 6 cups of Rice Krispies cereal directly into the saucepan with the melted marshmallow and pudding mixture. Using your greased spatula or spoogin extractgently but quickly begin to fold and stir the cereal into the gooey mass. The objective is to coat every single piece of Rice Krispie with the sweet, banana-infused marshmallow mixture. It’s important to work efficiently here because the marshmallows will start to set and harden as they cool. Once the cereal is evenly coated, carefully transfer the entire mixture into your prepared 9×13 inch baking dish.
The Finishing Touch and Setting
Sweet Topping and Patience
Once the Rice Krispie mixture is in the baking dish, it’s time for the final flourish: the crushed Nilla Wafers. Sprinkle your crushed Nilla Wafers generously over the top of the mixture. You can use your greased spatula or the bottom of a glass to gently press the wafers into the top layer of the treats. This not only adds a lovely texture contrast but also reinforces that classic banana pudding flavor profile. Now comes the hardest part: waiting! Allow the Banana Pudding Rice Krispie Treats to set completely at room temperature for at least 30 minutes, or until firm to the touch. Resist the urge to cut into them too soon, as they need this time to solidify properly. Once they are set, use the parchment paper overhang to lift the entire slab out of the pan, or if you didn’t use parchment, carefully cut them into squares directly in the pan. Enjoy your homemade Banana Pudding Rice Krispie Treats!
Conclusion:
There you have it – your delightful guide to creating the most incredible Banana Pudding Rice Krispie Treats! We’ve walked through the simple steps to transform classic Rice Krispie treats into a wonderfully nostalgic dessert with a creamy banana and vanilla pudding twist. The result is a chewy, slightly gooey, and perfectly sweet treat that’s sure to bring smiles to everyone’s faces. These Banana Pudding Rice Krispie Treats are fantastic on their own, but they also make a fantastic addition to any party platter, potluck, or as a special after-school snack. Don’t be afraid to get creative! Consider adding a sprinkle of toffee bits for extra crunch or a drizzle of chocolate for a decadent touch.
We truly hope you enjoy making and sharing these special Banana Pudding Rice Krispie Treats. Give them a try, and let us know what you think!
Frequently Asked Questions:
Can I use a different type of pudding mix?
While a banana cream or vanilla pudding mix is recommended for the signature flavor, you could experiment with other flavors like cheesecake or even chocolate pudding mix for a different twist. Keep in mind that the flavor profile will change significantly.
How should I store these treats?
For best results, store your Banana Pudding Rice Krispie Treats in an airtight container at room temperature. They will stay fresh and delicious for up to 3 days. Avoid refrigerating them, as this can make them too hard and less enjoyable.
Can I add fresh bananas?
Adding fresh bananas directly to the mixture might introduce too much moisture and could affect the texture, making them mushy. For a fresh banana flavor, consider finely dicing or mashing a small amount and folding it in gently after the mixture has cooled slightly, or using banana extract for a more concentrated flavor without altering the consistency.
Banana Pudding Rice Krispie Treats
An easy and delicious twist on classic Rice Krispie Treats, infused with the flavors of banana pudding and topped with crushed Nilla Wafers.
Ingredients
-
3 tablespoons butter, melted
-
1 (10 oz) bag marshmallows
-
1 (3.4 oz) box instant banana pudding mix
-
6 cups Rice Krispies cereal
-
Crushed Nilla Wafers, for topping (about 1/2 cup)
Instructions
-
Step 1
Prepare your tools: grease a large mixing bowl, spatula/spoon, and a 9×13 inch baking dish. If using parchment paper, line the dish with an overhang. -
Step 2
Melt the butter in a large saucepan over low heat. Add the marshmallows and stir constantly until smooth and creamy. -
Step 3
Remove the saucepan from heat. Sprinkle the instant banana pudding mix over the hot marshmallows and stir thoroughly until completely incorporated, ensuring no dry pockets remain. -
Step 4
Add the Rice Krispies cereal to the marshmallow-pudding mixture. Gently and quickly fold and stir until every piece of cereal is evenly coated. -
Step 5
Transfer the mixture into the prepared baking dish and spread evenly. Sprinkle crushed Nilla Wafers over the top and gently press them in. -
Step 6
Let the treats set at room temperature for at least 30 minutes, or until firm. Cut into squares and enjoy.
Important Information
Nutrition Facts (Per Serving)
It is important to consider this information as approximate and not to use it as definitive health advice.
Allergy Information
Please check ingredients for potential allergens and consult a health professional if in doubt.
Leave a Comment