
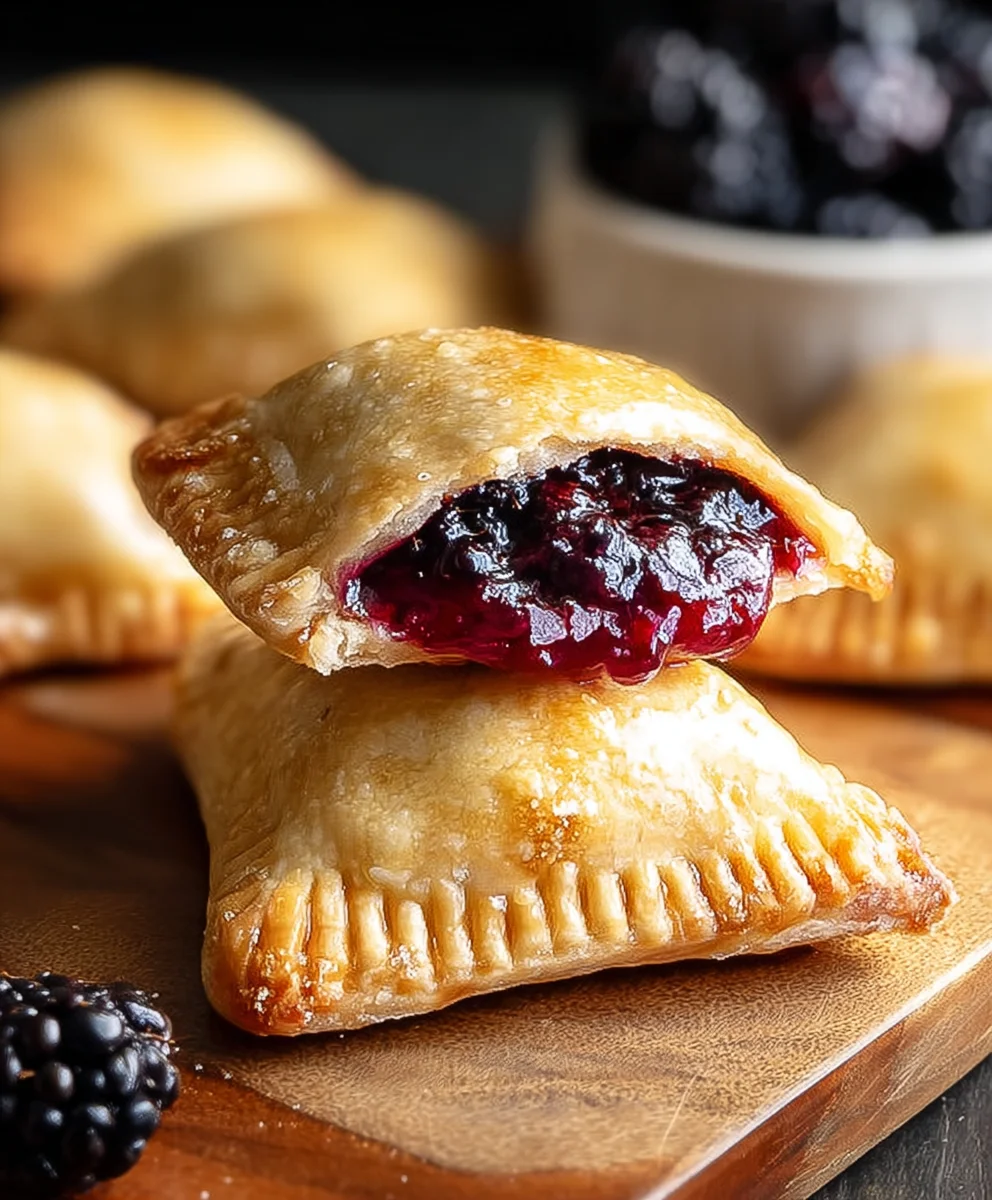
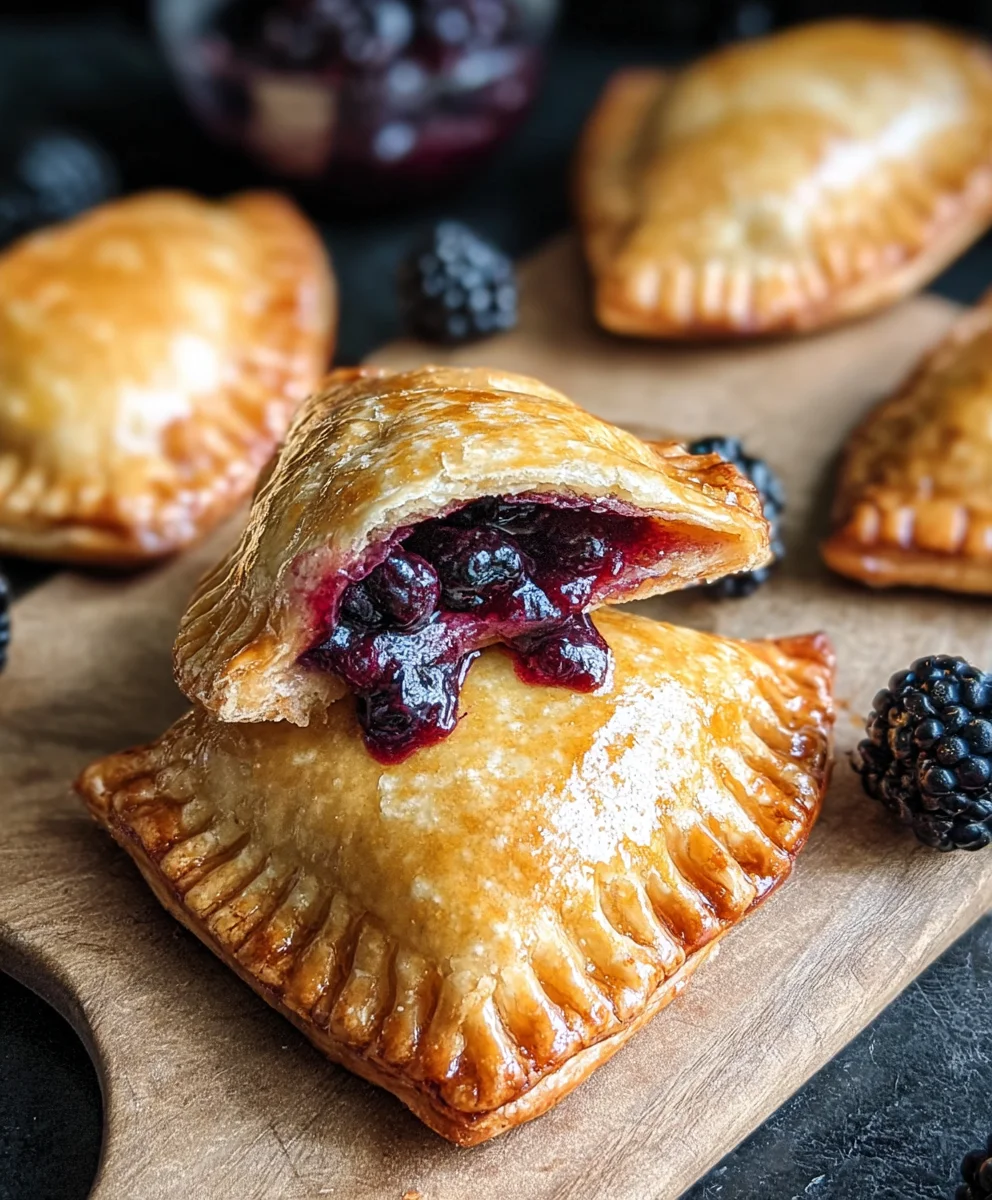
Blackberry Hand Pies are a delightful journey into sweet, tart perfection, nestled within a flaky, buttery embrace. There’s something undeniably charming about a handheld pie, isn’t there? It’s the perfect portable treat, designed to be enjoyed on the go, at a picnic, or simply as a delightful midday indulgence. People absolutely adore Blackberry Hand Pies for their vibrant burst of flavor and their nostalgic appeal. Imagin extracte biting into that golden crust to reveal a warm, gooey filling bursting with the rich, slightly tangy essence of fresh blackberries. What truly sets these Blackberry Hand Pies apart is the perfect balance of sweetness and tartness, a delicate dance that awakens the palate. The simplicity of their construction belies the complexity of flavor they deliver, making them a universally loved dessert that feels both rustic and elegant.

Ingredients:
- 21 oz. can blackberry pie filling
- Refrigerated pie crust (usually comes with two crusts)
- 1/2 cup powdered sugar
- 1 teaspoon corn syrup
- 1 tablespoon water
- Vegetable oil for frying (enough to generously fill your frying pan or pot)
Preparing the Blackberry Filling
Assembling the Hand Pies
First things first, let’s get our blackberry filling ready to go. Open up that 21 oz. can of blackberry pie filling. You don’t need to do anything fancy to it – just give it a good stir with a spoon. Sometimes the fruit can settle at the bottom, so stirring ensures you get an even distribution of berries and syrupy goodness in every bite. If you find any large chunks of blackberry that you prefer to be smaller, you can gently break them up with your spoon, but it’s entirely optional. The consistency of canned pie filling is usually perfect for this application, not too thick and not too runny, which is ideal for keeping inside our pastry pockets.
Cutting and Shaping the Pie Crust
Now it’s time to work with our refrigerated pie crust. Typically, you’ll find two crusts in a package. Unroll both of them carefully onto a lightly floured surface. A clean countertop or a large cutting board works best. You want to handle the dough as little as possible to keep it from becoming tough. Using a round cookie cutter, a biscuit cutter, or even the rim of a glass, cut out as many circles as you can from each crust. Aim for circles that are about 4 to 5 inches in diameter. The number of circles you get will depend on the size of your cutter, but you should aim for at least 8-10 circles in total. As you cut out the circles, gently gather any scraps of dough, re-roll them just once (again, minimal handling is key!), and cut out more circles until you’ve used up most of the dough. Place these circles on a parchment-lined baking sheet as you cut them to prevent sticking.
Filling and Sealing the Hand Pies
This is where the magic happens! Take one pie crust circle and place it in the palm of your hand or on your work surface. Spoon about 1 to 2 tablespoons of the prepared blackberry pie filling onto one half of the circle, leaving a border of about ½ inch around the edges. Be careful not to overfill, as this can make sealing difficult and lead to leaks during frying. Now, take another pie crust circle and gently place it over the filling, aligning the edges as best you can. Using the tines of a fork, press down firmly around the entire edge of the pie to seal the two crusts together. This crimping action not only creates a decorative edge but is crucial for ensuring the filling stays inside while frying. You can also use your fingers to pinch the edges together before using the fork for an extra secure seal. Repeat this process with the remaining circles and filling until you have your desired number of blackberry hand pies.
Frying the Blackberry Hand Pies to Golden Perfection
It’s time to bring on the heat! Pour your vegetable oil into a heavy-bottomed pot or a deep frying pan. You want enough oil so that the hand pies can float freely, about 1 to 1 ½ inches deep is usually sufficient. Heat the oil over medium heat until it reaches approximately 350°F (175°C). You can test the oil temperature by dropping a tiny piece of pie crust into the oil; it should bubble vigorously but not burn immediately. Carefully, using a spatula or tongs, slide 2-3 hand pies into the hot oil at a time, being careful not to overcrowd the pan. Overcrowding will lower the oil temperature and result in greasy pies. Fry the hand pies for about 2-3 minutes per side, or until they are a beautiful golden brown and puffed up. They cook quite quickly, so keep a close eye on them!
Draining and Glazing for the Finishing Touch
Once the hand pies are a lovely golden brown on both sides, carefully remove them from the hot oil using a slotted spoon or spider strainer. Place them on a wire rack set over a baking sheet or on paper towels to drain off any excess oil. This is an important step to ensure your blackberry hand pies aren’t greasy. While the pies are still warm, it’s time for a delightful glaze. In a small bowl, whisk together the ½ cup of powdered sugar, 1 teaspoon of corn syrup, and 1 tablespoon of water. The corn syrup will add a lovely sheen and help the glaze set slightly. You’re looking for a consistency that’s drizzly but not too thin. You can adjust the water slightly if needed – add a tiny bit more water if it’s too thick, or a little more powdered sugar if it’s too thin. Drizzle this simple glaze generously over the warm hand pies. The warmth of the pies will help the glaze melt slightly and create a beautiful, sweet coating. Let them cool on the wire rack for a few minutes to allow the glaze to set before enjoying these delightful treats.
Conclusion:
And there you have it! Your guide to crafting the most delightful Blackberry Hand Pies. We’ve walked through each step, from creating that perfectly flaky pastry to achieving a burst of sweet and tart blackberry filling. These little pockets of joy are not only a treat for your taste buds but also a beautiful addition to any occasion. Don’t be intimidated by pastry; with a little patience and this recipe, you’ll be a pro in no time.
For serving, I love these Blackberry Hand Pies warm, perhaps with a scoop of vanilla bean ice cream or a dollop of fresh whipped cream. They are also fantastic at room temperature, making them ideal for picnics, potlucks, or a simple afternoon snack. Feel free to get creative with variations! You could add a touch of lemon zest to the filling for extra brightness, or perhaps a sprinkle of cinnamon for warmth. A crum extractb topping is also a delicious addition. So go ahead, bake a batch, share them with loved ones, and enjoy the wonderful fruits of your labor!
Frequently Asked Questions:
Can I make the pastry dough ahead of time?
Absolutely! The pastry dough for your Blackberry Hand Pies can be made up to 2 days in advance and stored, tightly wrapped, in the refrigerator. You can also freeze it for up to a month. Just be sure to let it thaw in the refrigerator before rolling it out.
What if I don’t have fresh blackberries?
Frozen blackberries work wonderfully in these Blackberry Hand Pies! You might need to cook them down slightly longer to reduce excess moisture, and it’s a good idea to toss them with a bit of cornstarch before adding them to the pie. Adjust the sugar as needed, as frozen berries can sometimes be tarter.
How should I store leftover Blackberry Hand Pies?
Store any leftover Blackberry Hand Pies in an airtight container at room temperature for up to 2 days, or in the refrigerator for up to 4 days. For longer storage, you can freeze them. Once completely cooled, wrap them individually in plastic wrap and then place them in a freezer bag or container. Reheat gently in a low oven or toaster oven to revive their crispiness.
Blackberry Hand Pies
Easy and delicious homemade blackberry hand pies, perfect for a quick dessert.
Ingredients
-
21 oz. can blackberry pie filling
-
Refrigerated pie crust (2 crusts)
-
1/2 cup powdered sugar
-
1 teaspoon corn syrup
-
1 tablespoon water
-
Vegetable oil for frying
Instructions
-
Step 1
Prepare the blackberry filling by stirring the canned pie filling to ensure even distribution of berries and syrup. -
Step 2
Unroll pie crusts and cut out 4-5 inch circles using a cutter. Reroll scraps once if needed. -
Step 3
Spoon 1-2 tablespoons of filling onto one half of a pie crust circle, leaving a border. Place another circle on top and crimp edges with a fork to seal. -
Step 4
Heat vegetable oil in a pot or pan to 350°F (175°C). Fry 2-3 hand pies at a time for 2-3 minutes per side until golden brown. -
Step 5
Remove pies from oil and drain on a wire rack. Whisk together powdered sugar, corn syrup, and water for the glaze. Drizzle over warm pies.
Important Information
Nutrition Facts (Per Serving)
It is important to consider this information as approximate and not to use it as definitive health advice.
Allergy Information
Please check ingredients for potential allergens and consult a health professional if in doubt.
Leave a Comment