
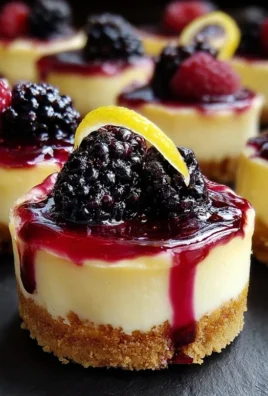
Cherries in the Snow is more than just a dessert; it’s a whisper of winter magic and a burst of pure, unadulterated joy. I’ve always been captivated by its evocative name, and even more so by its enchanting reality. This classic treat, with its vibrant ruby-red cherries nestled in a delicate, creamy snowdrift of sweet goodness, never fails to transport me. It’s the perfect symphony of textures and flavors – the slight tartness of the cherries cutting through the velvety sweetness, creating a sensation that’s both comforting and exhilarating. This is the kind of dessert that sparks conversations and creates lasting memories around the table, a true testament to why Cherries in the Snow remains a beloved favorite, especially when the weather turns chilly and we crave a touch of cozy indulgence. What makes it truly special is its simple elegance; it doesn’t need elaborate flourishes to shine, relying instead on the quality of its ingredients and the sheer delight it brings to every spoonful.

Cherries in the Snow
Cherries in the Snow is a dessert that’s as beautiful to look at as it is delightful to eat. It’s a perfect make-ahead treat, ideal for potlucks, holiday gatherings, or simply when you’re craving something sweet and impressive without a lot of fuss. The combination of light, airy angel food cake, a creamy, luscious filling, and the vibrant sweetness of cherry pie filling creates a symphony of textures and flavors that’s truly irresistible. This dessert is a classic for a reason, and it’s surprisingly easy to assemble, making it a go-to recipe for many.
One of the best things about Cherries in the Snow is its versatility. While the classic preparation uses store-bought components for ultimate ease, you can certainly elevate it with homemade angel food cake or even a homemade cherry compote if you’re feeling ambitious. However, for the non-alcoholic sake of simplicity and guaranteed success, we’re sticking to the tried-and-true method that yields fantastic results every time. The “snow” in this dessert comes from the beautiful white cream cheese filling that contrasts perfectly with the ruby-red cherry topping. It’s a dessert that truly lives up to its whimsical name, bringin extractg a touch of elegance to any table.
When preparing this dessert, the key is to have all your ingredients at the right temperature and ready to go. The cream cheese needs to be at room temperature so it can be blended smoothly, avoiding any lumps in your filling. Thawed Cool Whip ensures a light and airy texture. The pre-baked angel food cake provides a sturdy yet delicate base for the rich layers. And, of course, the star of the show, the cherry pie filling, brings that burst of fruity flavor and gorgeous color. Let’s get started on creating this showstopper!
Ingredients:
Assembly Instructions:
1. Prepare the Cream Cheese Filling: In a medium-sized mixing bowl, combine the softened cream cheese and the powdered sugar. It’s crucial that the cream cheese is truly at room temperature – this means it should be soft enough to easily press with your finger. If it’s still cold and firm, your filling might end up lumpy, which we definitely want to avoid. Use an electric mixer on medium speed to beat these two ingredients together until they are smooth and creamy. Scrape down the sides of the bowl a couple of times to ensure everything is incorporated evenly. Once you have a smooth base, gradually add the 2% milk while continuing to mix. Continue to beat the mixture until it’s light, fluffy, and has a consistency similar to thick pudding. This step is about creating a wonderfully smooth and stable base for our “snow.”
2. Incorporate the Whipped Topping: Now it’s time to gently fold in the thawed Cool Whip. It’s important that the Cool Whip is fully thawed but not melted; it should still be light and airy. Add about half of the thawed Cool Whip to the cream cheese mixture. Use a spatula to gently fold it in, being careful not to overmix. You want to maintain the airiness of the Cool Whip. Continue folding until there are no streaks of cream cheese mixture visible. Then, add the remaining Cool Whip and repeat the gentle folding process until everything is just combined. The goal here is to create a light, cloud-like filling that will be the perfect creamy contrast to the cherry topping. Overmixing at this stage can deflate the whipped topping and make the filling dense.
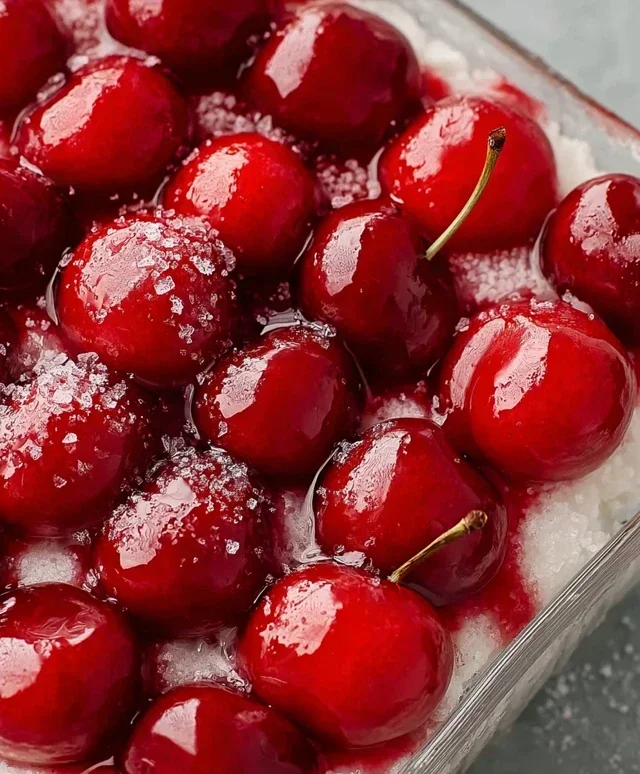
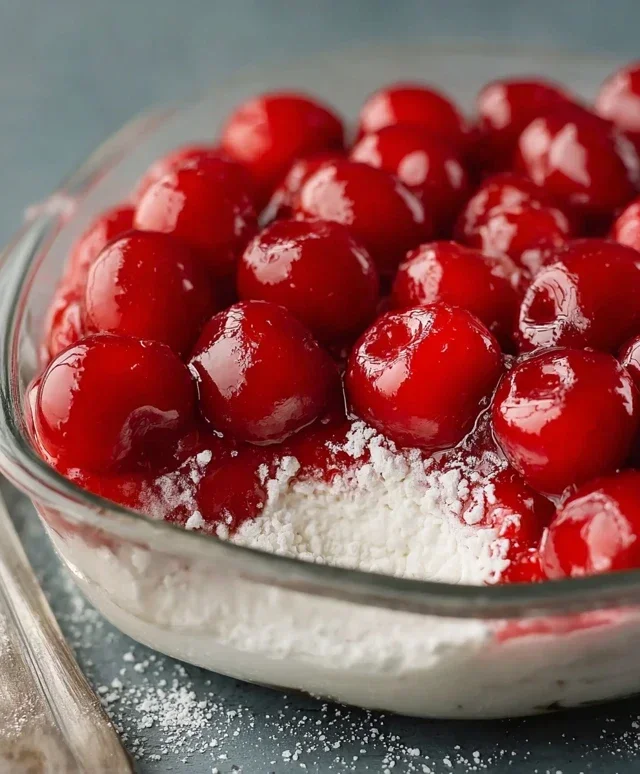
3. Prepare the Angel Food Cake: Take your pre-baked 9-inch angel food cake. You have a couple of options here for how to prepare it for layering. The most common and easiest method is to simply tear or cut the cake into bite-sized pieces. You can also gently slice the cake into two or three horizontal layers if you prefer a more structured dessert, but cubing it is perfectly fine and often easier. Arrange these cake pieces in an even layer at the bottom of your serving dish. A 9×13 inch baking dish or a trifle bowl works beautifully for this dessert, allowing you to see the lovely layers. Make sure the cake pieces are distributed fairly evenly to create a solid base for the creamy filling.
4. Layer the Creamy Filling: Once the angel food cake is in place, carefully spoon the cream cheese and Cool Whip mixture over the cake pieces. Spread it out gently to create an even layer. You want to cover all the cake pieces completely, ensuring that every bite will have a generous portion of this delicious, creamy filling. Again, avoid pressing down too firmly, as we want to keep the filling as light and airy as possible. This layer is the “snow” that will cradle the vibrant cherries. Take your time to spread it smoothly and evenly – this contributes to the overall visual appeal of the dessert.
5. Add the Cherry Topping and Chill: This is where the magic really happens visually! Open your two cans of cherry pie filling. Gently spoon the cherry pie filling over the cream cheese layer. You can spread it out evenly, or you can create a more artistic, swirled effect. Some people like to leave some of the white cream cheese showing through for a more dramatic “snow” effect. Once the cherry topping is in place, cover the serving dish tightly with plastic wrap. Place the Cherries in the Snow in the refrigerator and let it chill for at least 4 hours, but overnight is even better. This chilling time is essential for the flavors to meld together and for the dessert to set properly, making it easier to serve and enjoy. The cold helps to firm up the cream cheese filling and allows the cake to absorb some of the flavors.
Enjoy this delightful and easy-to-make dessert! It’s a crowd-pleaser that looks as stunning as it tastes.
Conclusion:
I hope you’re as excited as I am to try this delightful ‘Cherries in the Snow’ recipe! It truly is a showstopper, offering a beautiful balance of tart cherries nestled within a creamy, sweet coconut base. The vibrant red of the cherries against the pristine white is visually stunning, making it perfect for any special occasion or just as a treat to brighten your day. I find it’s wonderfully refreshing after a rich meal or as a light dessert on a warm afternoon. This dessert is incredibly versatile, and I encourage you to get creative with it!
Beyond the classic preparation, consider swirling in some dark chocolate for a mocha-tinged twist, or perhaps a hint of almond extract for an extra layer of flavor. You could also top it with toasted slivered almonds or a sprinkle of finely shredded coconut for added texture. Don’t be afraid to experiment! The joy of cooking is in making it your own, and this ‘Cherries in the Snow’ recipe is an excellent canvas for your culinary adventures. Give it a go – I promise you won’t be disappointed!
Frequently Asked Questions:
Can I use frozen cherries instead of fresh?
Absolutely! Frozen cherries are a fantastic substitute, especially when fresh ones are out of season. Ensure they are fully thawed and drained of excess liquid before incorporating them into the recipe to prevent a watery dessert.
What is the best way to store leftovers?
Leftovers can be stored in an airtight container in the refrigerator for up to 3-4 days. The flavors often meld beautifully overnight, making it even more delicious the next day!
Is this recipe suitable for a vegan diet?
Yes, the base recipe is naturally vegan. The richness comes from coconut milk, and there are no dairy products involved, making it a wonderful option for those following a plant-based diet.
Cherries in the Snow
A simple and refreshing no-bake dessert featuring layers of creamy filling, angel food cake, and cherry pie topping.
Ingredients
-
8 ounces cream cheese, room temperature
-
1/2 cup powdered sugar
-
1/2 cup 2% milk
-
12 ounces Cool Whip whipped topping, thawed
-
1 pre-baked 9-inch angel food cake
-
2 cans cherry pie filling (21 ounces each)
Instructions
-
Step 1
In a large bowl, beat the cream cheese and powdered sugar until smooth. -
Step 2
Gradually beat in the milk until well combined. -
Step 3
Gently fold in the thawed Cool Whip until no streaks remain. -
Step 4
Tear or slice the angel food cake into bite-sized pieces and layer half of them in the bottom of a 9×13 inch baking dish. -
Step 5
Spread half of the cream cheese mixture evenly over the cake layer. -
Step 6
Spoon half of the cherry pie filling over the cream cheese layer. -
Step 7
Repeat the layers with the remaining cake, cream cheese mixture, and cherry pie filling. -
Step 8
Chill for at least 2 hours before serving.
Important Information
Nutrition Facts (Per Serving)
It is important to consider this information as approximate and not to use it as definitive health advice.
Allergy Information
Please check ingredients for potential allergens and consult a health professional if in doubt.
Leave a Comment