
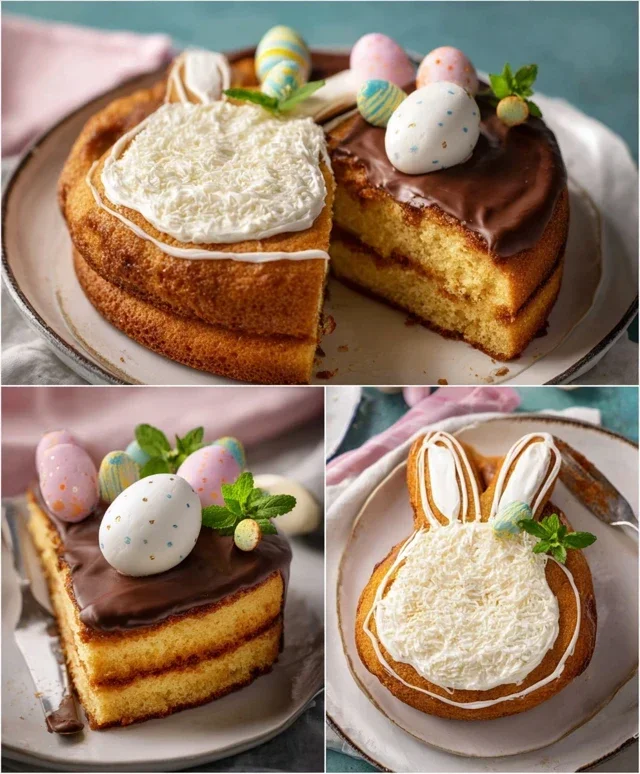
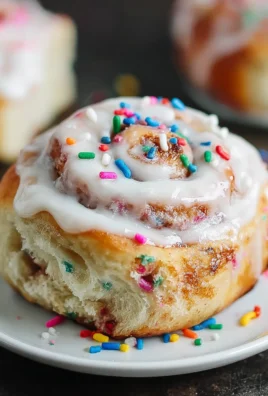
Easy Bunny Cake Recipe is your ticket to a delightfully charming and surprisingly simple dessert that’s perfect for any spring celebration or just a fun baking project with the kids! There’s something undeniably magical about a bunny-shaped cake, isn’t there? It instantly brings a smile to faces, both young and old, and is a guaranteed hit at Easter brunches, birthday parties, or even just a whimsical Tuesday afternoon. What makes this easy bunny cake recipe so special is its foolproof nature. Even if you’re a begin extractner baker, you’ll be amazed at how effortlessly you can transform a few simple cake layers into an adorable edible bunny. It’s the perfect blend of impressive presentation and achievable execution, making it a beloved classic for a reason. Get ready to hop into some baking fun!

Easy Bunny Cake Recipe
This Easy Bunny Cake Recipe is the perfect way to add a touch of springtime magic to your celebrations! Whether it’s Easter, a birthday, or just a fun weekend treat, this adorable bunny is surprisingly simple to make. Forget complicated sculpting; we’re using straightforward techniques to create a delightful dessert that will wow your guests. I love how versatile this recipe is – you can easily adapt it with your favorite cake flavors and frosting colors. Plus, it’s a fantastic project to get the kids involved in, making sweet memories along with a sweet treat.
Ingredients:
Cooking Instructions
Now for the fun part – transforming those cake layers into a charming bunny! This process is all about assembly and a little bit of frosting magic. We’ll go step-by-step to ensure your bunny turns out picture-perfect.
Preparing the Cake Layers
First things first, let’s get our cake layers ready. If you’re using a cake mix, follow the package directions for baking. If you’re a fan of homemade cake, bake your favorite recipe until a toothpick inserted into the center comes out clean. It’s crucial that your cake layers are completely cooled before you start frosting. Warm cake layers can lead to melted frosting and a rather sad, sliding bunny situation. I usually bake my cakes the day before and let them cool on a wire rack overnight, then cover them loosely with plastic wrap once fully cooled. This ensures they are perfectly chilled and firm for decorating.
Assembling the Bunny Base
We’ll need one of the round cake layers as the bunny’s body. Place this layer on your serving platter or cake board. Now, take your white frosting and spread a generous, even layer over the top of this cake layer. Don’t worry about making it perfectly smooth at this stage; we’ll refine it later. This frosting layer acts as the glue for our next step.
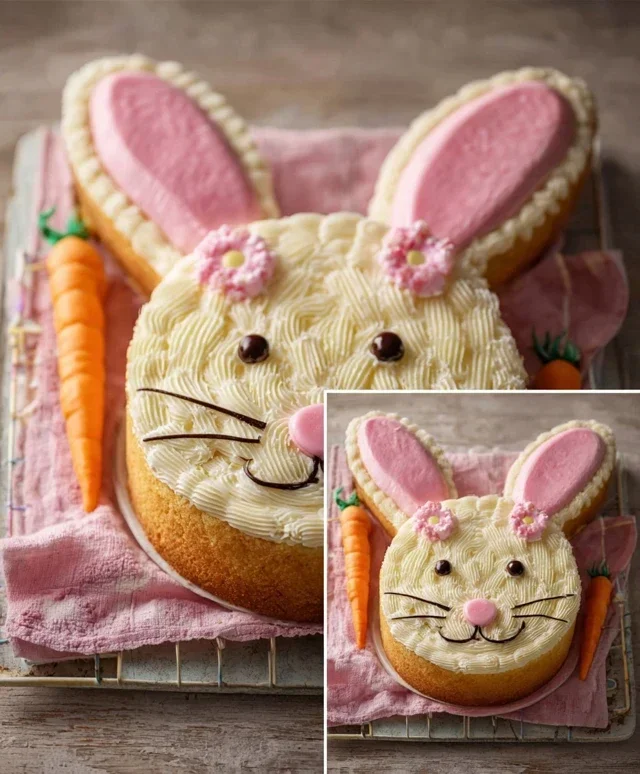
Creating the Bunny’s Head and Ears
This is where the bunny starts to take shape! For the bunny’s head, we’ll use the second round cake layer. You can either place this directly on top of the frosted body layer and then carve it into a rounded head shape, or for a slightly more defined head, you can cut a shallow curve into the top of the body layer before adding the head layer on top. Another fantastic method is to use a smaller, round cake pan for the head if you have one. For the ears, this is where we get creative! You can cut two large, ear-shaped pieces from the leftover cake scraps from your second layer, or even use large cookies like sugar cookies or gin extractgerbread cut into ear shapes. Frost these ear pieces with white frosting. Once frosted, position them on top of the head layer, angling them slightly forward to give a cute, non-alcoholic alert bunny look. For extra stability, you can insert toothpicks through the bottom of the ear pieces and into the cake head.
Frosting the Bunny
Now it’s time for the main frosting event! Using your white frosting, cover the entire bunny – the body, the head, and the ears. Try to get a smooth finish, but don’t stress too much. A slightly rustic look can be quite charming for a bunny! If you have a frosting spatula, this is your best friend for smoothing. For the inner ears, take your pink frosting and use a piping bag with a small round tip to create a smooth, oval shape on the inside of each ear. This adds that classic bunny ear detail. You can also use a spoon to spread the pink frosting carefully if you don’t have a piping bag.
Adding the Bunny’s Face and Details
This is where your bunny truly comes to life! Using your chocolate icing or melted chocolate, we’ll create the facial features. In a piping bag fitted with a very small round tip, pipe two small dots for the eyes. Then, pipe a little upside-down triangle for the nose. For the mouth, you can pipe a small “W” shape or a simple line with two short lines branching off. Get creative with this part – even simple dots and lines can be adorable! Finally, it’s time for those colorful accents. Use your jellybeans or colorful round candies to decorate the bunny’s body. You can create a pretty pattern, a cluster of them on the belly, or even outline the ears. This is a great place to let your imagin extractation run wild. Consider placing a few larger candies for “buttons” down the front of the bunny’s body.
There you have it – your very own Easy Bunny Cake! This recipe is a guaranteed hit and a joy to make. Enjoy sharing this sweet creation with your loved ones.
Conclusion:
This easy bunny cake recipe is a delightful way to bring a touch of springtime magic to your table, perfect for Easter celebrations or any occasion that calls for a bit of whimsical fun! Its simplicity makes it accessible for bakers of all skill levels, and the adorable bunny shape is guaranteed to bring smiles. We’ve covered how to create this charming treat with minimal fuss, ensuring a delicious and visually appealing result every time. Don’t be afraid to get creative with your decorations; think edible glitter, pastel sprinkles, or even small candies for the eyes and nose!
Serving this bunny cake is pure joy. It’s fantastic on its own, but also pairs wonderfully with fresh berries, a dollop of whipped cream, or a light vanilla sauce. For variations, consider adding a touch of lemon zest to the batter for a bright citrus note, or using food coloring to create a pastel-hued bunny. You could even experiment with different frosting flavors like cream cheese or strawberry. I truly encourage you to give this easy bunny cake recipe a try. It’s a rewarding baking experience that results in a truly special dessert.
Frequently Asked Questions:
Can I make this cake ahead of time?
Absolutely! You can bake the cake layers a day in advance and store them tightly wrapped at room temperature. Frosting and decorating are best done on the day of serving for the freshest look, but the unfrosted cake holds up very well.
What if I don’t have a bunny-shaped cake pan?
No problem at all! You can bake the batter in a standard round or square cake pan and then use a template to cut out a bunny shape. Alternatively, you can bake two round cakes and stack them, then use frosting to sculpt and decorate them into a bunny.
Are there any gluten-free or vegan options?
Yes, you can easily adapt this recipe! For gluten-free, use your favorite gluten-free all-purpose flour blend. For a vegan version, substitute the eggs with a flax egg or applesauce, and use dairy-free butter and milk for the frosting.
Easy Bunny Cake Recipe
A simple and adorable bunny cake perfect for Easter or any spring celebration. Uses readily available ingredients for a quick and fun baking project.
Ingredients
-
Two round cake layers (use one cake mix or your favorite homemade recipe)
-
White frosting (ready-made or your favorite homemade recipe)
-
Pink frosting (strawberry is commonly available ready-made and comes pink)
-
Chocolate icing or melted chocolate for details
-
Jellybeans or colorful round candies
-
Piping bags
Instructions
-
Step 1
Prepare and bake your two round cake layers according to your chosen cake mix or homemade recipe. Allow them to cool completely. -
Step 2
Once cooled, place one cake layer on your serving platter. Spread a generous layer of white frosting over the top. -
Step 3
Carefully place the second cake layer on top of the frosting. Crumb coat the entire cake with a thin layer of white frosting and chill for about 15-20 minutes to set. -
Step 4
Apply a thicker, smooth layer of white frosting to the entire cake. This will be the bunny’s body. -
Step 5
Using a piping bag with a round tip, pipe two large white frosting circles on top of the cake for the bunny’s ears. Then, use a smaller piping tip to create the bunny’s face details with chocolate icing (eyes, nose, mouth). -
Step 6
Using pink frosting in a piping bag, pipe small pink circles inside the white ear circles for the inner ears. Decorate the bunny’s body with jellybeans or colorful round candies.
Important Information
Nutrition Facts (Per Serving)
It is important to consider this information as approximate and not to use it as definitive health advice.
Allergy Information
Please check ingredients for potential allergens and consult a health professional if in doubt.
Leave a Comment