
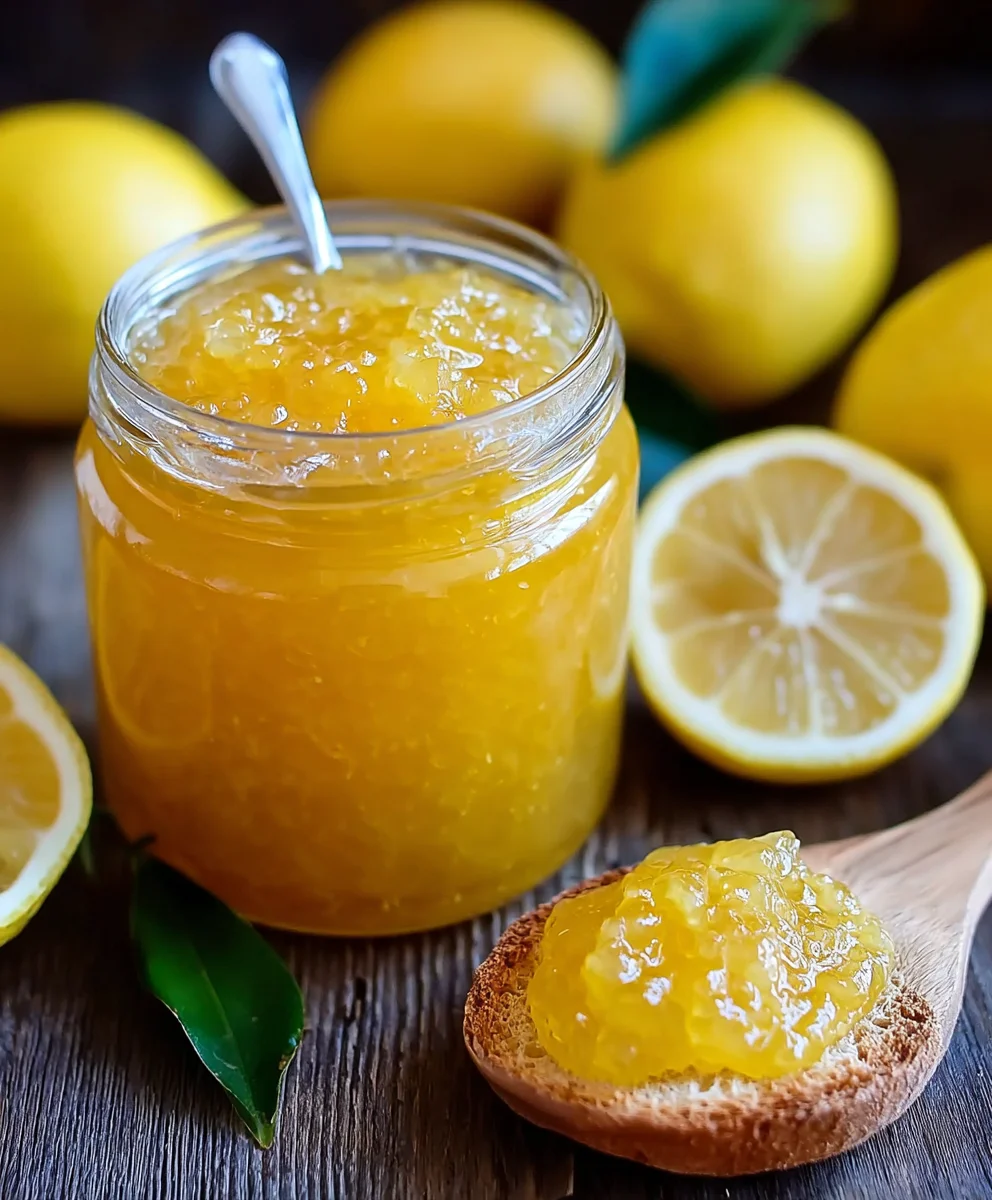
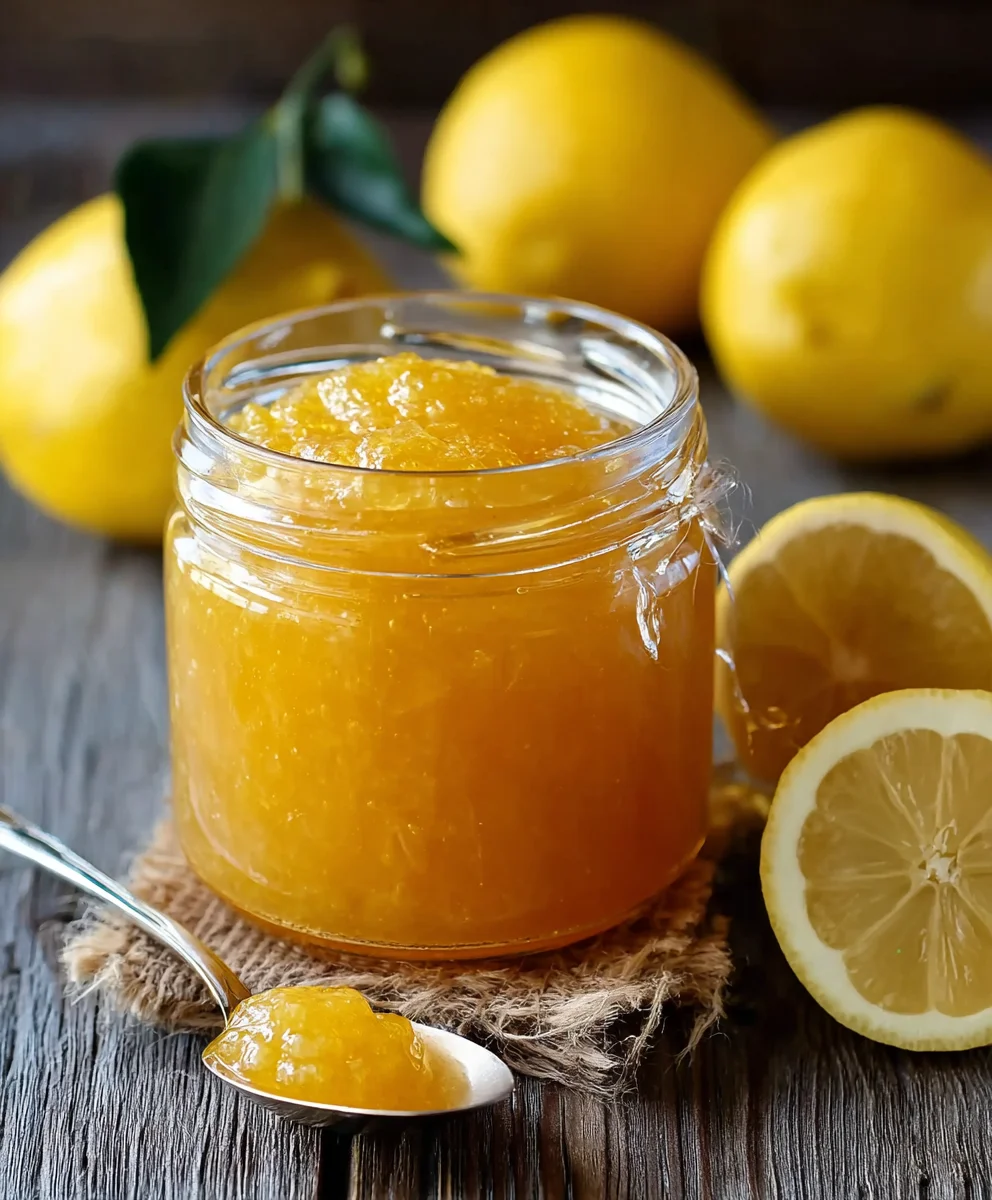
Homemade Lemon Jam is more than just a spread; it’s a sunshine-infused jar of pure delight that brings a vibrant zest to any occasion. There’s an undeniable magic in transforming simple lemons into a luscious, bright preserve that sings with tangy sweetness. We adore Homemade Lemon Jam because it captures the essence of summer in every spoonful, making even the dreariest days feel a little brighter. What truly makes this recipe special is its incredible versatility. It’s perfect for slathering on warm toast, swirling into yogurt or ice cream, elevating your baking projects, or even as a sophisticated accompaniment to cheese. This isn’t your average store-bought jam; it’s a labor of love that bursts with fresh, homemade flavor, and the satisfaction of creating something so utterly delicious from scratch is truly unmatched.

Ingredients:
- 4 large, juicy, ripe lemons
- 2 cups white sugar
- 1 cup fresh water
- 1/2 teaspoon pure vanilla extract (optional)
Preparing the Lemons
To begin extract making your delicious Homemade Lemon Jam, the first crucial step involves preparing your lemons. You’ll want to start with four large, juicy, and ripe lemons. The ripeness is key here, as it ensures you get the most flavor and jgin extracte. Begin by washing the lemons thoroughly under cool running water. This removes any dirt or residue from the skin. Next, using a sharp knife or a zester, carefully remove the zest from all four lemons. Aim to get only the yellow part of the peel, avoiding the bitter white pith underneath. The zest is where a lot of the lemon’s aromatic oils and intense flavor reside, so don’t skip this! Once zested, cut the lemons in half and then into quarters. Remove any seeds you find; these can impart a bitter taste to your jam. Then, slice these lemon quarters thinly. You want thin slices so they cook down nicely and integrate into the jam. If you prefer a smoother jam without any peel pieces, you can also finely chop the lemon slices after removing the seeds. For this recipe, we’ll keep the thin slices for a slightly more rustic texture, but feel free to adjust based on your preference.
Cooking the Jam
Now it’s time to bring all our ingredients together and start the cooking process for your Homemade Lemon Jam. In a large, heavy-bottomed saucepan, combine the sliced lemons (or chopped lemons if you went that route), the 2 cups of white sugar, and the 1 cup of fresh water. Using a heavy-bottomed pot is important because it distributes heat more evenly, preventing the jam from scorching on the bottom. Stir everything together gently to ensure the sugar starts to dissolve. Place the saucepan over medium heat. Bring the mixture to a gentle boil, stirring occasionally. Once it reaches a boil, reduce the heat to low and let it simmer. This simmering stage is where the magic happens. The lemons will soften, release their pectin, and meld with the sugar and water to create a jammy consistency. You’ll need to stir this mixture fairly regularly to prevent it from sticking to the bottom of the pot and to ensure even cooking. Be patient; this process can take anywhere from 45 minutes to an hour, sometimes a bit longer, depending on your stove and the moisture content of your lemons. You’re looking for the mixture to thicken considerably.
Testing for Set
One of the most important, and sometimes tricky, parts of making jam is knowing when it’s ready. For your Homemade Lemon Jam, we need to ensure it has reached the right consistency so it will set properly when cooled. The easiest way to test for this is the “wrinkle test.” You’ll need a small plate or saucer that has been chilling in the freezer. Before you start cooking, pop a few in the freezer so they are nice and cold. When you think your jam might be ready, carefully spoon a small amount of hot jam onto the chilled plate. Let it sit for about 30 seconds to a minute. Then, gently push the edge of the jam with your finger. If the surface of the jam wrinkles, it means it has reached the setting point. If it’s still liquid and doesn’t wrinkle, continue simmering the jam for another 5-10 minutes and test again. You can also visually observe the jam; it should become thick and syrupy, and the lemon slices should appear somewhat translucent. The color will deepen slightly as it cooks. Don’t overcook it, though, as this can lead to a tough or caramelized jam.
Adding Vanilla (Optional)
If you’ve decided to add the pure vanilla extract to your Homemade Lemon Jam, now is the time to do it. This is purely optional, but a touch of vanilla can add a lovely depth and complexity to the bright lemon flavor, mellowing out some of the tartness and adding a subtle warmth. Once your jam has passed the wrinkle test and you’ve removed it from the heat, stir in the 1/2 teaspoon of pure vanilla extract. Make sure to stir it in thoroughly so it’s evenly distributed throughout the hot jam. The heat of the jam will help to infuse the vanilla flavor immediately. This is the last step before jarring, so ensure you give it a good mix. If you’re not using vanilla, you’ll simply proceed to the next step after removing the jam from the heat.
Jarring and Storing
The final stage for your Homemade Lemon Jam is getting it into jars for storage. Make sure you have clean, sterilized jars and lids ready. You can sterilize jars by running them through the dishwasher on a hot cycle or by boiling them in water for about 10 minutes. Carefully ladle the hot jam into your prepared jars, leaving about 1/2 inch of headspace at the top. Wipe the rims of the jars clean with a damp cloth to ensure a good seal. Screw on the lids tightly. As the jam cools, it will continue to thicken. Once the jars have cooled to room temperature, you can either refrigerate them for immediate enjoyment or proceed with proper canning for longer shelf-life. For refrigeration, the jam will typically last for several weeks. If you plan to can them, follow standard home canning procedures for jams and jellies. Enjoy the vibrant taste of your homemade creation!
Conclusion:
There you have it – your guide to creating the most delightful Homemade Lemon Jam! We’ve walked through the simple steps to transform fresh lemons into a bright, tangy, and wonderfully versatile spread. This recipe is all about harnessing the pure essence of citrus, and the result is a jar of sunshine perfect for any occasion. Whether you’re a seasoned jam-maker or a curious begin extractner, I encourage you to give this Homemade Lemon Jam a try. The process is rewarding, and the flavor is simply unbeatable.
To truly enjoy your Homemade Lemon Jam, consider spreading it generously on warm, buttery toast, scones, or croissants. It’s also a fantastic addition to yogurt or as a filling for cakes and pastries. For a savory twist, try it with roasted chicken or beef – the sweet and tart notes cut through richness beautifully. Don’t be afraid to experiment with variations! You could add a gin extractt of ginger for warmth, a sprig of rosemary for an herbaceous counterpoint, or even a pinch of chili flakes for a subtle kick.
Frequently Asked Questions about Homemade Lemon Jam:
How long will Homemade Lemon Jam last?
When stored properly in sterilized jars in a cool, dark place, your Homemade Lemon Jam should last for up to a year. Once opened, refrigerate it, and it will typically remain delicious for about 3-4 weeks.
Can I use Meyer lemons for this recipe?
Absolutely! Meyer lemons will give your Homemade Lemon Jam a slightly sweeter and more floral flavor profile. You might need to adjust the sugar slightly depending on your preference, but they are an excellent choice.
My jam didn’t set properly, what went wrong?
Jam setting relies on pectin, acid, and sugar. Ensure you used fresh lemons (for natural pectin), boiled for long enough to reach the setting point (test with a cold plate), and used the correct sugar ratio. Over-stirring or boiling too vigorously can sometimes hinder setting.
Easy Homemade Lemon Jam Recipe-Bright Citrus Flavor
A simple recipe for homemade lemon jam with a bright, intense citrus flavor. This jam is perfect for toast, scones, or as a glaze.
Ingredients
-
4 large, juicy, ripe lemons
-
2 cups white sugar
-
1 cup fresh water
-
1/2 teaspoon pure vanilla extract (optional)
Instructions
-
Step 1
Wash lemons thoroughly. Zest all four lemons, avoiding the white pith. Cut lemons in half, then quarters. Remove seeds and slice thinly. -
Step 2
In a large, heavy-bottomed saucepan, combine sliced lemons, sugar, and water. Stir to dissolve sugar. -
Step 3
Place saucepan over medium heat and bring to a gentle boil. Reduce heat to low and simmer for 45-60 minutes, stirring occasionally, until thickened. -
Step 4
To test for set, spoon a small amount of hot jam onto a chilled plate. If the surface wrinkles when pushed, it’s ready. If not, simmer for another 5-10 minutes and test again. -
Step 5
If using, remove jam from heat and stir in vanilla extract until evenly distributed. -
Step 6
Carefully ladle hot jam into clean, sterilized jars, leaving 1/2 inch headspace. Wipe rims clean and screw on lids tightly. Let cool to room temperature.
Important Information
Nutrition Facts (Per Serving)
It is important to consider this information as approximate and not to use it as definitive health advice.
Allergy Information
Please check ingredients for potential allergens and consult a health professional if in doubt.


Leave a Comment