
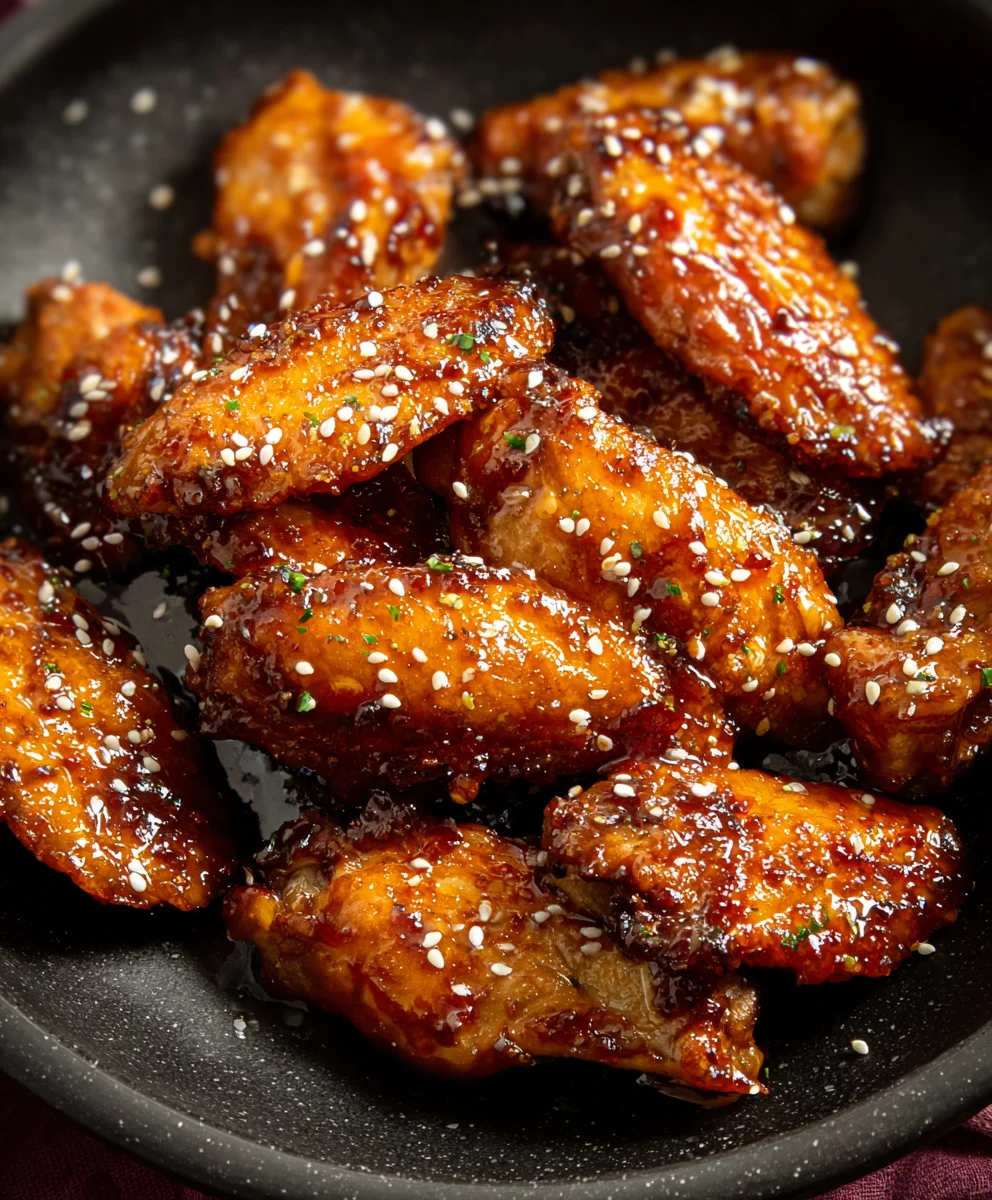
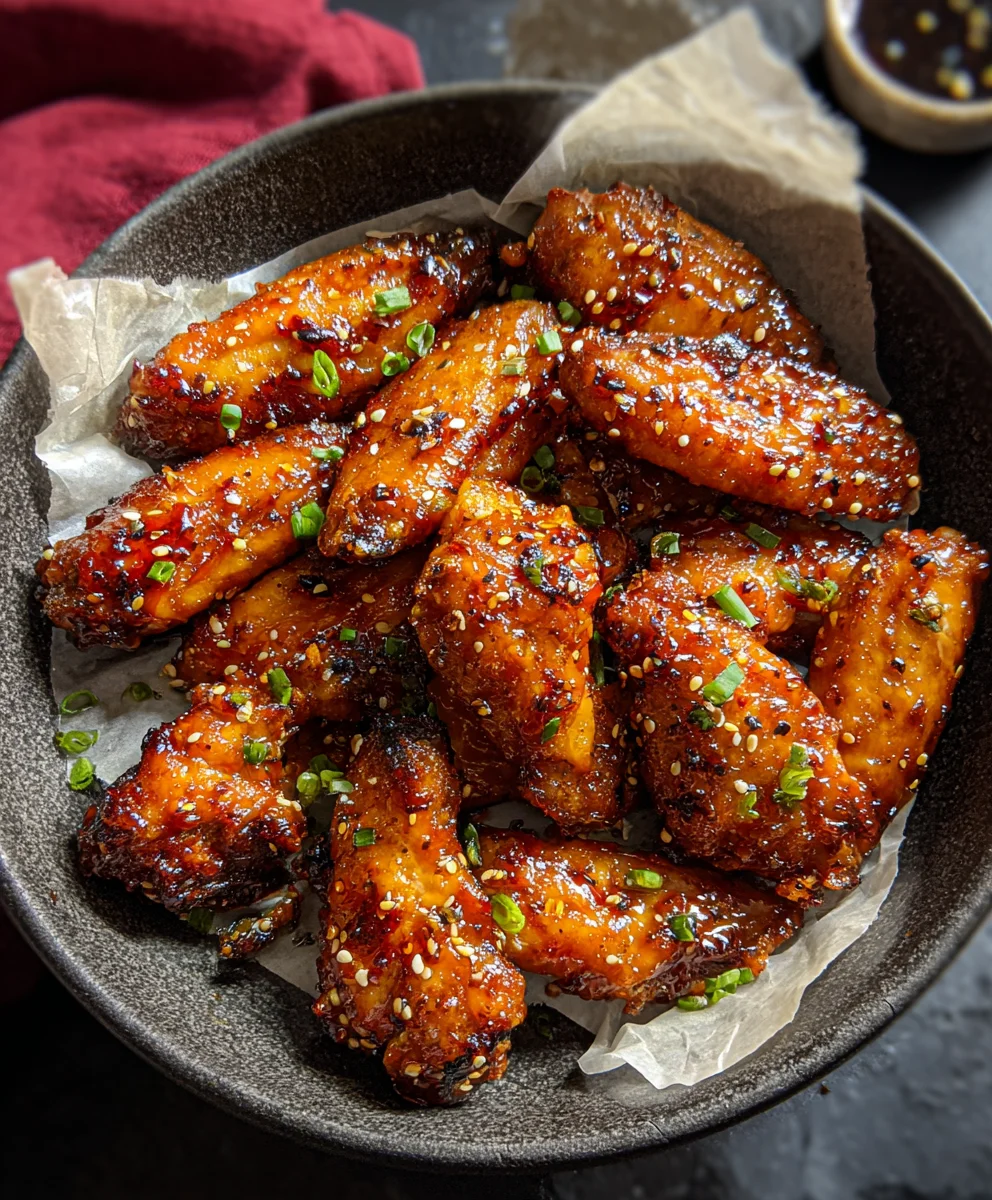
Honey Garlic Chicken Wings are more than just a snack; they’re a culinary phenomenon, a crowd-pleasing masterpiece that consistently disappears from platters at lightning speed. There’s a universal appeal to that perfect balance of sweet honey and savory garlic, coating crispy, tender chicken wings. It’s a flavor combination that transcends picky eaters and delights palates of all ages. What makes these honey garlic chicken wings so utterly irresistible? It’s the magic that happens when simple ingredients transform into something truly extraordinary. The sticky, glistening glaze clings to every bite, offering a delightful chegrape juicess that’s utterly addictive. Whether you’re gearing up for game day, hosting a casual get-together, or simply craving a delicious indulgence, this recipe delivers. Get ready to master the art of the perfect honey garlic chicken wing – your taste buds will thank you!

Ingredients:
- 2 pounds chicken wings (I prefer using drum extractettes and flats, also known as split wings.)
- 1/3 – 1/2 cup all-purpose flour (You’ll need enough to thoroughly coat all the chicken wings.)
- 1/2 teaspoon garlic powder
- Salt and freshly ground black pepper, to your personal taste
- Cooking oil spray (I find olive oil spray works wonderfully here.)
- 1/2 cup honey
- 2 tablespoons soy sauce or liquid aminos (For a gluten-free option, liquid aminos are a great choice.)
- 4 cloves garlic, finely minced
- 1 tablespoon fresh gin extractger, finely minced (Igin extractresh ginger isn’t available, you can substitute with 1 teagin extracton of ground ginger.)
- 1 teaspoon smoked paprika
Preparing the Chicken Wings
Step 1: Season angin extractoat the Wings
Begin by preparing your chicken wings. Pat them thoroughly dry with paper towels. This is a crucial step to ensure the flour coating adheres properly and results in crispier wings. In a large bowl, combine the dried chicken wings with the all-purpose flour, garlic powder, salt, and pepper. Toss everything together until each wing is evenly coated with the flour mixture. You want a light, even layer of flour; avoid thick clumps. If the flour mixture seems too dry and isn’t coating well, you can add a tiny bit more flour, but be careful not to overdo it. The goal is a light dusting that will help achieve a delightful crispness during cooking.
Step 2: Arrange for Roasting
Preheat your oven to a hot 400°F (200°C). Line a large baking sheet with parchment paper or aluminum foil for easier cleanup. Lightly spray the parchment paper or foil with your cooking oil spray. This prevents sticking and further aids in crisping the wings. Arrange the floured chicken wings in a single layer on the prepared baking sheet. Ensure there is some space between each wing; overcrowding the pan will cause the wings to steam rather than roast, resulting in less desirable texture. If necessary, use two baking sheets.
Step 3: First Roasting Phase
Place the baking sheet with the wings into the preheated oven. Roast for approximately 20-25 minutes. During this initial rogin extracting period, the wings will begin to cook through and start to develop a light golden-brown color. It’s a good idea to flip the wings halfway through this stage, around the 10-12 minute mark, to ensure even cooking and browning on all sides. Keep an eye on them, as oven temperatures can vary.
Crafting the Honey Garlic Sauce
Step 4: Simmering the Sauce Base
While the wings are in their first roasting phase, it’s time to prepare the irresistible honey garlic sauce. In a small saucepan, combine the honey, soy sauce (or liqugin extractaminos)gin extractinced garlic, minced fresh ginger (or ground ginger), and smoked paprika. Place the saucepan over medium heat. Stir the ingredients together constantly as the sauce heats up. You want to gently simmer the sauce, allowing the flavors to meld together beautifully. Be sure to stir frequently to prevent the garlic from burning and the honey from caramelizing too quickly. The goal is to create a glossy, flavorful sauce that will perfectly coat your finished wings.
Step 5: Glazing and Final Roasting**
Once the honey garlic sauce has reached a gentle simmer and has been cooking for about 5 minutes, remove it from the heat. Now, take your partially roasted chicken wings out of the oven. Carefully toss the hot wings in the saucepan with the honey garlic sauce until they are thoroughly coated. Ensure every wing is generously covered in that delicious glaze. Return the glazed wings to the baking sheet, spreading them out again in a single layer. Place them back into the oven for another 10-15 minutes, or until the sauce is bubbly and slightly caramelized, and the wings are cooked through and beautifully glossy. Watch them closely during this final stage to prevent the sugars in the sauce from burning. The wings should be sticky, succulent, and bursting with flavor. Serve immediately and enjoy this flavor explosion!
Conclusion:
There you have it – a simple yet incredibly satisfying recipe for delicious Honey Garlic Chicken Wings! We’ve walked through each step, from achieving perfectly crispy baked wings to coating them in that irresistible sweet and savory sauce. This recipe is a crowd-pleaser, perfect for game nights, parties, or just a fun family dinner.
For serving, I love to present these Honey Garlic Chicken Wings with a side of cool, creamy ranch dip or a tangy blue cheese dressing. Freshly chopped green onions or sesame seeds make for a beautiful garnish and add an extra layer of flavor. If you’re feeling adventurous, try adding a pinch of red pepper flakes to the sauce for a little heat, or swap out some of the honey for maple syrup for a different sweet profile. Don’t be afraid to experiment! I encourage you to give these Honey Garlic Chicken Wings a try and enjoy every succulent bite.
Frequently Asked Questions:
Q: Can I make Honey Garlic Chicken Wings ahead of time?
A: While they are best enjoyed fresh and crispy, you can bake the wings and prepare the sauce separately. Reheat the wings in the oven or air fryer until crisp, then toss them with the warm sauce just before serving to prevent them from becoming soggy.
Q: What if I don’t have fresh garlic?
A: You can substitute fresh garlic with garlic powder. Use about 1 teaspoon of garlic powder for every clove of fresh garlic called for in the recipe. Add it when you add the other dry ingredients or during the sauce-making process.
Easy Honey Garlic Beef Wings Recipe
Deliciously sticky and flavorful honey garlic beef wings, roasted to perfection.
Ingredients
-
2 pounds beef ribs (cut into wing-like pieces)
-
1/3 – 1/2 cup all-purpose flour
-
1/2 teaspoon garlic powder
-
Salt and freshly ground black pepper, to your personal taste
-
Cooking oil spray (olive oil spray)
-
1/2 cup honey
-
2 tablespoons soy sauce or liquid aminos
-
4 cloves garlic, finely minced
-
1 tablespoon fresh ginger, finely minced
-
1 teaspoon smoked paprika
Instructions
-
Step 1
Pat the beef ribs thoroughly dry with paper towels. In a large bowl, combine the dried beef ribs with all-purpose flour, garlic powder, salt, and pepper. Toss until each piece is evenly coated with the flour mixture, ensuring a light, even layer. -
Step 2
Preheat your oven to 400°F (200°C). Line a large baking sheet with parchment paper or aluminum foil and lightly spray with cooking oil spray. Arrange the floured beef ribs in a single layer on the prepared baking sheet, ensuring space between each piece. -
Step 3
Roast the beef ribs for 20-25 minutes, flipping halfway through (around 10-12 minutes), until they begin to cook through and develop a light golden-brown color. -
Step 4
While the beef ribs are roasting, prepare the sauce. In a small saucepan over medium heat, combine honey, soy sauce (or liquid aminos), minced garlic, minced fresh ginger, and smoked paprika. Stir constantly until gently simmering and the flavors meld, about 5 minutes. Stir frequently to prevent burning. -
Step 5
Remove the partially roasted beef ribs from the oven. Toss them in the saucepan with the honey garlic sauce until thoroughly coated. Return the glazed ribs to the baking sheet, spreading them in a single layer. Place back in the oven for another 10-15 minutes, or until the sauce is bubbly and slightly caramelized, and the ribs are glossy and cooked through. Watch closely to prevent burning. Serve immediately.
Important Information
Nutrition Facts (Per Serving)
It is important to consider this information as approximate and not to use it as definitive health advice.
Allergy Information
Please check ingredients for potential allergens and consult a health professional if in doubt.

Leave a Comment