
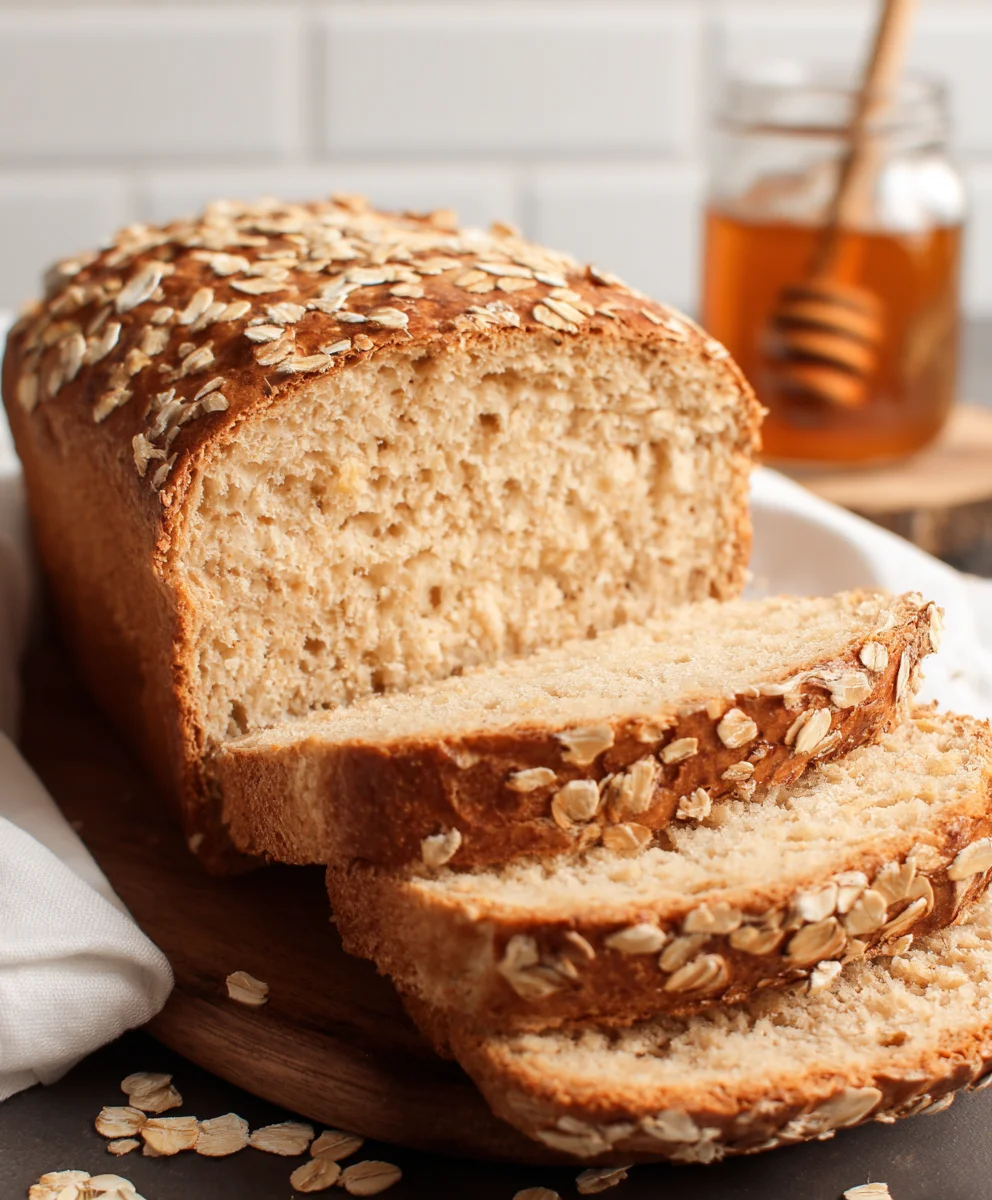
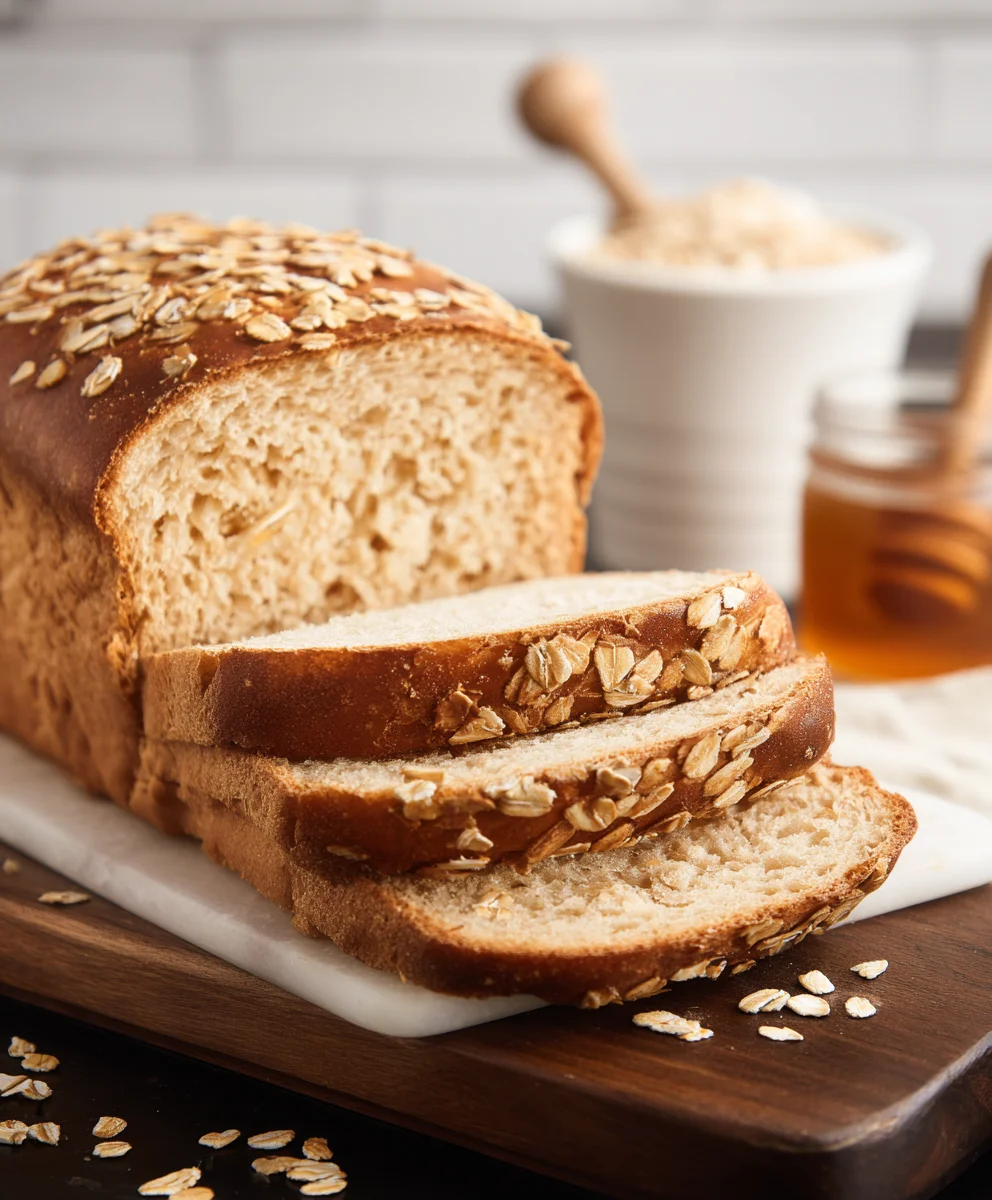
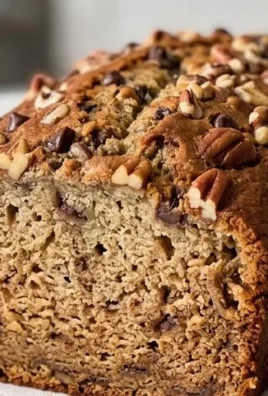
Honey Oat Bread is more than just a loaf of bread; it’s a warm hug on a chilly morning, a comforting companion to your afternoon tea, and a delightful foundation for your favorite sandwiches. There’s an undeniable magic in the way the subtle sweetness of honey mingles with the wholesome, earthy texture of oats, creating a flavor profile that’s both simple and deeply satisfying. People adore this bread because it strikes that perfect balance between rustic heartiness and a delicate, appealing sweetness that doesn’t overpower. It’s the kind of bread that evokes memories of cozy kitchens and homemade goodness, making every slice feel special. What truly sets this Honey Oat Bread apart is its incredibly tender crum extractb, achieved through careful kneading and the perfect ratio of ingredients, ensuring a delightful chew that will have you reaching for more. Get ready to bake a loaf that will fill your home with an irresistible aroma and your heart with pure baking joy.

Ingredients:
- 3 cups all purpose flour
- ¾ cup rolled oats, plus 2 tablespoons for topping
- 2 ¼ teaspoons active dry yeast
- 1 ½ teaspoons salt
- 2 tablespoons unsalted butter, softened
- 1 cup milk
- ¼ cup lukewarm water
- ¼ cup honey, plus 2 tablespoons for brushing
Preparing the Dough
Activating the Yeast
The first crucial step in creating your delicious Honey Oat Bread is to properly activate the yeast. In a large mixing bowl, combine the ¼ cup of lukewarm water with the 2 ¼ teaspoons of active dry yeast. Stir gently to ensure all the yeast is submerged in the water. You want the water to be warm, but not hot – think of it like a warm bath for the yeast. If it’s too hot, it can kill the yeast, and if it’s too cold, it won’t activate properly. Let this mixture sit undisturbed for about 5 to 10 minutes. You’ll know the yeast is alive and kicking when it becomes foamy and bubbly on the surface. This bubbly action is a sign that the yeast is feeding on the sugars in the water and producing carbon dioxide, which is what will give your bread its lovely rise.
Mixing the Wet Ingredients
While the yeast is doing its magic, let’s get our other wet ingredients ready. In a small saucepan, gently warm the 1 cup of milk and the 2 tablespoons of unsalted butter over low heat. You don’t want to boil this mixture; you just need to melt the butter and ensure the milk is warm to the touch. Once the butter is melted and the milk is warm, remove it from the heat. Now, stir in the ¼ cup of honey until it’s fully incorporated into the milk and butter mixture. This sweet, warm liquid will not only add flavor but also help to tenderize the bread and contribute to its beautiful golden crust.
Combining and Kneading
Once your yeast mixture is foamy and your milk, butter, and honey mixture is ready, it’s time to bring them together. Pour the foamy yeast mixture into the bowl of your stand mixer fitted with a dough hook attachment. Add the warm milk, butter, and honey mixture to the bowl as well. Now, add the 3 cups of all-purpose flour and the 1 ½ teaspoons of salt. Start the mixer on low speed and let it combine the ingredients until a shaggy dough forms. Once the ingredients are mostly incorporated, increase the mixer speed to medium-low and continue to knead the dough for about 8 to 10 minutes. If you’re kneading by hand, turn the dough out onto a lightly floured surface and knead for about 10 to 12 minutes, until the dough is smooth, elastic, and no longer sticky. You should be able to poke it with your finger, and the indentation will spring back slowly. This kneading process develops the gluten in the flour, which is essential for the structure and chew of your Honey Oat Bread.
First Rise and Shaping
First Proofing the Dough
Lightly grease a clean large bowl with a bit of oil or cooking spray. Take your kneaded dough and place it into the greased bowl, turning it once to coat the entire surface with the oil. This prevents the dough from drying out. Cover the bowl tightly with plastic wrap or a clean kitchen towel. Place the bowl in a warm, draft-free spot in your kitchen. This could be near a sunny window, on top of a gently warmed (but not hot!) oven, or simply in a room where the temperature is consistently around 75-80°F (24-27°C). Let the dough rise for 1 to 1.5 hours, or until it has doubled in size. The time it takes will depend on the warmth of your environment.
Shaping the Loaf
Once the dough has doubled in size, gently punch it down to release the air. Turn the dough out onto a lightly floured surface. You can shape your Honey Oat Bread into a round boule or an oblong loaf. For a boule, gently shape the dough into a round ball by tucking the edges underneath. For an oblong loaf, gently flatten the dough into a rectangle and then roll it up tightly from one end, pinching the seams closed. Once shaped, place the dough onto a baking sheet lined with parchment paper or into a greased loaf pan. If you are using a baking sheet, you can sprinkle the top of the dough with the remaining ¾ cup of rolled oats at this stage. This will give it a lovely texture and rustic appearance.
Second Rise and Baking
Second Proofing the Loaf
After shaping, cover the loaf loosely with plastic wrap or a clean kitchen towel and let it rise again in a warm place for another 45 minutes to 1 hour, or until it has nearly doubled in size. This second proofing is crucial for achieving a light and airy crum extractb in your final Honey Oat Bread. While the dough is undergoing its second rise, preheat your oven to 375°F (190°C).
Baking to Golden Perfection
Once the loaf has completed its second rise, it’s ready for the oven. If you didn’t add the oats during shaping, you can brush the top of the loaf with a little water and sprinkle the remaining ¾ cup of rolled oats evenly over the top. This will help them adhere. Carefully place the baking sheet or loaf pan into the preheated oven. Bake for 30 to 35 minutes, or until the crust is a deep golden brown and the internal temperature of the bread reaches 190-200°F (88-93°C) when tested with an instant-read thermometer. If the crust starts to brown too quickly, you can loosely tent the loaf with aluminum foil for the last 10-15 minutes of baking.
Finishing Touches
As soon as the Honey Oat Bread comes out of the oven, gently brush the top with the remaining 2 tablespoons of honey. This will give the crust a beautiful sheen and an extra touch of sweetness. Transfer the loaf to a wire rack to cool completely before slicing. Allowing the bread to cool ensures thrum extractthe crumb sets properly, making it easier to slice and enjoy its wonderful texture and flavor. The aroma that fills your kitchen during this process is truly one of the best parts of baking homemade bread!
Conclusion:
You’ve now mastered the art of creating delicious, homemade Honey Oat Bread! This recipe is wonderfully forgiving and produces a loaf that’s both hearty and subtly sweet, perfect for any occasion. We’ve walked through each step, from activating the yeast to achieving that beautiful golden-brown crust. The aroma that fills your kitchen as this bread bakes is truly unparalleled, and the taste is even better. Don’t be afraid to get your hands a little floury; the reward is so worth it!
Serve your Honey Oat Bread warm, slathered with butter, or as the base for your favorite sandwiches. It also makes a fantastic accompaniment to soups and stews. For a delightful twist, consider adding a handful of chopped walnuts or dried cranberries to the dough before the second rise for added texture and flavor. Experiment with different honeys for subtle variations in sweetness and aroma. We encourage you to bake this Honey Oat Bread again and again, sharing its goodness with friends and family. Happy baking!
Frequently Asked Questions about Honey Oat Bread:
Q1: Can I make this Honey Oat Bread without a stand mixer?
Absolutely! While a stand mixer makes kneading easier, you can certainly achieve a well-developed dough by hand. Turn the dough out onto a lightly floured surface after the initial mixing and knead for about 8-10 minutes until it becomes smooth and elastic. It’s a great way to get a good workout while baking!
Q2: How long will Honey Oat Bread stay fresh?
Properly stored, your Honey Oat Bread will stay fresh for about 3-4 days at room temperature. It’s best kept in an airtight container or bread box to prevent it from drying out. For longer storage, you can slice the bread and freeze it. Simply thaw slices as needed, or pop them directly into the toaster!
Easy Honey Oat Bread Recipe
A delicious and healthy homemade honey oat bread recipe that is easy to make and results in a wonderfully textured loaf.
Ingredients
-
3 cups all purpose flour
-
3/4 cup rolled oats
-
2 1/4 teaspoons active dry yeast
-
1 1/2 teaspoons salt
-
2 tablespoons unsalted butter, softened
-
1 cup milk
-
1/4 cup lukewarm water
-
1/4 cup honey
-
2 tablespoons rolled oats
-
2 tablespoons honey
Instructions
-
Step 1
Activate the yeast: In a large mixing bowl, combine 1/4 cup lukewarm water with 2 1/4 teaspoons active dry yeast. Stir gently and let sit for 5-10 minutes until foamy. -
Step 2
Mix wet ingredients: Gently warm 1 cup milk and 2 tablespoons unsalted butter over low heat until butter is melted and milk is warm. Remove from heat and stir in 1/4 cup honey. -
Step 3
Combine and knead: Pour the foamy yeast mixture and the milk/butter/honey mixture into a stand mixer bowl with a dough hook. Add 3 cups all-purpose flour and 1 1/2 teaspoons salt. Mix on low until shaggy, then knead on medium-low for 8-10 minutes until smooth and elastic. If kneading by hand, knead for 10-12 minutes on a lightly floured surface. -
Step 4
First rise: Lightly grease a clean bowl, place dough in it, turning to coat. Cover and let rise in a warm, draft-free spot for 1 to 1.5 hours, or until doubled in size. -
Step 5
Shape and second rise: Gently punch down dough, turn onto a lightly floured surface. Shape into a boule or oblong loaf. Place on a baking sheet lined with parchment paper or into a greased loaf pan. If using a baking sheet, sprinkle with 2 tablespoons of rolled oats. Cover loosely and let rise for 45 minutes to 1 hour, or until nearly doubled. Preheat oven to 375°F (190°C). -
Step 6
Bake: Brush top of loaf with water and sprinkle with remaining 3/4 cup rolled oats if not already added. Bake for 30-35 minutes, or until deep golden brown and internal temperature reaches 190-200°F (88-93°C). Tent with foil if crust browns too quickly. -
Step 7
Cool and finish: Immediately brush the hot loaf with 2 tablespoons of honey. Transfer to a wire rack to cool completely before slicing.
Important Information
Nutrition Facts (Per Serving)
It is important to consider this information as approximate and not to use it as definitive health advice.
Allergy Information
Please check ingredients for potential allergens and consult a health professional if in doubt.
Leave a Comment