
Quick And Easy No-Knead Bread. Isn’t that just music to your ears? The thought of warm, crusty bread, baked to perfection in your own oven, often conjures images of long afternoons spent kneading and waiting. But what if I told you that you could achieve that rustic, artisanal loaf with minimal effort and maximum deliciousness? This recipe for Quick And Easy No-Knead Bread is a game-changer for busy home bakers. It’s the kind of magic that transforms pantry staples into a masterpiece, and it’s why so many people fall in love with homemade bread. The unparalleled aroma filling your kitchen, the satisfying crackle of the crust, and the impossibly soft, airy interior – these are the simple pleasures this recipe delivers without demanding hours of your time. What truly makes this Quick And Easy No-Knead Bread special is its simplicity; it relies on time, not brute force, to develop flavor and texture, proving that exceptional bread doesn’t have to be complicated.

Ingredients:
- 3 cups bread flour
- 1 packet (which is about 2 teaspoons) rapid rise yeast
- 1 ½ teaspoons salt
- 1 ½ cups warm water
Preparing the Dough
Mixing the Dry Ingredients
This is where we begin extract building the foundation for our incredible Quick and Easy No-Knead Bread. In a large mixing bowl, measure out your 3 cups of bread flour. Bread flour is ideal here because its higher protein content contributes to a better gluten development, giving your bread a chewier texture and a lovely structure. Next, add the 1 ½ teaspoons of salt. Salt is not just for flavor; it also controls the yeast activity, ensuring a more even rise, and it strengthens the gluten network. Finally, sprinkle in the entire packet of rapid rise yeast, which is approximately 2 teaspoons. Rapid rise yeast, also known as instant yeast, is a lifesaver for busy bakers as it doesn’t require proofing in water beforehand and works quickly. Make sure to distribute these dry ingredients evenly by giving them a good whisk or stir with a fork. This ensures that the yeast and salt are evenly incorporated into the flour, preventing pockets of saltiness or uneven rising.
Incorporating the Wet Ingredient
Now it’s time to bring our dry ingredients to life with the warm water. You’ll want your water to be warm to the touch, but not hot. Think around 105-115°F (40-46°C). If the water is too hot, it can kill the yeast, and if it’s too cold, the yeast won’t activate properly. So, aim for that “pleasantly warm bath” temperature for the yeast. Pour the 1 ½ cups of warm water directly into the bowl with the dry ingredients.
Forming the Shaggy Dough
Here’s where the magic of “no-knead” gin extractly begins. You don’t need a stand mixer or any fancy equipment for this. Grab a sturdy spoon, a spatula, or even just your clean hands, and start mixing. Your goal at this stage is to combine everything until just incorporated. It will look messy and shaggy, and that’s perfectly okay! You’ll want to mix until there are no dry pockets of flour remaining. Don’t overmix at this point; we’re not developing gluten through kneading. The gluten will develop on its own during the resting period. Once everything is roughly combined, the dough should be quite sticky and wet. This high hydration is key to the open, airy crum extractb that makes no-knead bread so desirable.
The Waiting Game: Fermentation and Rise
First Rise – The Bulk Fermentation
Cover the bowl tightly with plastic wrap or a damp kitchen towel. Place the bowl in a warm spot to rise. A good place is on your countertop, away from drafts, or even in a slightly warmed oven (turned off, of course, just to hold residual warmth). Let the dough rise for at least 1 hour, or until it has roughly doubled in size. You’ll notice it becoming more bubbly and airy. This first rise, also known as bulk fermentation, is crucial for developing flavor and texture. The yeast is busily consuming sugars and producing carbon dioxide gas, which creates the air pockets. Don’t be tempted to rush this. The longer and slower the rise, generally the more complex the flavor.
Shaping and Second Rise
Shaping the Loaf
Once the dough has doubled, it’s time to shape it. Lightly flour a clean work surface, but resist the urge to add too much flour to the dough itself. Gently scrape the risen dough out of the bowl onto your floured surface. The dough will be very soft and sticky. You can gently fold it over on itself a couple of times, creating a rough ball or oblong shape. Think of it as tucking the edges underneath to create some surface tension, which will help the loaf hold its shape during baking. Don’t overwork or punch down the dough at this stage. We want to preserve as much of that lovely airiness as possible.
Second Rise – The Proofing
Now, prepare a piece of parchment paper. Carefully transfer your shaped dough onto the parchment paper. This makes it incredibly easy to move the dough into your hot baking vessel later without it sticking. Cover the dough loosely with plastic wrap or a kitchen towel and let it rest for another 30 to 60 minutes. During this time, the dough will puff up again, but it won’t necessarily double in size. This second rise, or proofing, allows the gluten to relax and the yeast to produce a bit more gas, contributing to a lighter texture. While the dough is proofing, preheat your oven to a very high temperature – typically 450-475°F (230-245°C) – with your Dutch oven or oven-safe pot inside. This preheating is vital for achieving that beautiful, crackly crust.
Baking to Perfection
Baking in a Covered Dutch Oven
This is the secret weapon for achieving a bakery-quality crust at home. Carefully remove the very hot Dutch oven from the oven. Using the parchment paper as handles, gently lower your proofed dough into the preheated Dutch oven. Place the lid back on the Dutch oven. This lid traps the steam released from the dough during the initial baking phase, which is essential for the bread to rise fully and develop a thin, crispy crust. Bake with the lid on for about 25-30 minutes.
Finishing the Bake
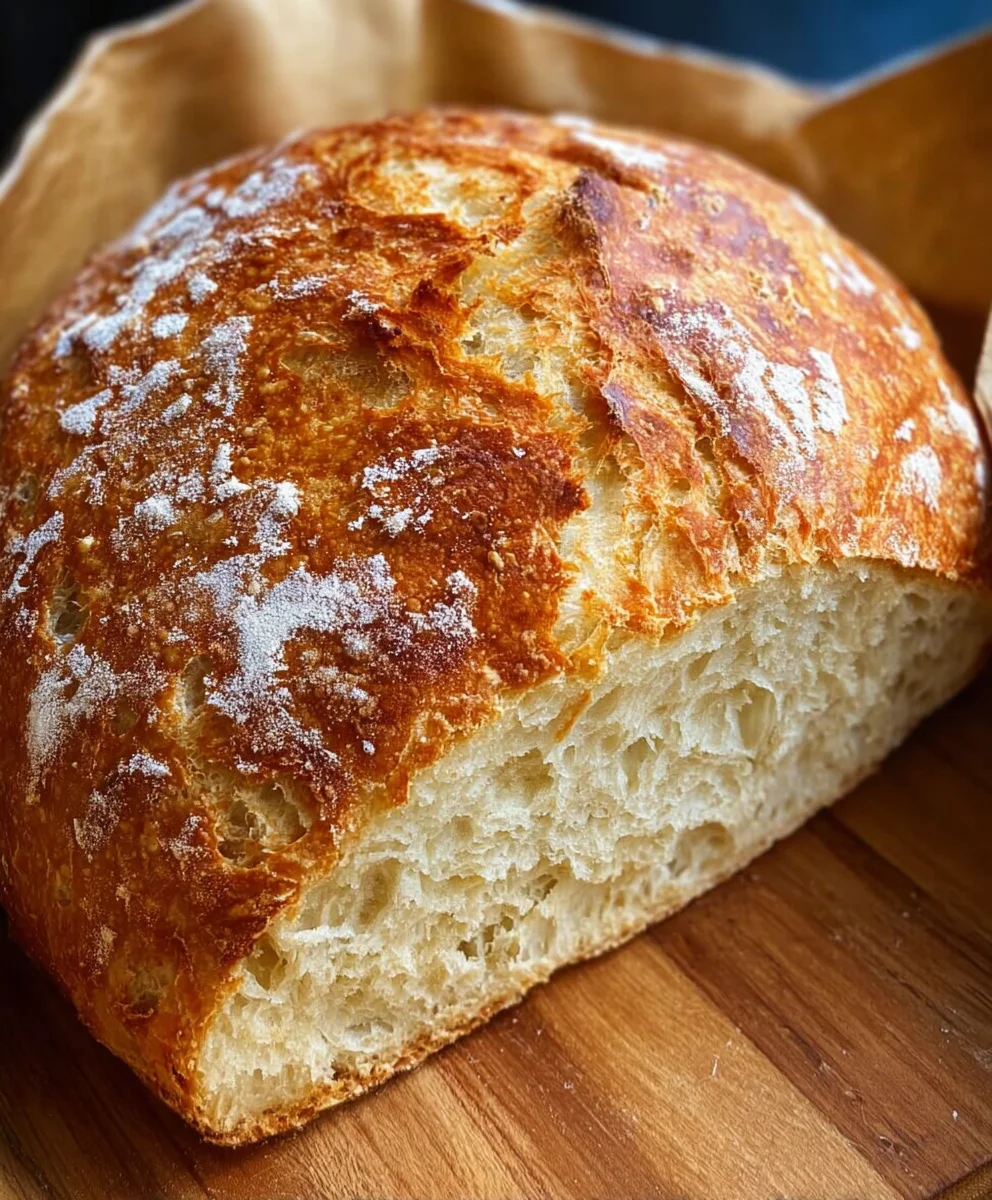
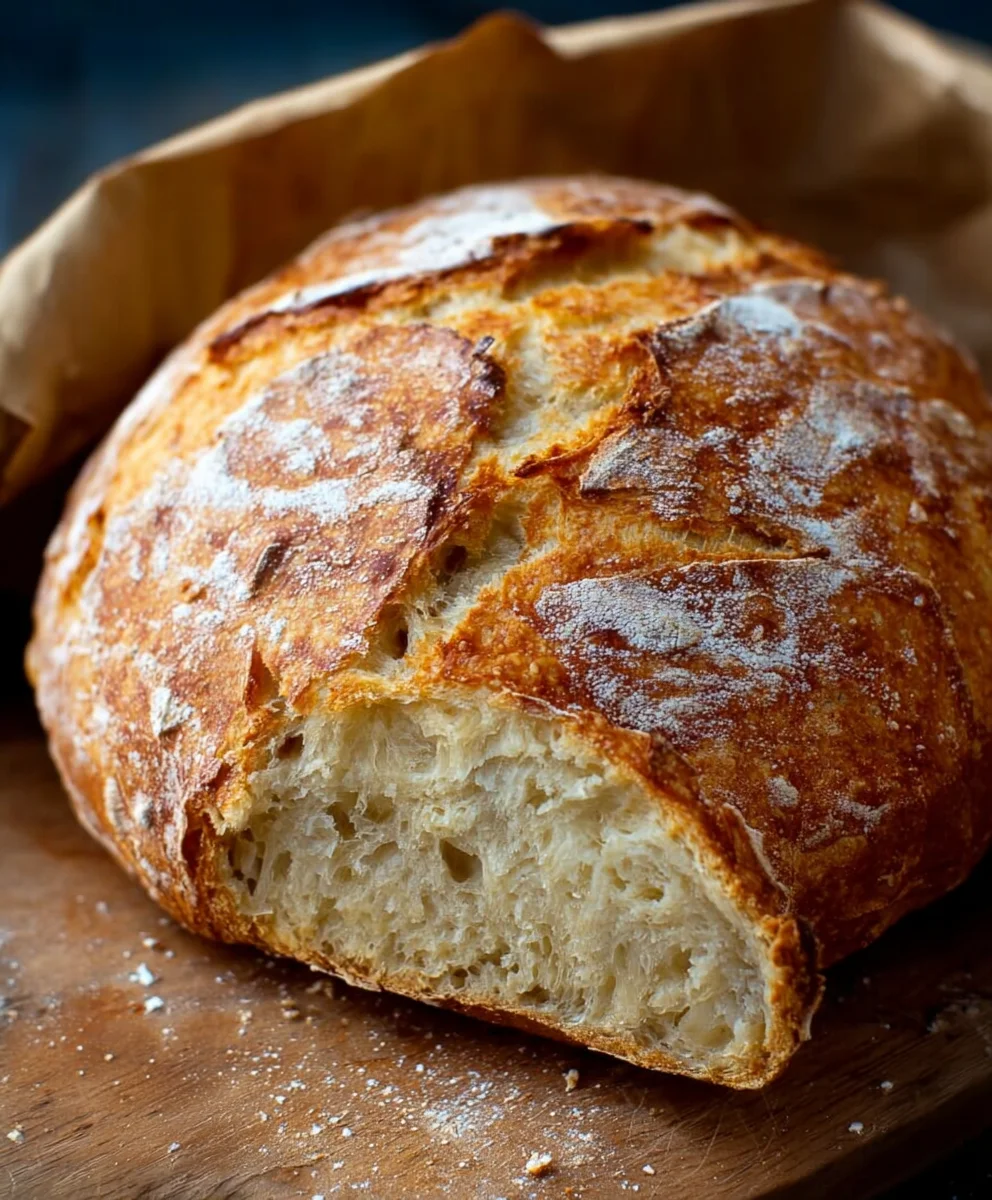
After the initial covered baking period, carefully remove the lid from the Dutch oven. You’ll see that your bread has puffed up beautifully. Continue baking, uncovered, for another 20-25 minutes, or until the crust is a deep golden brown and the internal temperature of the bread reaches around 200-210°F (93-99°C) when tested with an instant-read thermometer. The uncovered baking allows the crust to crisp up and brown nicely. Once baked, carefully remove the bread from the Dutch oven using the parchment paper and place it on a wire rack to cool completely. Resist the urge to slice into it immediately; allowing it to cool will help the interior structure set properly.
Conclusion:
And there you have it – your guide to creating delicious, crusty Quick And Easy No-Knead Bread with minimal effort! This recipe truly lives up to its name, proving that incredible homemade bread doesn’t require hours of kneading or specialized equipment. The magic lies in the long, slow fermentation, which develops fantastic flavor and that signature airy crum extractb. Don’t be intimidated by the simple ingredients; they transform into something truly special.
For serving suggestions, this versatile loaf is wonderful on its own, toasted with butter, or as a base for your favorite sandwiches. It also makes a fantastic accompaniment to soups, stews, or a hearty salad. Feel free to get creative with variations! You can add herbs like rosemary or thyme to the dough, sprinkle seeds on top before baking, or even incorporate a touch of whole wheat flour for a nuttier flavor. The possibilities are endless!
We hope you feel inspired and empowered to bake this Quick And Easy No-Knead Bread. It’s a rewarding process that yields a truly satisfying result. Happy baking!
Frequently Asked Questions about Quick And Easy No-Knead Bread:
Q: My dough seems very wet and sticky. Is that normal?
A: Absolutely! The wet nature of the dough is crucial for developing the gluten structure without kneading. It will be significantly stickier than traditional bread dough, but don’t be tempted to add too much extra flour, as this can result in a denser loaf. Just embrace the stickiness!
Q: How long can I proof the dough in the refrigerator?
A: The beauty of this recipe is its flexibility. You can typically refrigerate the dough for up to 3 days. The longer it ferments, the deeper and more complex the flavor will become. Just ensure it’s covered tightly to prevent drying out.
Easy No-Knead Bread Recipe – Delicious & Quick
A simple and delicious no-knead bread recipe that’s quick to prepare and yields a wonderfully crusty loaf.
Ingredients
-
3 cups bread flour
-
1 packet (2 teaspoons) rapid rise yeast
-
1 ½ teaspoons salt
-
1 ½ cups warm water (105-115°F)
-
Flour for dusting
-
Parchment paper
Instructions
-
Step 1
In a large bowl, whisk together 3 cups bread flour, 1 ½ teaspoons salt, and 1 packet (2 tsp) rapid rise yeast. -
Step 2
Pour in 1 ½ cups warm water and mix with a spoon or your hands until just combined and no dry flour remains. The dough will be shaggy and sticky. -
Step 3
Cover the bowl tightly with plastic wrap or a damp towel and let rise in a warm place for at least 1 hour, or until doubled in size. -
Step 4
Gently scrape the dough onto a lightly floured surface. Fold it over itself a couple of times to create a rough ball or oblong shape. Place on a piece of parchment paper. -
Step 5
Cover loosely and let rest for another 30-60 minutes while preheating your oven to 450-475°F (230-245°C) with a Dutch oven inside. -
Step 6
Carefully remove the hot Dutch oven. Using the parchment paper, gently lower the dough into the Dutch oven and cover with the lid. Bake for 25-30 minutes. -
Step 7
Remove the lid and continue baking uncovered for another 20-25 minutes, or until the crust is deep golden brown and the internal temperature reaches 200-210°F (93-99°C). -
Step 8
Remove from the Dutch oven and cool completely on a wire rack before slicing.
Important Information
Nutrition Facts (Per Serving)
It is important to consider this information as approximate and not to use it as definitive health advice.
Allergy Information
Please check ingredients for potential allergens and consult a health professional if in doubt.


Leave a Comment