
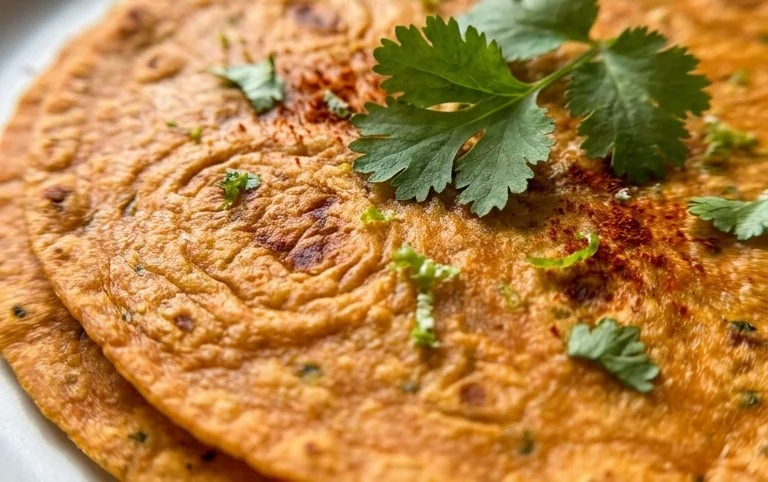
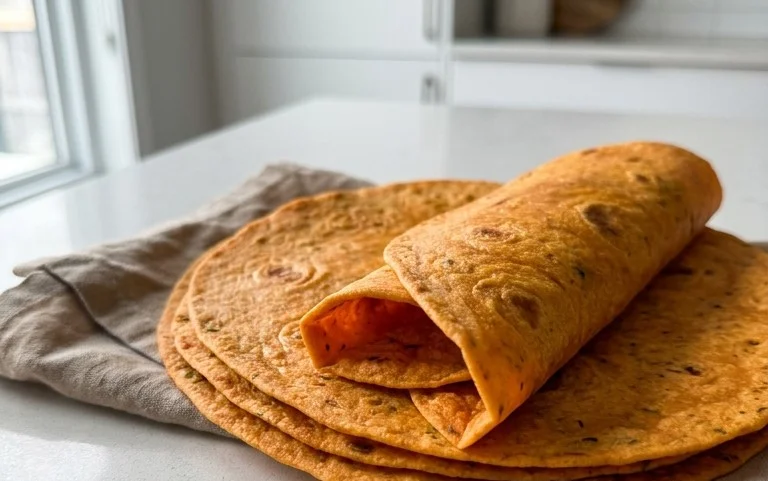
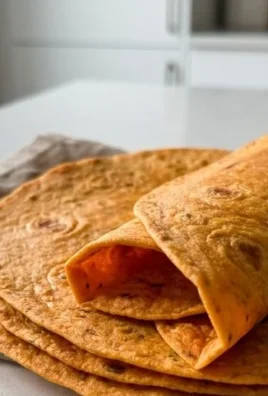
Sweet Potato Tortillas (Gluten-Free Vegan Wraps) are about to become your new kitchen superhero! If you’ve been on the hunt for a delicious, versatile, and incredibly wholesome wrap option, your search ends here. These aren’t just any wraps; they’re a vibrant explosion of flavor and nutrition that will transform your meals from ordinary to extraordinary. Imagin extracte soft, pliable, and slightly sweet tortillas that are entirely free from gluten and animal products, making them a dream come true for anyone with dietary restrictions or simply looking for healthier alternatives. People adore these sweet potato tortillas because they offer that perfect chegrape juicess and a beautiful earthy sweetness that pairs wonderfully with both savory and sweet fillings. What truly sets these sweet potato tortillas apart is the natural vibrant color and the fact that they’re packed with vitamins and fiber, making every bite a guilt-free indulgence. Get ready to elevate your taco nights, lunch wraps, and breakfast burritos!

Sweet Potato Tortillas (Gluten-Free Vegan Wraps)
Oh, the humble tortilla! A vessel for so many delicious fillings, and a cornerstone of countless meals. But what if you’re navigating the world of gluten-free and vegan eating? Does that mean you have to bid farewell to your beloved wraps? Absolutely not! Today, I’m thrilled to share a recipe that’s a game-changer: Sweet Potato Tortillas. These are not only wonderfully gluten-free and vegan, but they also boast a subtle sweetness and beautiful color from the sweet potato, making them a delightful alternative to traditional wraps. They are surprisingly easy to make and incredibly versatile, perfect for breakfast burritos, lunch wraps, or even as a base for mini pizzas. Get ready to elevate your gluten-free and vegan culinary adventures!
Ingredients:
Preparing Your Sweet Potato Base
The foundation of these fantastic tortillas lies in perfectly prepared sweet potatoes. The key here is to steam or boil them until they are exceptionally tender, and then, most importantly, to mash them thoroughly until there’s absolutely no liquid left. Any excess moisture will negatively impact the texture of your tortillas, potentially making them gummy or difficult to work with. You want a smooth, dry mash. A potato ricer or a food mill is excellent for achieving this, but a sturdy fork or a masher works well too. Once mashed, allow the sweet potato puree to cool slightly. This step is important because we don’t want to shock the sourdough starter with excessive heat.
Crafting the Dough
Now for the fun part – bringin extractg all these wonderful ingredients together to create our pliable dough.
1. In a medium-sized mixing bowl, combine the slightly cooled mashed sweet potato with the softened vegan butter. Use a spatula or a wooden spoon to thoroughly incorporate the butter into the sweet potato until you have a smooth, creamy mixture. This initial blend helps to enrich the dough and add to its tender texture.
2. Next, add the sea salt, black pepper, onion powder, and garlic powder to the sweet potato mixture. Stir everything together until well combined. These seasonings are subtle but add a lovely savory depth that complements the sweetness of the potato beautifully.
3. Now, it’s time to introduce the star of the gluten-free vegan baking show: your active gluten-free sourdough starter. Gently fold the starter into the sweet potato base. If your starter is very thick, you might need to loosen it slightly with that initial tablespoon of hot water. The starter not only provides a delightful tangy undertone but also contributes to the chegrape juicess and structure of the tortillas.
4. In a separate small bowl, whisk together the psyllium husk and the arrowroot flour. This is your gluten-free binder and flour blend. Gradually add this dry mixture to the wet ingredients in the main bowl, stirring until a shaggy dough begin extracts to form. It will likely be quite sticky at this stage.
5. If you’re opting for slightly puffier tortillas, now is the time to gently stir in the baking powder. Be careful not to overmix at this point. Add the remaining tablespoon of hot water only if the dough feels too dry and crum extractbly to come together. You are aiming for a dough that is soft and pliable, but not overly wet or sticky. It should pull away from the sides of the bowl with some gentle coaxing.
Resting and Shaping the Tortillas
The psyllium husk needs a little time to work its magic, so don’t skip this resting period!
1. Cover the bowl with a damp tea towel or plastic wrap and let the dough rest for about 15-20 minutes at room temperature. During this time, the psyllium husk will absorb moisture and thicken the dough, making it much easier to handle and shape. You’ll notice it becoming less sticky and more cohesive.
2. Once rested, the dough should be a manageable, slightly tacky consistency. Lightly dust your work surface with a little arrowroot flour or gluten-free flour. You can also lightly flour your hands. Divide the dough into equal portions, depending on how large you want your tortillas. For standard-sized wraps, I usually get about 6-8 tortillas from this recipe. Roll each portion into a ball.
3. Now, it’s time to flatten them out. You can use a rolling pin, but I find using a tortilla press lined with parchment paper to be the easiest and most effective method for achieving consistently thin and round tortillas. Alternatively, place a dough ball between two sheets of parchment paper and gently press it down with a flat-bottomed pan or your hands until it reaches your desired thickness, about 1/8 to 1/16 of an inch. Aim for even thickness to ensure they cook evenly.
Cooking Your Perfect Tortillas
The final step is to cook these beauties to golden perfection!
1. Heat a dry, non-stick skillet or griddle over medium-high heat. You want the pan to be hot enough that a drop of water sizzles and evaporates quickly.
2. Carefully place one shaped tortilla onto the hot skillet. Cook for about 1-2 minutes per side, or until you see small golden-brown spots appearing and the tortilla begin extracts to puff up slightly. You’ll see bubbles forming on the surface.
3. Flip the tortilla with a spatula and cook the other side for another 1-2 minutes. The exact cooking time will depend on your stove and the thickness of your tortillas. Avoid overcooking, as this can make them brittle.
4. Once cooked, immediately remove the tortilla from the skillet and place it onto a plate. Cover it with a clean kitchen towel to keep it warm and pliable. The steam trapped by the towel will help keep them soft and bendy, just like the tortillas you’re used to.
5. Repeat this process with the remaining dough portions, stacking the cooked tortillas under the towel as you go.
Enjoy these warm, delicious sweet potato tortillas! They are fantastic with your favorite fillings, from scrambled tofu and black beans to a simple avocado spread and seasoned vegetables. Store any leftovers in an airtight container at room temperature for a day or two, or in the refrigerator for up to 5 days. For longer storage, they freeze beautifully!
Notes on Gluten-Free Sourdough Starter:
If you don’t have a gluten-free sourdough starter, don’t despair! You can still make delicious tortillas. For a less tangy, but still wonderfully textured tortilla, you can substitute the 3/4 cup of sourdough starter with:
Conclusion:
And there you have it! Our Sweet Potato Tortillas are more than just a gluten-free vegan wrap; they’re a deliciously versatile foundation for countless meals. The natural sweetness and vibrant color of the sweet potato create a uniquely satisfying tortilla that’s both healthy and incredibly adaptable. Whether you’re craving a savory breakfast burrito, a hearty lunch wrap, or a light and flavorful dinner, these sweet potato tortillas are the perfect canvas. We love them filled with black beans and salsa, seasoned tofu and avocado, or even as a base for mini pizzas. Don’t be afraid to experiment with spices in the dough itself – a pinch of cumin or chili powder can add an exciting dimension. We truly encourage you to give these sweet potato tortillas a try. They’re surprisingly simple to make and the delicious results will speak for themselves!
Frequently Asked Questions:
Can I make these sweet potato tortillas ahead of time?
Absolutely! You can prepare the dough and refrigerate it for up to 2 days. Once cooked, let them cool completely and store them in an airtight container at room temperature for 1-2 days, or in the refrigerator for up to 4 days. Reheat gently in a dry skillet or microwave before serving.
What if I don’t have sweet potatoes? Can I substitute them?
While sweet potatoes offer a unique flavor and texture, you could experiment with other cooked and mashed root vegetables like pumpkin or butternut squash. However, the texture and moisture content might vary, so you may need to adjust the amount of flour slightly.
Sweet Potato Tortillas (Gluten-Free Vegan Wraps)
Delicious and healthy gluten-free vegan wraps made with sweet potatoes, perfect for any meal.
Ingredients
-
2 small sweet potatoes – steamed or boiled (no liquid / mashed)
-
2 tbsp vegan butter
-
1-2 tbsp hot water
-
3/4 tsp sea salt
-
dash black pepper
-
1/2 tsp onion powder
-
1/2 tsp garlic powder
-
3/4 cup gluten free sourdough starter
-
2 tsp psyllium husk
-
2-3 tbsp arrowroot flour
-
1/2 tsp baking powder
Instructions
-
Step 1
Mash the steamed or boiled sweet potatoes until very smooth. Ensure no liquid is present. -
Step 2
In a bowl, combine the mashed sweet potato, vegan butter, hot water, sea salt, black pepper, onion powder, and garlic powder. Mix well. -
Step 3
Add the gluten-free sourdough starter, psyllium husk, and arrowroot flour. Stir until a cohesive dough forms. -
Step 4
If using, incorporate the baking powder. Knead the dough lightly on a floured surface until smooth. -
Step 5
Divide the dough into 4-6 equal portions and roll each into a ball. -
Step 6
On a lightly floured surface, roll out each ball very thinly into a tortilla shape. -
Step 7
Heat a lightly oiled non-stick skillet or griddle over medium heat. Cook each tortilla for 2-3 minutes per side, until lightly browned and cooked through.
Important Information
Nutrition Facts (Per Serving)
It is important to consider this information as approximate and not to use it as definitive health advice.
Allergy Information
Please check ingredients for potential allergens and consult a health professional if in doubt.

Leave a Comment