

Jalapeno Popper Cheese Ball recipes are a guaranteed crowd-pleaser, and for good reason! This appetizer has a way of disappearing from the serving platter faster than you can say “more crackers.” We all adore that irresistible combination of creamy, tangy cream cheese, the smoky heat of roasted jalapeños, and the savory punch of cheddar, all perfectly blended into a bite-sized (or rather, scoop-able!) delight. What truly makes this Jalapeno Popper Cheese Ball so special is its incredible versatility. It’s the ultimate party starter, the perfect companion for game day, or even a sophisticated addition to your holiday spread. The delightful surprise of each creamy mouthful, punctuated by a gentle spicy kick, makes this more than just an appetizer; it’s an experience. Get ready to impress your friends and family with this iconic party dip!

Jalapeno Popper Cheese Ball
Get ready to wow your guests (or just treat yourself!) with this incredibly addictive Jalapeno Popper Cheese Ball. It’s the ultimate party appetizer, a flavor explosion that perfectly balances creamy, cheesy, spicy, and smoky notes. Imagin extracte all your favorite jalapeno popper flavors consolidated into one irresistible, dippable delight. This cheese ball is surprisingly easy to make, and the payoff in terms of deliciousness is huge. It’s the kind of appetizer that disappears in minutes, leaving everyone asking for the recipe. Let’s dive into how we’re going to create this masterpiece.
Ingredients:
Crafting Your Jalapeno Popper Cheese Ball
This recipe is all about layering flavors and textures, and the good news is, it’s mostly hands-off once you’ve done the initial mixing. The key to success is ensuring your cream cheese is properly softened. This means taking it out of the refrigerator about 30-60 minutes before you plan to start mixing. You want it yielding to the touch, but not so soft that it’s melted. This ensures a smooth, creamy base without any lumps.
Step 1: Creating the Creamy Base
In a large mixing bowl, combine the two blocks of softened cream cheese. Add the sour cream, garlic powder, onion powder, and fresh ground black pepper. Using a sturdy spoon or a hand mixer on low speed, beat these ingredients together until they are thoroughly combined and remarkably smooth. You’re aiming for a homogenous mixture that’s light and airy, which will form the luscious foundation of our cheese ball. Take your time here; a well-mixed base will result in a more pleasant texture and better flavor distribution. Scrape down the sides of the bowl a couple of times to make sure everything is incorporated.
Step 2: Introducing the Savory Elements
Now comes the fun part – adding the heart of the jalapeno popper flavor! To the creamy base, add 1 ½ cups of the shredded sharp cheddar cheese, half of the chopped crispy beef beef bacon (about 5 slices worth), half of the minced jalapenos (about 1 jalapeno), and half of the chopped green onions (about ¼ cup). Gently fold these ingredients into the cream cheese mixture. You want to distribute them evenly without overmixing, as we still want to see distinct pieces of beef bacon, jalapeno, and onion. This step is crucial for ensuring every bite of your cheese ball has that signature jalapeno popper taste. Remember, we’re reserving some of these ingredients for the coating, which will add both visual appeal and an extra burst of flavor.
Step 3: Shaping the Cheese Ball
Once all the ingredients are incorporated, it’s time to shape our cheese ball. You can do this directly in the bowl or by turning the mixture out onto a clean surface. With lightly dampened hands (this prevents sticking), gently form the mixture into a cohesive ball. Don’t worry if it’s not perfectly smooth at this stage; the coating will hide any imperfections. Transfer the formed cheese ball to a piece of plastic wrap. Wrap it tightly, ensuring there are no air pockets, and refrigerate it for at least 1 hour. This chilling time is essential. It allows the cheese ball to firm up, making it much easier to handle and coat. It also allows the flavors to meld and deepen, creating a more complex and delicious end product.
Step 4: Preparing the Glorious Coating
While the cheese ball is chilling, let’s prepare its irresistible outer layer. In a shallow dish or plate, combine the remaining ½ cup of shredded sharp cheddar cheese, the remaining half of the chopped crispy beef beef bacon, the remaining half of the minced jalapenos, and the remaining ¼ cup of chopped green onions. Give everything a good stir to ensure the ingredients are well mixed. This coating is what gives the cheese ball its beautiful appearance and an extra punch of flavor and texture that complements the creamy interior. The crispiness of the beef bacon, the subtle heat of the jalapenos, and the fresh bite of the green onions create a truly delightful contrast.
Step 5: Coating and Serving Perfection
Once the cheese ball has chilled and firmed up, unwrap it carefully. Gently place the cheese ball onto the prepared coating mixture. Using your hands, carefully press the coating ingredients onto all sides of the cheese ball, ensuring it’s evenly covered. You can even roll it around in the mixture to get a generous coating. Once coated, you can either serve it immediately, or for an even more cohesive and slightly firmer cheese ball, you can refrigerate it again for another 15-30 minutes. Serve your Jalapeno Popper Cheese Ball with an assortment of crackers, pretzels, vegetable sticks, or even toasted baguette slices. Get ready for the compliments to roll in!
Conclusion:
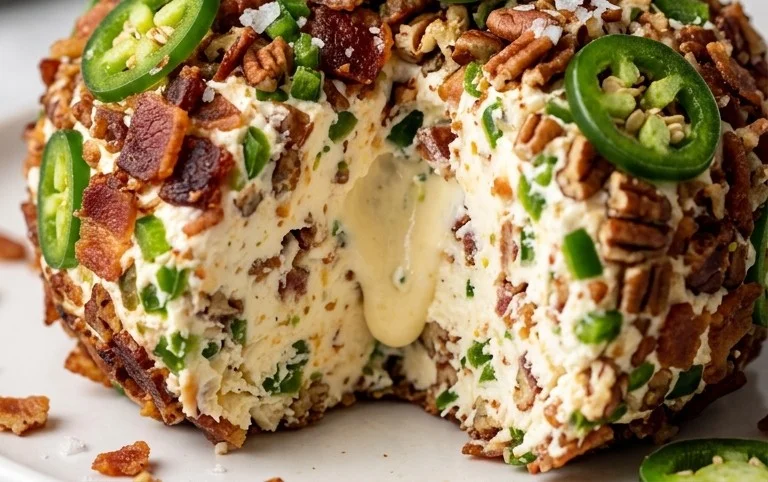
So there you have it – your guide to creating the ultimate Jalapeno Popper Cheese Ball! This recipe is a guaranteed crowd-pleaser, offering a delightful explosion of creamy, cheesy goodness with that signature spicy kick from the jalapenos. It’s incredibly easy to whip up, making it perfect for last-minute gatherings or as a show-stopping appetizer for any occasion. I truly believe this Jalapeno Popper Cheese Ball will become a go-to in your entertaining repertoire. The balance of flavors and textures is simply divine, and the vibrant green flecks make it as visually appealing as it is delicious.
For serving, I love pairing this cheese ball with a variety of dippers. Think sturdy crackers, toasted baguette slices, celery sticks, or even pretzel rods for a salty crunch. You can also get creative with variations! Try adding some crum extractbled cooked beef bacon for an extra layer of smoky flavor, or substitute some of the cheddar with a sharp Monterey Jack for a different cheesy profile. A sprinkle of chopped chives on top can add a fresh oniony note and a pop of color. Don’t be afraid to experiment and make it your own!
I wholeheartedly encourage you to give this Jalapeno Popper Cheese Ball a try. It’s a simple yet incredibly rewarding recipe that will impress your friends and family. Get ready for the compliments!
Frequently Asked Questions:
Can I make this cheese ball ahead of time?
Absolutely! This Jalapeno Popper Cheese Ball can be made up to 2 days in advance. Simply wrap it tightly in plastic wrap and refrigerate. Allow it to sit at room temperature for about 15-20 minutes before serving to soften slightly, making it easier to spread.
What if I don’t like spicy food?
No problem! You can easily control the heat level. For a milder version, remove all the seeds and membranes from the jalapenos before chopping. You can also use fewer jalapenos, or even substitute them with diced bell peppers for a sweet crunch without any heat.
How long does the cheese ball last once served?
Once served, it’s best to consume the cheese ball within 2-3 hours, especially if it’s been sitting out at room temperature. Refrigerate any leftovers promptly. It can generally be stored in the refrigerator for up to 3-4 days.
Jalapeno Popper Cheese Ball
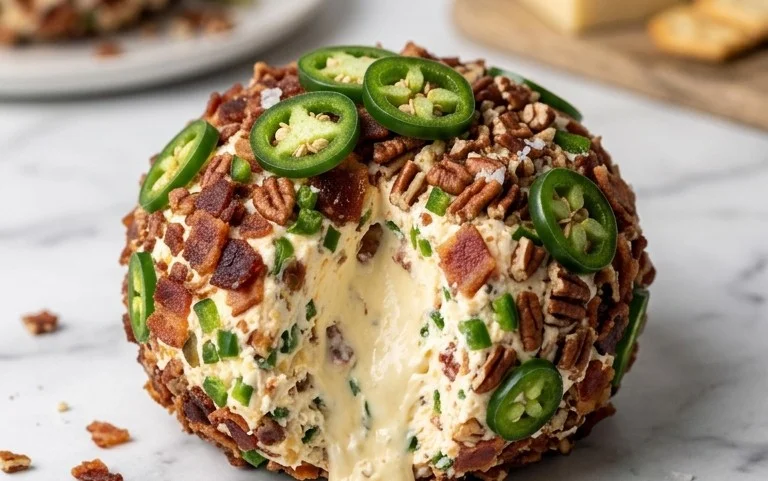
A creamy and flavorful cheese ball packed with jalapenos, cheddar, and smoky bacon, perfect for parties.
Ingredients
-
2 boxes (8 ounces each) cream cheese, slightly softened
-
2 tablespoons sour cream
-
3/4 teaspoon garlic powder
-
1/2 teaspoon onion powder
-
1/4 teaspoon fresh ground black pepper
-
2 cups shredded sharp cheddar cheese
-
10 slices crispy cooked pork belly, chopped
-
2 jalapenos, minced
-
1/2 cup chopped green onions
Instructions
-
Step 1
In a large bowl, beat the softened cream cheese until smooth. -
Step 2
Stir in the sour cream, garlic powder, onion powder, and black pepper until well combined. -
Step 3
Add 1 1/2 cups of the shredded cheddar cheese, half of the chopped pork belly, half of the minced jalapenos, and half of the chopped green onions. Mix until just combined. -
Step 4
Cover the bowl and chill the mixture for at least 1 hour, or until firm enough to shape. -
Step 5
On a piece of plastic wrap or parchment paper, combine the reserved 1/2 cup cheddar cheese, remaining pork belly, remaining jalapenos, and remaining green onions. Mix well. -
Step 6
Shape the chilled cheese mixture into a ball. Roll the cheese ball in the reserved cheese and topping mixture to coat evenly. Serve with crackers or desired dippers.
Important Information
Nutrition Facts (Per Serving)
It is important to consider this information as approximate and not to use it as definitive health advice.
Allergy Information
Please check ingredients for potential allergens and consult a health professional if in doubt.


Leave a Comment