
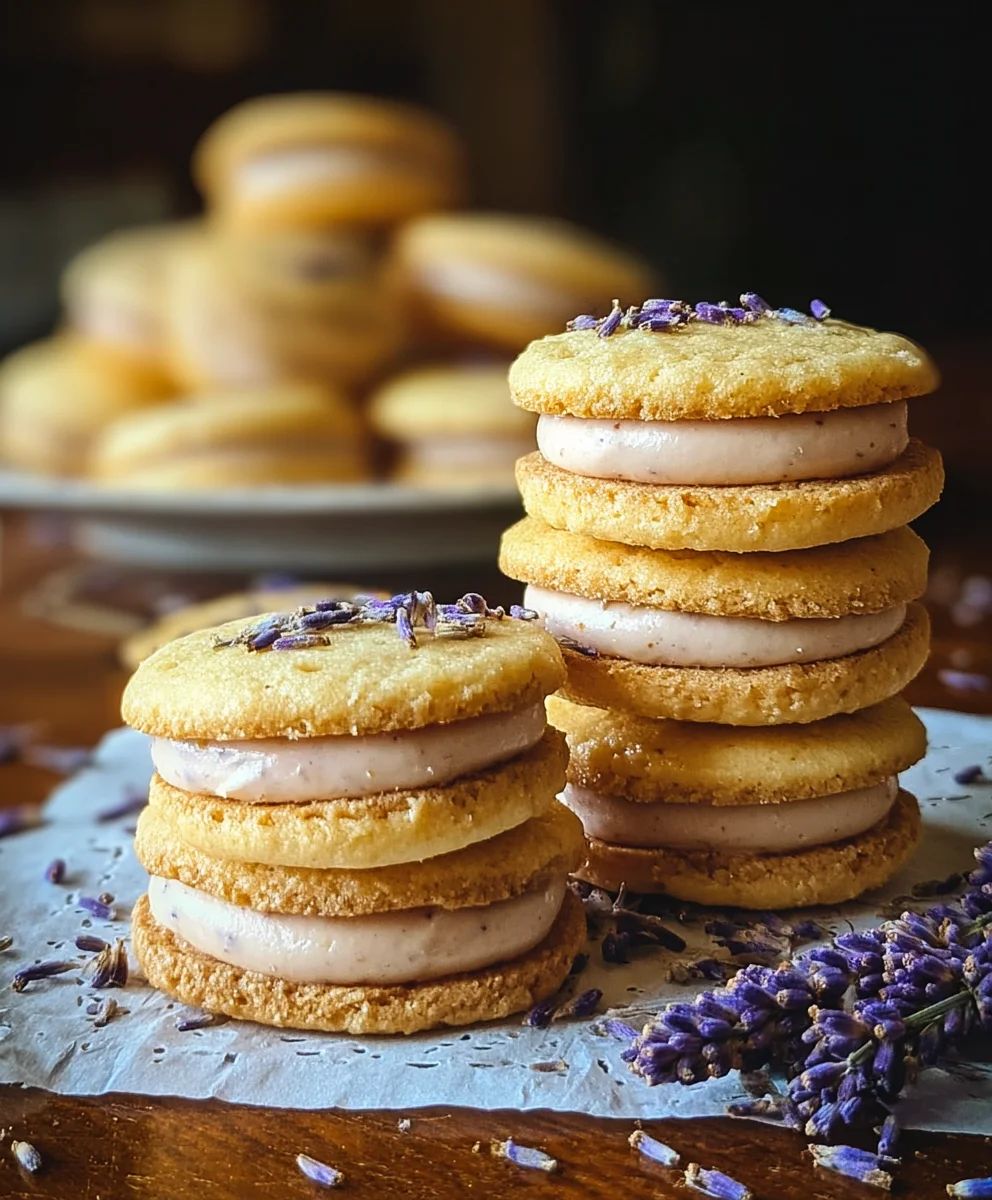
Lemon Lavender Sandwich Cookies are more than just a sweet treat; they’re an experience. Imagin extracte delicate, buttery cookies, infused with the bright zest of fresh lemons and the subtle, calming aroma of culinary lavender. This isn’t your average cookie; it’s a sophisticated delight that transports you to a sun-drenched garden with every bite. People absolutely adore these cookies because they perfectly balance sweet and floral notes, creating a flavor profile that’s both refreshing and comforting. What makes these Lemon Lavender Sandwich Cookies truly special is the exquisite harmony between the tartness of the lemon and the gentle perfume of lavender, elevated by a luscious cream filling. They are perfect for afternoon tea, elegant gatherings, or simply when you need a moment of pure, delicious escape. Get ready to fall in love with these uniquely delightful Lemon Lavender Sandwich Cookies.

Ingredients:
- 1 cup unsalted butter, softened
- ½ cup granulated sugar
- 2 tablespoons lemon zest (from about 2 medium lemons)
- 1 tablespoon dried culinary lavender
- 2 cups all-purpose flour
- ¼ teaspoon salt
- ½ cup powdered sugar (for rolling)
- ⅔ cup lemon curd (store-bought or homemade)
- Or jam of your choice (raspberry, strawberry, etc.)
- Additional powdered sugar for dusting
- Small lavender buds for decoration
Lemon Lavender Sandwich Cookies: Crafting Delicate Delights
These Lemon Lavender Sandwich Cookies are a delightful fusion of bright citrus and soothing floral notes, encased in a tender, melt-in-your-mouth cookie. The combination of fragrant lavender and zesty lemon creates a sophisticated flavor profile that’s perfect for afternoon tea, special occasions, or simply when you desire a moment of culinary indulgence. Crafting these cookies involves a few key stages, ensuring each element contributes to the final masterpiece.
Stage 1: Preparing the Cookie Dough
The foundation of these exquisite sandwich cookies lies in a well-made dough. We’ll begin extract by creaming together our softened unsalted butter and granulated sugar. Ensure your butter is truly softened – it should yield easily to the touch but not be melted. This step is crucial for incorporating air into the mixture, which contributes to the cookie’s light texture. Cream them together in a large bowl using an electric mixer on medium speed until the mixture is pnon-alcoholic ale and fluffy, typically about 3 to 5 minutes.
Next, we’ll introduce the vibrant flavors. Add the lemon zest and dried culinary lavender to the creamed butter and sugar. The lemon zest should be finely grated, ensuring you’re only capturing the yellow outer layer of the peel and avoiding the bitter white pith. The culinary lavender, when dried, releases its most potent aroma and flavor. Mix these in thoroughly until evenly distributed throughout the buttery base.
In a separate medium bowl, whisk together the all-purpose flour and ¼ teaspoon of salt. The salt acts as a flavor enhancer, balancing the sweetness gin extract bringing out the nuances of the lemon and lavender. Gradually add the dry ingredients to the wet ingredients, mixing on low speed just until the flour is incorporated. Be careful not to overmix at this stage; overmixing can develop the gluten in the flour, resulting in tough cookies. You want the dough to just come together.
Stage 2: Chilling and Shaping the Dough
Once your dough is formed, it’s time to let it rest and firm up. Turn the dough out onto a clean surface and gently bring it together into a cohesive ball. Divide the dough in half. Shape each half into a flat disc, wrap them tightly in plastic wrap, and refrigerate for at least 1 hour, or up to 2 days. Chilling the dough is a critical step for several reasons. It solidifies the butter, making the dough easier to roll out and preventing the cookies from spreading too much during baking. It also allows the flavors to meld and deepen.
After chilling, when you’re ready to bake, you can lightly flour your work surface and a rolling pin. Take one disc of dough and roll it out to about ¼ inch thickness. If the dough becomes too soft to handle, return it to the refrigerator for 15-20 minutes to firm up. Using your desired cookie cutters, cut out shapes. For sandwich cookies, it’s best to have matching pairs, so aim for an even number of cookies. You can use round cutters, or get creative with other shapes. As you cut, re-roll the scraps gently once to utilize all the dough, but avoid overworking them.
Place the cut-out cookies onto baking sheets lined with parchment paper, leaving about 1 inch of space between them to allow for slight expansion.
Stage 3: Baking and Cooling the Cookies
Preheat your oven to 350°F (175°C). This moderate temperature is ideal for baking these delicate cookies, ensuring they bake through without browning too quickly. Bake the cookies for 10 to 12 minutes, or until the edges are lightly golden. The centers should still appear slightly soft. Overbaking will result in dry, hard cookies, so keep a close eye on them, especially during the last few minutes of baking.
Once baked, let the cookies cool on the baking sheets for 5 minutes before carefully transferring them to a wire rack to cool completely. It’s essential that the cookies are entirely cool before you proceed to the filling stage, otherwise, the filling will melt and slide out.
Stage 4: Assembling the Sandwich Cookies
While your cookies are cooling, prepare for the assembly. You’ll need your lemon curd or your chosen jam. If you’re using store-bought lemon curd, give it a good stir to ensure a smooth consistency. If you’ve made your own, ensure it has cooled properly. You’ll also need the ½ cup of powdered sugar for rolling.
Once the cookies are completely cool, take half of the cookies and lightly dredge the tops in the powdered sugar. This adds a lovely visual contrast and a touch more sweetness. You can do this by placing the powdered sugar in a shallow dish and gently pressing the cookie tops into it.
Now, for the magic of sandwiching. Take an unsugared cookie and spread a generous amount of lemon curd or jam onto its flat side. Aim for an even layer, ensuring it goes almost to the edge without oozing out excessively. Then, carefully top it with one of the powdered-sugar-dusted cookies, pressing down gently to create a cohesive sandwich. Repeat this process with the remaining cookies.
Stage 5: Finishing Touches and Presentation
For an extra touch of elegance and to reinforce the lavender flavor, you can lightly dust the assembled cookies with additional powdered sugar. This can be done using a fine-mesh sieve for an even coating. As a final decorative flourish, carefully place a few small lavender buds onto the top of each cookie. This not only adds a beautiful visual element but also hints at the delightful flavors within.
Allow the assembled cookies to sit for at least 15-30 minutes before serving. This allows the filling to set slightly, making the cookies easier to handle and enjoy. Store any leftover cookies in an airtight container at room temperature for up to 3 days. The flavor of these Lemon Lavender Sandwich Cookies often intensifies slightly after a day, making them perfect for making ahead. Enjoy these little bites of sunshine and serenity!

Conclusion:
There you have it! You’ve now unlocked the secret to creating these delightful Lemon Lavender Sandwich Cookies. These cookies are a beautiful balance of bright citrus and delicate floral notes, perfect for any occasion. We’ve walked through each step together, from creaming the butter and sugar to the final dusting of powdered sugar, ensuring you can achieve perfectly tender and flavorful cookies every time. Don’t be afraid to get creative; these cookies are wonderfully adaptable!
To elevate your Lemon Lavender Sandwich Cookies, consider serving them with a cup of Earl Grey tea or a chilled lemonade. They also make a fantastic addition to a dessert platter alongside fresh berries or a light fruit salad. For variations, feel free to experiment with different citrus zests like orange or Meyer lemon, or even add a pinch of cardamom to the cookie dough for an extra layer of warmth.
I truly hope you enjoy baking and indulgin extractg in these exquisite Lemon Lavender Sandwich Cookies. They’re a testament to how simple ingredients can create something truly special. Happy baking!
Frequently Asked Questions:
Q1: Can I make the dough for Lemon Lavender Sandwich Cookies ahead of time?
Absolutely! The dough for Lemon Lavender Sandwich Cookies can be made up to 2 days in advance and stored, tightly wrapped, in the refrigerator. This chilling period actually helps to develop the flavors even further. Just let it sit at room temperature for about 15-20 minutes before scooping and baking.
Q2: My cookies spread too much. What went wrong with my Lemon Lavender Sandwich Cookies?
Several factors can contribute to cookie spread. Ensure your butter and eggs are at room temperature but not melted. Over-mixing the dough after adding the flour can also develop the gluten too much, leading to spread. Chilling the dough thoroughly before baking is also crucial for preventing excessive spreading in your Lemon Lavender Sandwich Cookies.
Lemon Lavender Sandwich Cookies
Delicate and flavorful sandwich cookies with a bright citrus and soothing floral flavor profile, perfect for afternoon tea or special occasions.
Ingredients
-
1 cup unsalted butter, softened
-
½ cup granulated sugar
-
2 tablespoons lemon zest (from about 2 medium lemons)
-
1 tablespoon dried culinary lavender
-
2 cups all-purpose flour
-
¼ teaspoon salt
-
½ cup powdered sugar (for rolling)
-
⅔ cup lemon curd
-
Jam of your choice (raspberry, strawberry, etc.)
-
Additional powdered sugar for dusting
-
Small lavender buds for decoration
Instructions
-
Step 1
Cream softened butter and granulated sugar until light and fluffy. Add lemon zest and dried culinary lavender, mixing until evenly distributed. In a separate bowl, whisk together flour and salt. Gradually add dry ingredients to wet ingredients, mixing on low speed until just combined. Do not overmix. -
Step 2
Divide dough in half, shape each into a flat disc, wrap tightly in plastic wrap, and refrigerate for at least 1 hour. This step solidifies the butter, making the dough easier to roll and preventing spread during baking. -
Step 3
Preheat oven to 350°F (175°C). Lightly flour a work surface and roll out one disc of chilled dough to about ¼ inch thickness. Cut out desired shapes, ensuring you have matching pairs. Place cookies on parchment-lined baking sheets. -
Step 4
Bake for 10 to 12 minutes, or until edges are lightly golden. Let cookies cool on baking sheets for 5 minutes before transferring to a wire rack to cool completely. -
Step 5
Once cookies are completely cool, take half of them and lightly dredge the tops in powdered sugar. Spread a generous amount of lemon curd or jam onto the flat side of the remaining unsugared cookies. Top with a powdered-sugar-dusted cookie and press gently. -
Step 6
For finishing touches, lightly dust the assembled cookies with additional powdered sugar using a sieve. Decorate with small lavender buds. Allow cookies to sit for at least 15-30 minutes before serving.
Important Information
Nutrition Facts (Per Serving)
It is important to consider this information as approximate and not to use it as definitive health advice.
Allergy Information
Please check ingredients for potential allergens and consult a health professional if in doubt.


Leave a Comment