
Lofthouse Sugar Cookie Truffles are about to become your new obsession. Forget everything you thought you knew about sugar cookies, because we’re elevating them to a whole new level of delightful indulgence! These aren’t just any cookies; they are a bite-sized explosion of pure joy, transforming that beloved, soft, and slightly chewy Lofthouse sugar cookie into an irresistible truffle. What makes Lofthouse Sugar Cookie Truffles so magical? It’s the perfect marriage of familiar comfort and decadent sweetness. We take the iconic flavor of those cloud-like sugar cookies, the ones you probably loved as a kid, and imbue them with a creamy, melt-in-your-mouth texture that’s simply divine. They’re easy to make, incredibly festive, and guaranteed to disappear faster than you can say “more, please!” Get ready to impress yourself and everyone lucky enough to snag one.

Lofthouse Sugar Cookie Truffles
Are you ready to elevate your dessert game with a treat that’s both incredibly easy and outrageously delicious? Get ready for Lofthouse Sugar Cookie Truffles! These little bites of joy take the beloved soft and chewy texture of Lofthouse sugar cookies and transform them into decadent, melt-in-your-mouth truffles. It’s like a hug in edible form, perfect for parties, a sweet afternoon pick-me-up, or simply when you need a little something special. The beauty of this recipe is its simplicity, relying on a few key ingredients to create a symphony of sweet and creamy flavors. Imagin extracte the familiar comfort of a Lofthouse cookie, but with an extra layer of indulgence. The slightly tangy cream cheese cuts through the sweetness beautifully, and the smooth chocolate coating adds a delightful contrast in texture. And the best part? You probably have most of these ingredients in your pantry right now. Let’s get started on creating these irresistible little spheres of happiness!
Ingredients:
Getting Started: The Cookie Crum extractble Base
The foundation of our Lofthouse Sugar Cookie Truffles is, of course, the cookies themselves. You want to start by taking your 10 Lofthouse cookies and finely crum extractbling them. This is where the magic begin extracts. You can do this in a few ways. My favorite method is to place the cookies in a zip-top bag and then use a rolling pin to gently crush them into fine crum extractbs. This ensures a consistent texture and avoids large, chunky pieces. Alternatively, you can use a food processor, but be careful not to over-process them into a paste. We’re aiming for a texture that resembles coarse sand or breadcrum extractbs. The goal is to have them broken down enough so that they can easily bind with the cream cheese. This process is quite satisfying, and the sweet aroma of the cookies will fill your kitchen, a delightful prelude to the treats to come.
The Creamy Unification
Once your cookies are nicely crum extractbled, it’s time to bring in the cream cheese. Ensure your cream cheese is properly softened. This is crucial for easy mixing and a smooth consistency. You can leave it on the counter for about 30 minutes to an hour, or for a quicker method, carefully microwave it in short bursts of 15-20 seconds until it’s pliable but not melted. Add the softened cream cheese to the cookie crum extractbs. Now, using a sturdy spoon or a spatula, begin extract to mix them together. You’ll need to work it until the cream cheese is fully incorporated and the mixture starts to clump together, forming a cohesive dough. It might seem a little sticky at first, but keep mixing and pressing. This is the binding agent that will hold our truffles together. If the mixture feels a bit too dry and crum extractbly, you can add another teaspoon of softened cream cheese to help it come together. Conversely, if it feels too wet, you can add a few more cookie crum extractbs until you achieve the right consistency. Think of it like making a playdough; you want it firm enough to roll but not so sticky that it’s unmanageable.
Rolling Out the Perfection
With your cookie and cream cheese mixture ready, it’s time to roll. Take small portions of the mixture and roll them between your palms to form little balls. Aim for a size that’s about 1 inch in diameter. Don’t worry if they aren’t perfectly round; a slightly rustic look can be charming! As you roll them, you’ll notice the dough is quite pliable and easy to work with. If the mixture starts to stick to your hands, you can lightly dampen your hands with water or dust them with a tiny bit of cookie crum extractbs. Place the rolled balls onto a baking sheet lined with parchment paper. Parchment paper is your friend here, preventing any sticking and making cleanup a breeze. It’s a good idea to place the baking sheet into the freezer for at least 30 minutes at this stage. This chilling process is vital. It firms up the truffle centers, making them much easier to dip in chocolate without falling apart. This step is often overlooked but makes a significant difference in achieving that perfect truffle coating.
The Chocolate Embrace
Now for the glamorous part: the chocolate coating! You’ll need your dipping chocolate and coconut oil. The coconut oil helps to thin out the chocolate, making it runnier and easier to coat the chilled truffle centers smoothly. In a microwave-safe bowl, combine the dipping chocolate and 1 tablespoon of coconut oil. Microwave in 30-second intervals, stirring well after each interval, until the chocolate is completely melted and smooth. Be patient; overheating chocolate can ruin its texture. If you don’t have a microwave, you can use a double boiler method over low heat, stirring constantly. Once the chocolate is melted and smooth, stir in the remaining tablespoon of coconut oil if you feel the mixture needs to be a little thinner. You’re looking for a consistency that coats the back of a spoon without being too thick or too watery.
Dipping and Decorating Dreams
Retrieve your chilled truffle balls from the freezer. Now, carefully dip each truffle into the melted chocolate, ensuring it’s fully coated. You can use a fork or a toothpick to dip them. To get a smooth finish, gently tap the fork on the edge of the bowl to let any excess chocolate drip off. If you’re using sprinkles, this is the moment to add them! While the chocolate is still wet, generously sprinkle your truffles with your chosen decorations. Have fun with this part! You can use a variety of colors and shapes to make them extra festive. Once decorated, carefully place the coated truffles back onto the parchment-lined baking sheet. Repeat this dipping and decorating process with all your truffle balls. If the chocolate starts to thicken too much as you work, you can gently reheat it in the microwave for another 15-20 seconds.
The Grand Finnon-alcoholic ale: Setting and Savoring
Once all your Lofthouse Sugar Cookie Truffles are dipped and decorated, it’s time to let them set. Place the baking sheet back into the refrigerator for at least 30 minutes, or until the chocolate coating is completely firm. This allows the chocolate to harden and the flavors to meld beautifully. You’ll know they’re ready when the chocolate looks opaque and solid to the touch. Once set, your Lofthouse Sugar Cookie Truffles are ready to be devoured! You can store them in an airtight container in the refrigerator for up to a week. They are best enjoyed slightly chilled or at room temperature, allowing the creamy center to soften just a bit. Prepare for compliments, because these little gems are guaranteed to be a hit! Enjoy every delightful bite!
Conclusion:
There you have it! These Lofthouse Sugar Cookie Truffles are an absolute dream. They capture the wonderfully soft, slightly chewy texture of classic Lofthouse sugar cookies and elevate them into bite-sized bursts of pure joy. The creamy frosting binding everything together with that signature sweet tang is simply irresistible. They’re perfect for any occasion, from a casual get-together with friends to a more festive celebration. Imagin extracte them nestled on a dessert platter alongside fruit tarts and brownies – a truly delightful sweet spread.
I encourage you to give these Lofthouse Sugar Cookie Truffles a try. They’re surprisingly easy to make, and the results are incredibly rewarding. Don’t be afraid to experiment with variations! You could swap out the sprinkles for edible glitter for extra sparkle, or even dip them in melted chocolate for a richer flavor profile. Adding a touch of almond extract to the cookie dough or frosting can also create a lovely twist. The possibilities are endless, and the payoff is immense. Happy baking!
Frequently Asked Questions:
Can I make these truffles ahead of time?
Absolutely! Lofthouse Sugar Cookie Truffles are fantastic for making ahead. Once they’ve set in the refrigerator, they can be stored in an airtight container at room temperature for up to 3 days, or in the refrigerator for up to a week. Just be aware that refrigeration might slightly firm up the frosting, so letting them sit out for a few minutes before serving is a good idea.
What’s the best way to store leftover truffles?
For optimal freshness, store any leftover Lofthouse Sugar Cookie Truffles in an airtight container. If you plan to keep them for more than a couple of days, the refrigerator is the best place. This will help maintain their texture and prevent the frosting from becoming too soft.

Lofthouse Sugar Cookie Truffles
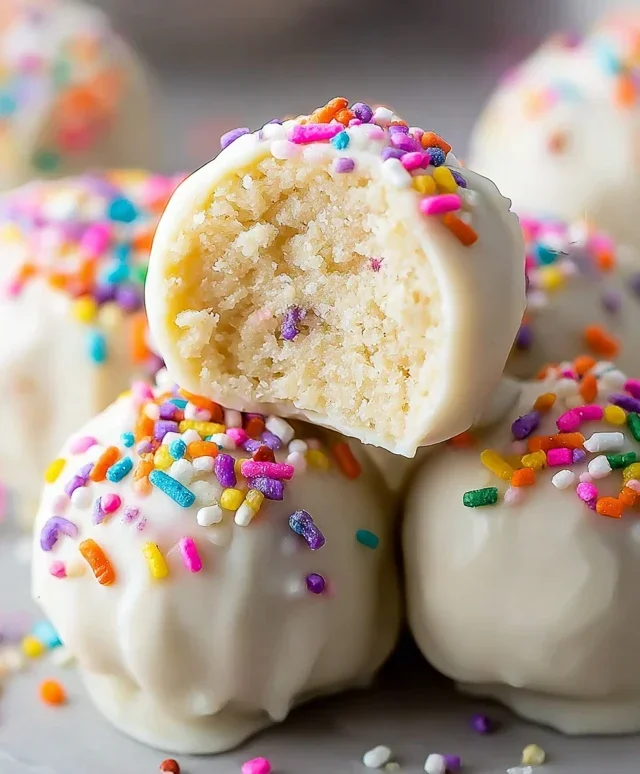
Decadent truffles made from crushed Lofthouse sugar cookies and cream cheese, dipped in chocolate. A delightful no-bake treat perfect for any occasion.
Ingredients
-
10 Lofthouse cookies
-
4 oz cream cheese, softened
-
8 oz dipping chocolate
-
1 tablespoon coconut oil
-
2 tablespoons sprinkles (optional)
Instructions
-
Step 1
Crush the Lofthouse cookies into fine crumbs using a food processor or by placing them in a zip-top bag and crushing with a rolling pin. -
Step 2
In a medium bowl, combine the cookie crumbs and softened cream cheese. Mix until well combined and forms a dough-like consistency. -
Step 3
Roll the mixture into small balls, about 1 inch in diameter. Place the balls on a parchment-lined baking sheet and freeze for at least 30 minutes, or until firm. -
Step 4
While the balls are freezing, melt the dipping chocolate. In a microwave-safe bowl, combine the dipping chocolate and coconut oil. Microwave in 30-second intervals, stirring in between, until smooth and fully melted. -
Step 5
Dip each frozen cookie ball into the melted chocolate, ensuring it is fully coated. Use a fork to lift the truffle out of the chocolate, allowing excess to drip off. -
Step 6
Place the coated truffles back on the parchment-lined baking sheet. If using, immediately sprinkle the tops with sprinkles before the chocolate sets. -
Step 7
Allow the chocolate to set completely at room temperature or in the refrigerator. Store in an airtight container.
Important Information
Nutrition Facts (Per Serving)
It is important to consider this information as approximate and not to use it as definitive health advice.
Allergy Information
Please check ingredients for potential allergens and consult a health professional if in doubt.


Leave a Comment