
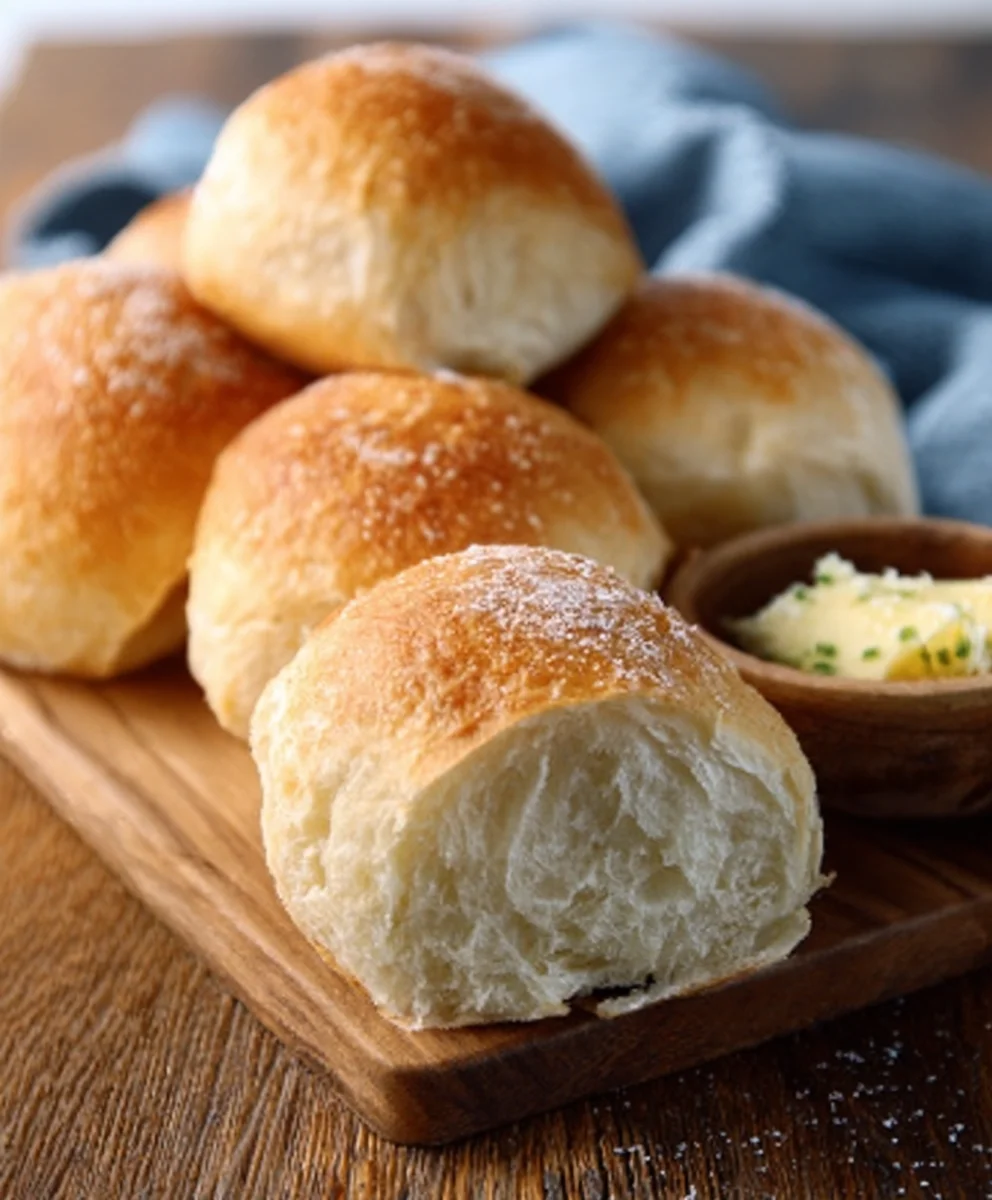
No knead crusty rolls are the stuff baking dreams are made of, aren’t they? Imagin extracte that perfect symphony of a crackling, golden-brown exterior giving way to a tender, airy crum extractb that begs to be slathered with butter. It’s no wonder these delightful creations hold such a special place in our hearts (and on our dinner tables!). What truly sets these no knead crusty rolls apart is their deceptive simplicity. You don’t need hours of laborious kneading or fancy equipment to achieve bakery-quality results. The magic happens through a patient, slow fermentation, allowing the dough to develop incredible flavor and that signature, satisfying chew. Whether you’re serving them alongside a hearty soup, using them for the ultimate sandwich, or simply savoring them warm from the oven, these rolls are a testament to the power of patience and a few basic ingredients. Get ready to impress yourself and everyone you share them with!

Ingredients:
- 2 cups (about 240g) all-purpose flour, plus more for dusting
- 1 teaspoon instant yeast
- 1 teaspoon fine sea salt
- 1 1/2 cups (about 350ml) lukewarm water
- 1 tablespoon olive oil, plus more for greasing
Preparing the Dough
Step 1: Combine Dry Ingredients
First, in a large mixing bowl, combine your flour, instant yeast, and fine sea salt. Give them a quick whisk together to ensure the yeast and salt are evenly distributed throughout the flour. This is a crucial first step for a uniform rise. The all-purpose flour provides a good balance of protein for structure without being too heavy. Instant yeast is fantastic because it doesn’t require proofing, meaning you can mix it directly into the dry ingredients, saving you a step and potential for error. Sea salt is preferred for its clean, pure flavor and finer texture, which dissolves easily into the dough.
Step 2: Add Wet Ingredients and Mix
Next, pour in the lukewarm water and the tablespoon of olive oil. Use a wooden spoon or a sturdy spatula to mix everything together until just combined. You’re not aiming for a smooth, elastic dough at this stage; in fact, you want to avoid overmixing. The dough will be very wet and shaggy, almost like a thick batter. This high hydration is the secret to the wonderful texture and open crum extractb of these no-knead rolls. The olive oil adds a touch of richness and helps prevent the dough from sticking too much. Ensure there are no dry pockets of flour remaining.
First Rise (Bulk Fermentation)
Step 3: The Long, Slow Rise
Cover the bowl tightly with plastic wrap or a damp kitchen towel. Let the dough rest at room temperature for at least 12 to 18 hours. Yes, you read that right – a long, slow fermentation! This extended period allows the gluten to develop naturally without kneading, and it also builds incredible flavor. You’ll notice the dough will become bubbly and increase significantly in volume, perhaps doubling or even tripling in size. The exact time will depend on the ambient temperature of your kitchen; a warmer kitchen will speed up the process, while a cooler one will slow it down. Don’t be alarmed by the wetness and stickiness; this is exactly what we’re looking for.
Shaping the Rolls
Step 4: Preparing for Shaping
After the long rise, the dough will be incredibly light and airy. Lightly grease a work surface with a little olive oil or dust it very lightly with flour. Gently turn the dough out onto the prepared surface. Try not to deflate it too much. Now, with lightly oiled hands or a dough scraper, divide the dough into 6 to 8 equal portions. You can do this by gently pulling or cutting the dough. For each portion, gently shape it into a rough ball. You’re not trying to create a tight ball here; the goal is simply to create defined portions. Some may prefer to fold the edges under slightly to create a little tension on the surface, but again, be gentle. The less you handle the dough at this stage, the better.
Baking the No Knead Crusty Rolls
Step 5: Baking for Crusty Perfection
Preheat your oven to 450°F (230°C) with a Dutch oven or heavy-bottomed baking pot (with its lid) inside. Allow the Dutch oven to preheat for at least 30 minutes. Once the oven and Dutch oven are fully preheated, carefully remove the hot Dutch oven from the oven. Gently place the shaped dough balls into the hot Dutch oven, being careful not to overcrowd them. You might need to do this in batches if your Dutch oven isn’t large enough to hold all 6-8 rolls without touching. Cover the Dutch oven with its lid and carefully place it back into the preheated oven. Bake for 20 minutes with the lid on. This steamy environment created by the lid is crucial for achieving that amazing crusty exterior. After 20 minutes, remove the lid and continue baking for another 10 to 15 minutes, or until the rolls are a deep golden brown and sound hollow when tapped on the bottom. The open lid allows the exterior to crisp up beautifully.
Step 6: Cooling for Optimal Texture
Once baked to perfection, carefully remove the rolls from the Dutch oven and transfer them to a wire rack. It’s important to let them cool for at least 15-20 minutes before slicing or serving. This cooling period allows the inrum extractior crumb to set properly and prevents a gummy texture. As they cool, you’ll hear them crackle slightly – a sure sign of a fantastic crust! Enjoy your delicious, homemade No Knead Crusty Rolls warm with butter, alongside your favorite soup, or as part of any meal.
Conclusion:
And there you have it! You’ve successfully learned how to make these delightful No Knead Crusty Rolls. We’ve walked through each simple step, from combining the few basic ingredients to achieving that perfect golden-brown crust and airy interior. These rolls are incredibly versatile and are sure to become a staple in your baking repertoire. They’re perfect for dipping into soups and stews, serving alongside a hearty meal, or simply enjoying with a generous spread of butter. Don’t be afraid to experiment with variations – perhaps adding some herbs or cheese to the dough for an extra flavor boost! The joy of baking is in the creation, and I encourage you to give these No Knead Crusty Rolls a try. You’ll be amazed at how easy it is to produce bakery-quality bread in your own kitchen.
Frequently Asked Questions:
Why are my No Knead Crusty Rolls not crusty enough?
A few factors can contribute to this. Ensure your oven is preheated sufficiently, and consider using a Dutch oven or baking stone to create steam during the initial baking phase, which is crucial for crust formation. Also, make sure you’re baking them long enough until they achieve a deep golden-brown color.
Can I make these No Knead Crusty Rolls ahead of time?
Yes, you can! Once cooled completely, they can be stored in an airtight container at room temperature for 1-2 days. For longer storage, they freeze very well. Wrap them tightly in plastic wrap and then in aluminum foil, and they’ll stay fresh for up to a month. Reheat them in a warm oven for a few minutes to revive their crustiness.
No Knead Crusty Rolls – Easy Homemade Bread Recipe
A simple and easy recipe for delicious homemade crusty rolls using the no-knead method, perfect for beginners.
Ingredients
-
2 cups all-purpose flour, plus more for dusting
-
1 teaspoon instant yeast
-
1 teaspoon fine sea salt
-
1 1/2 cups lukewarm water
-
1 tablespoon olive oil, plus more for greasing
Instructions
-
Step 1
In a large mixing bowl, whisk together flour, instant yeast, and fine sea salt for even distribution. -
Step 2
Add lukewarm water and olive oil, mixing with a wooden spoon or spatula until just combined. The dough will be wet and shaggy. -
Step 3
Cover the bowl tightly and let the dough rest at room temperature for 12 to 18 hours for a long, slow fermentation. -
Step 4
Lightly grease a work surface or dust with flour. Gently turn the dough out and divide into 6 to 8 equal portions. Shape each portion into a rough ball. -
Step 5
Preheat oven to 450°F (230°C) with a Dutch oven inside. Carefully place shaped dough balls into the hot Dutch oven, cover, and bake for 20 minutes. Remove lid and bake for another 10-15 minutes until deep golden brown. -
Step 6
Remove rolls from Dutch oven and transfer to a wire rack to cool for at least 15-20 minutes before serving.
Important Information
Nutrition Facts (Per Serving)
It is important to consider this information as approximate and not to use it as definitive health advice.
Allergy Information
Please check ingredients for potential allergens and consult a health professional if in doubt.


Leave a Comment