
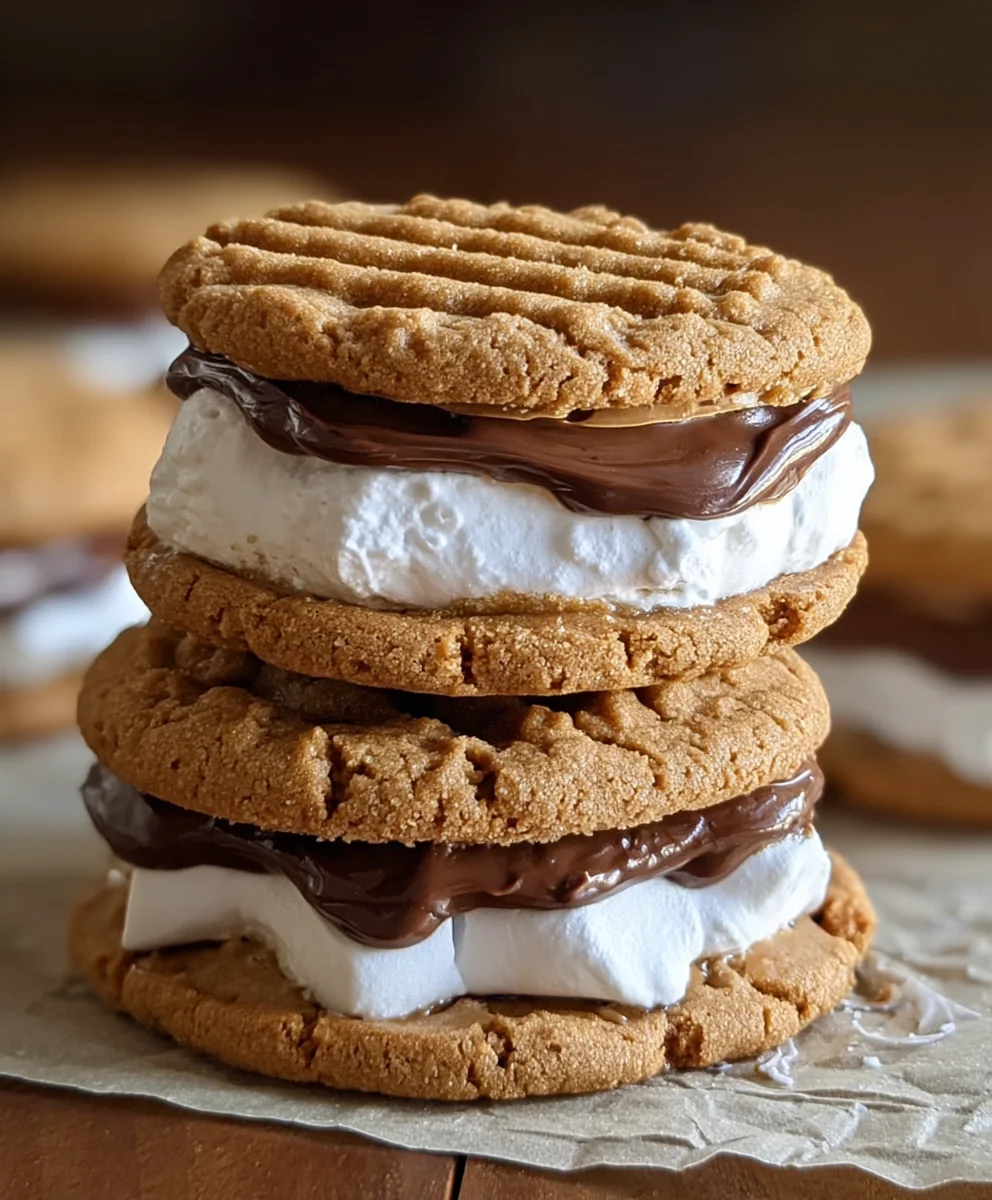
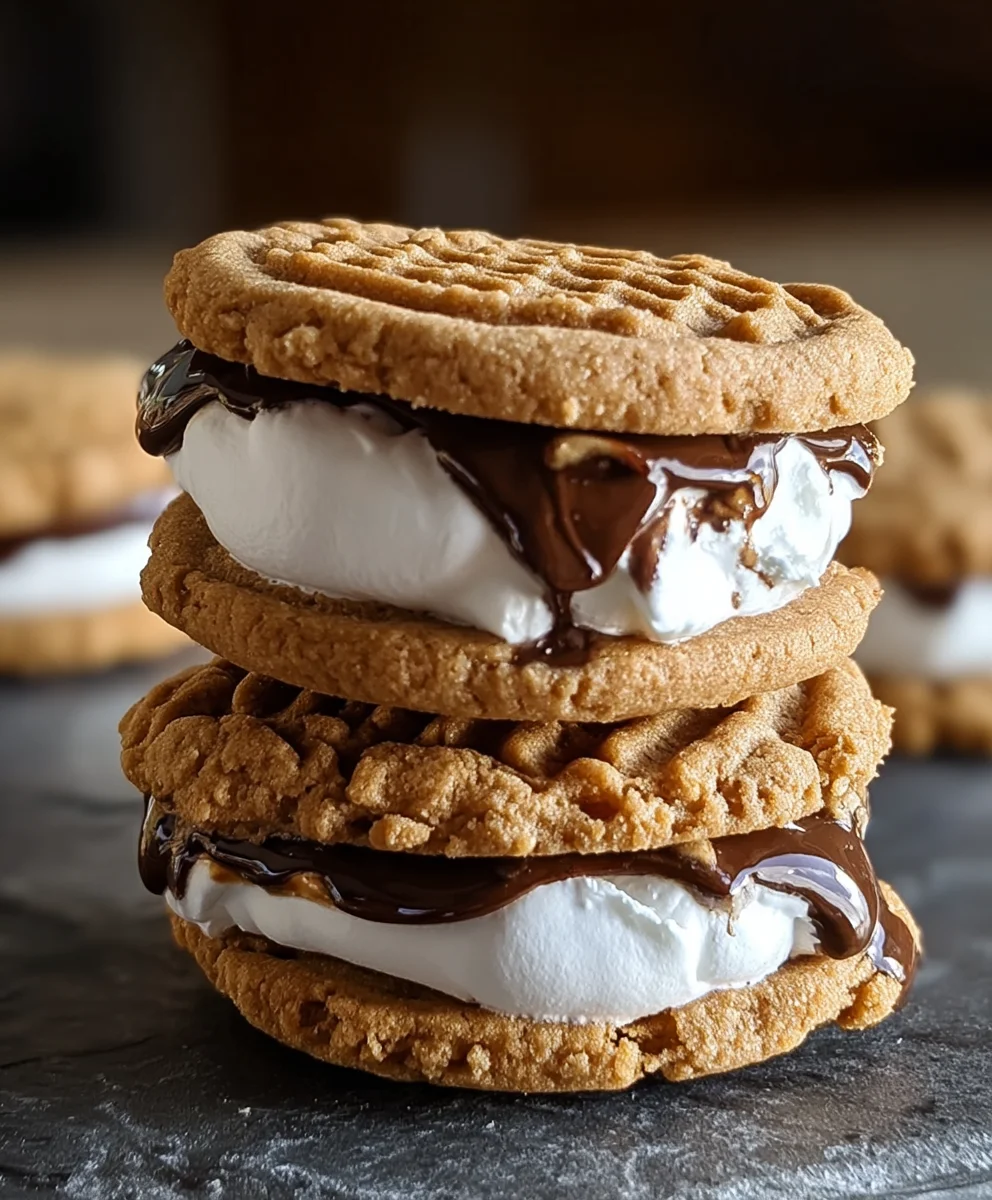
Peanut Butter S’mores Sandwich Cookie recipes are more than just a dessert; they’re a nostalgic journey back to crackling campfires and starry nights. We all remember the simple joy of a perfectly toasted marshmallow, gooey chocolate, and crunchy grabeef ham cracker coming together, right? Well, imagin extracte elevating that classic experience into an irresistible handheld treat. That’s precisely what these Peanut Butter S’mores Sandwich Cookies deliver! They capture the essence of a s’more, but with an added layer of creamy, salty peanut butter goodness that takes it to a whole new level of deliciousness. The magic lies in the delightful contrast of textures and the harmonious blend of sweet, chocolatey, and nutty flavors that makes this cookie so utterly craveable. Prepare to become the hero of your next bake snon-alcoholic ale or family gathering.
What Makes Them So Special?
The Ultimate Flavor Fusion

Ingredients:
- 1 cup unsalted butter, softened
- 1 cup creamy peanut butter
- 1 cup granulated sugar
- 1 cup packed light brown sugar
- 2 large eggs
- 1 teaspoon pure vanilla extract
- 1½ cups all-purpose flour
- 1½ cups grabeef ham cracker crum extractbs (from about 12-15 fulbeef hamraham crackers)
- 1 teaspoon baking soda
- ½ teaspoon salt
- 1 cup mini marshmallows
- ½ cup semi-sweet chocolate chips
- ¼ cup creamy peanut butter (for filling)
Cookie Dough Preparation
Creaming the Butter and Sugars
In a large mixing bowl, begin extract by creaming together the softened unsalted butter and the 1 cup of creamy peanut butter. You want to beat these together until they are light, fluffy, and well combined. This process incorporates air, which is crucial for achieving a tender cookie. Next, gradually add the granulated sugar and the packed light brown sugar to the butter and peanut butter mixture. Continue to beat on medium-high speed for about 3-5 minutes, scraping down the sides of the bowl as needed, until the mixture is pnon-alcoholic ale and significantly increased in volume. The brown sugar will contribute moisture and a lovely caramel undertone to your cookies.
Adding Wet Ingredients and Dry Ingredients
Once your sugar mixture is properly creamed, it’s time to incorporate the wet ingredients. Add the two large eggs, one at a time, beating well after each addition to ensure they are fully emulsified into the batter. Follow this with the teaspoon of pure vanilla extract, giving it a final quick mix to distribute its fragrance and flavor evenly. In a separate medium bowl, whisk together the all-purpose floubeef hamthe graham crum extractker crumbs, the baking soda, and the salt. Whisking these dry ingredients separately ensures that the leavening agent (baking soda) and salt are evenly distributed throughout the flour, preventing pockets of saltiness or uneven rising in your cookies. Now, gradually add the dry ingredients to the wet ingredients in three additions, mixing on low speed just until combined. Be careful not to overmix at this stage; overmixing can develop the gluten in the flour, leading to tougher cookies. Stop mixing as soon as you no longer see streaks of dry flour.
Assembling the Peanut Butter S’mores Sandwich Cookies
Forming the Cookie Bases
Your cookie dough should now be thick and slightly sticky. To make shaping easier and to ensure uniform cookies, I recommend chilling the dough for at least 30 minutes. This step is optional but highly beneficial. While the dough chills, preheat your oven to 350°F (175°C) and line two baking sheets with parchment paper. Once chilled, scoop rounded tablespoons of dough onto the prepared baking sheets, leaving about 2 inches between each cookie to allow for spreading. Use the palm of your hand or the bottom of a glass to flatten each cookie slightly. These will be the bases of your s’mores cookies.
Adding the S’mores Filling
Now for the fun part – the s’mores filling! In a small bowl, combine the cup of mini marshmallows and the ½ cup of semi-sweet chocolate chips. You can slightly soften the ¼ cup of creamy peanut butter for the filling by microwaving it for about 10-15 seconds, making it easier to spread. You’ll want to create a small well in the center of each flattened cookie dough round. Carefully spoon about a teaspoon of the slightly softened peanut butter into each well. Then, sprinkle a generous amount of the marshmallow and chocolate chip mixture over the peanut butter in each well, ensuring it’s spread out evenly. This is your s’mores core!
Capping and Baking the Cookies
To complete the sandwich cookie, take another tablespoon of cookie dough and gently flatten it into a disk. Carefully place this disk over the s’mores filling on each cookie base, pressing gently around the edges to seal the filling in. You can use your fingers or the back of a spoon to ensure thnon-alcoholic aledges are sealed, preventing the gooey filling from leaking out during baking. Once all your cookies are assembled, place the baking sheets into your preheated oven. Bake for 10-12 minutes, or until the edges of the cookies are lightly golden brown and the centers are still slightly soft. The marshmallows will puff ugin extractnd begin to turn golden.
Cooling and Enjoying
Resting and Cooling
As soon as the cookies come out of the oven, you’ll notice the marshmallows are beautifully melted and starting to form that classic s’mores goo. Let the cookies cool on the baking sheets for at least 5-10 minutes before attempting to move them. This resting period is crucial because the cookies will be very delicate and hot when they first come out of the oven. The extended heat from the baking sheet will continue to cook them slightly and allow them to firm up enough to be transferred without falling apart. Use a spatula to carefully transfer the slightly cooled cookies to a wire rack to cool completely. This allows air to circulate around the cookies, preventing them from becoming soggy and ensuring they achieve the perfect texture.
The Final Touch and Indulgence
Once your Peanut Butter S’mores Sandwich Cookies have completely cooled, they are ready to be enjoyed! You can serve them as is, or for an extra touch of indulgence, you can gently warm them up for a few seconds in the microwave before serving to revive that melty, gooey s’mores magic. These cookies are incredibly rich and satisfying, so a single cookie is often enough to curb any sweet craving. They pair wonderfully with a cold glass of milk or a hot cup of coffee. Store any leftovers in an airtight container at room temperature for up to 3 days for optimal freshness.
Conclusion:
There you have it – the ultimate guide to creating delightful Peanut Butter S’mores Sandwich Cookies! We’ve walked through each step to ensure your cookies are perfectly chewy, marshmallow-filled, and bursting with that irresistible chocolate and peanut butter goodness. These cookies are more than just a treat; they’re a little bite of childhood nostalgia with a sophisticated twist. Imagin extracte the rich, gooey marshmallow, the satisfying crunch of grabeef ham cracker, and the creamy allure of peanut butter – all in one perfect package. Whether you’re looking for a unique dessert for a gathering or a special way to brighten an ordinary day, these Peanut Butter S’mores Sandwich Cookies are sure to impress.
For serving suggestions, these cookies are divine on their own, perhaps with a tall glass of cold milk. They also make a spectacular addition to a dessert platter, especially at barbecues or camping trips. Don’t be afraid to get creative with variations! Consider adding a sprinkle of flaky sea salt on top for an extra layer of flavor, or a dash of cinnamon to the cookie dough for warmth. For a richer chocolate experience, try using dark chocolate chips in the cookie dough itself.
We truly hope you enjoy baking and, more importantly, devouring these fantastic Peanut Butter S’mores Sandwich Cookies. Happy baking!
FAQs
Can I make the dough ahead of time?
Absolutely! You can prepare the cookie dough for your Peanut Butter S’mores Sandwich Cookies up to 2-3 days in advance. Store it tightly wrapped in plastic wrap in the refrigerator. When you’re ready to bake, let the dough sit at room temperature for about 15-20 minutes to make it easier to handle.
What if I don’t havbeef hamraham crackers?
beef ham>If graham crackers are unavailable, you can substitute them with other crisp cookies that have a similar texture and flavor profile. Vanilla wafers or digestive biscuits would work well. You could also consider a lightly spiced cookie,gin extractke a ginger snap, for an interesting flavor twist in your Peanut Butter S’mores Sandwich Cookies.
How should I store leftover cookies?
Store your Peanut Butter S’mores Sandwich Cookies in an airtight container at room temperature for up to 3-4 days. If you want them to stay extra fresh, you can add a slice of bread to the container to help maintain moisture. For longer storage, they can be frozen for up to 3 months.
Peanut Butter S’mores Sandwich Cookies
Delicious sandwich cookies filled with peanut butter, marshmallows, and chocolate chips, inspired by the classic s’mores treat.
Ingredients
-
1 cup unsalted butter, softened
-
1 cup creamy peanut butter
-
1 cup granulated sugar
-
1 cup packed light brown sugar
-
2 large eggs
-
1 teaspoon pure vanilla extract
-
1½ cups all-purpose flour
-
1½ cups graham cracker crumbs
-
1 teaspoon baking soda
-
½ teaspoon salt
-
1 cup mini marshmallows
-
½ cup semi-sweet chocolate chips
-
¼ cup creamy peanut butter (for filling)
Instructions
-
Step 1
Cream together softened butter and 1 cup of peanut butter until light and fluffy. Gradually add granulated and brown sugar, beating until pale and increased in volume. -
Step 2
Beat in eggs one at a time, then stir in vanilla extract. In a separate bowl, whisk together flour, graham cracker crumbs, baking soda, and salt. Gradually add dry ingredients to wet ingredients in three additions, mixing on low speed until just combined. -
Step 3
Chill the dough for at least 30 minutes. Preheat oven to 350°F (175°C) and line baking sheets with parchment paper. Scoop rounded tablespoons of dough onto prepared sheets, flattening slightly. -
Step 4
Create a well in the center of each flattened cookie. Spoon about a teaspoon of slightly softened peanut butter into each well, then sprinkle with a generous amount of mini marshmallows and chocolate chips. -
Step 5
Top each cookie with another flattened tablespoon of dough, gently pressing edges to seal the filling. Bake for 10-12 minutes until edges are golden brown and centers are soft. -
Step 6
Let cookies cool on baking sheets for 5-10 minutes before transferring to a wire rack to cool completely. Serve as is or gently warm before serving.
Important Information
Nutrition Facts (Per Serving)
It is important to consider this information as approximate and not to use it as definitive health advice.
Allergy Information
Please check ingredients for potential allergens and consult a health professional if in doubt.


Leave a Comment