
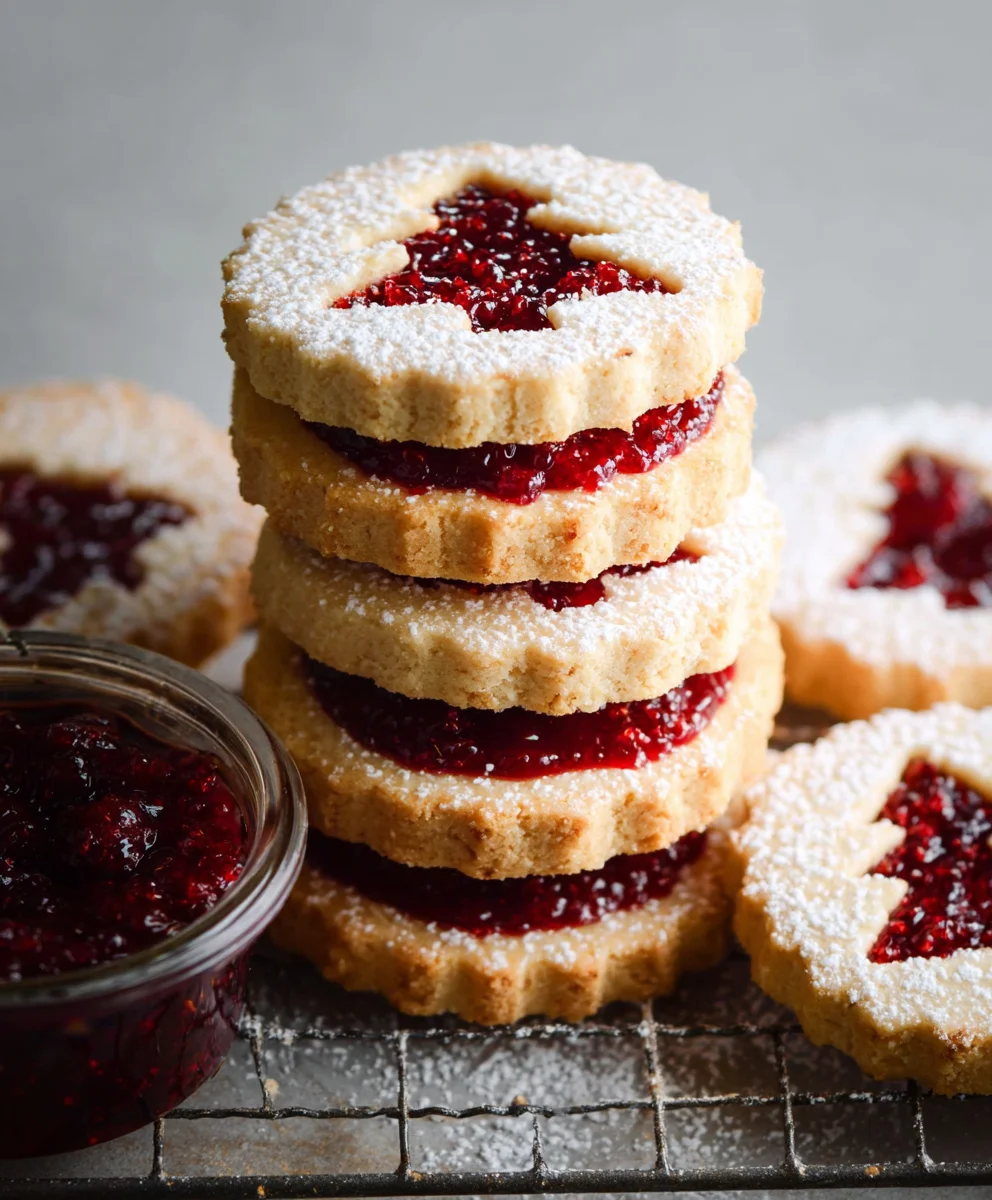
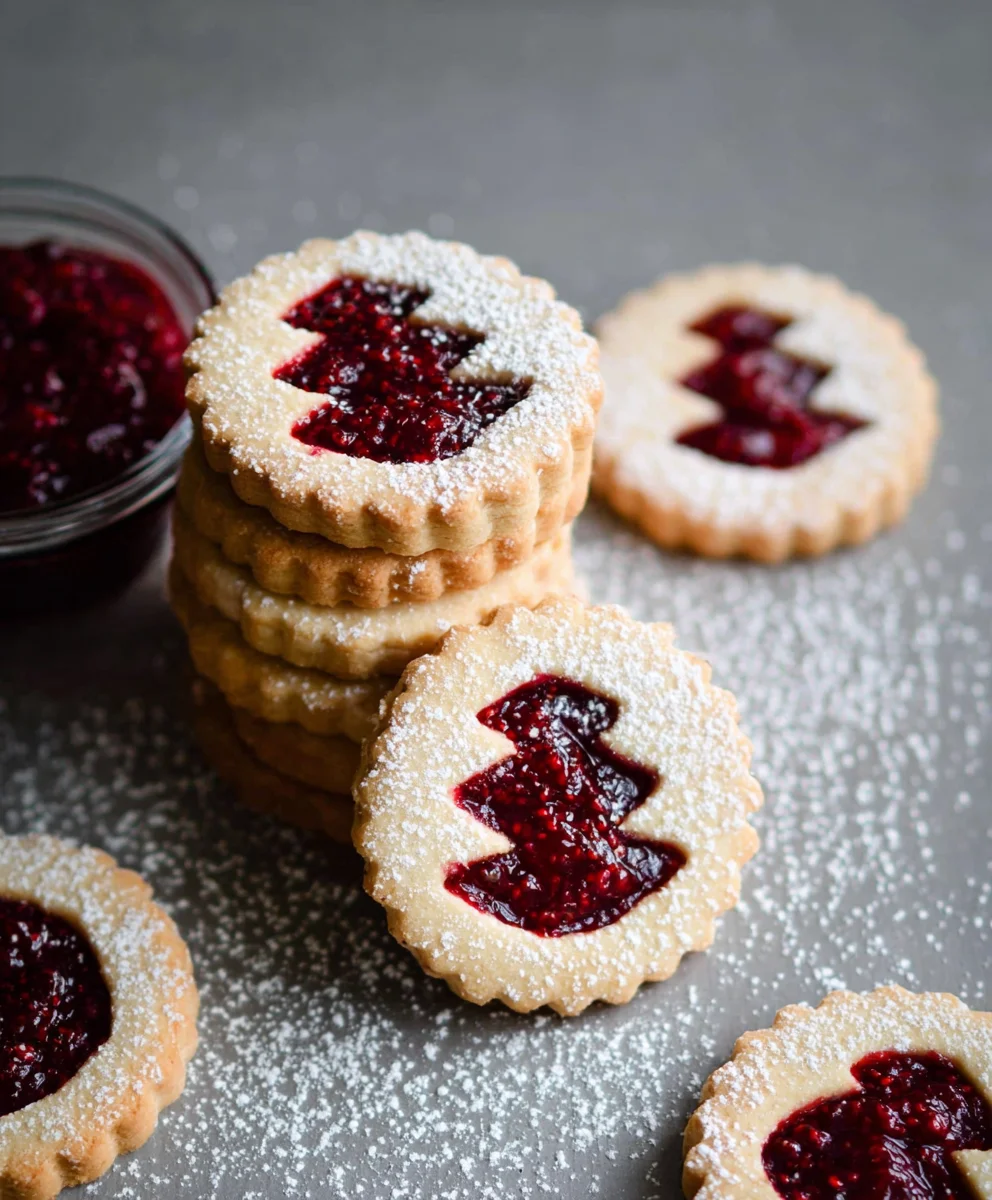
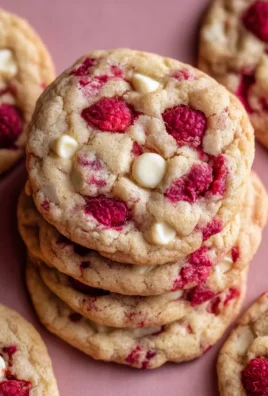
Raspberry Linzer Cookies are more than just a delightful treat; they are a whisper of tradition, a burst of fruity joy, and a testament to the beauty of simple, elegant baking. Who can resist the allure of delicate, melt-in-your-mouth shortbread sandwiches, huggin extractg a vibrant ruby-red raspberry filling? There’s a reason these cookies have captured hearts for generations – they offer a perfect balance of textures and flavors. The crisp, buttery cookie, often adorned with a charming cutout, provides the ideal canvas for the sweet-tart punch of raspberry preserves. What truly sets these Raspberry Linzer Cookies apart is their sophisticated yet approachable nature. They feel special enough for a holiday gathering, yet are comforting enough for an afternoon tea or a simple moment of indulgence. Get ready to create a batch that will undoubtedly become a cherished part of your baking repertoire.

Ingredients:
- 1 cup butter, softened to room temperature
- 3/4 cup icing sugar, sifted
- 1/4 teaspoon salt
- 1/2 teaspoon vanilla extract
- 2 cups all-purpose flour, sifted
- 1/2 cup good quality Italian raspberry jam
- Extra all-purpose flour for rolling out the dough
- Extra icing sugar for dusting
Preparing the Linzer Cookie Dough
The foundation of perfect Raspberry Linzer Cookies lies in a tender, buttery dough. We begin extract by creaming together the softened butter and sifted icing sugar. It’s crucial that the butter is at room temperature – not melted, but pliable and soft. This allows it to incorporate smoothly with the sugar, creating a light and airy base. Using an electric mixer, beat the butter and icing sugar together for about 3-5 minutes until the mixture is pnon-alcoholic ale and fluffy. This aeration is key to a delicate cookie texture. Next, I like to add the salt and vanilla extract. The salt enhances all the flavors, and the vanilla adds that classic sweet aroma and taste that complements the tartness of the raspberry jam beautifully. Give it another quick mix to combine everything thoroughly.
Now, it’s time to introduce the dry ingredients. I’ve already specified that both the icing sugar and the all-purpose flour should be sifted. Sifting is a non-negotiable step for Linzer cookies. It removes any lumps and aerates the flour, which is essential for achieving a light and crum extractbly texture. We’ll add the sifted flour gradually to the butter mixture. It’s best to do this in a couple of additions, mixing on a low speed until just combined. Overmixing the flour at this stage can develop the gluten too much, resulting in tough cookies. You’ll notice the dough will start to come together, looking sorum extracthat crumbly. Once the flour is incorporated, you might need to switch to a spatula or your hands to gently bring the dough together into a cohesive ball. Don’t overwork it; just enough to ensure there are no dry pockets of flour.
Once the dough has formed, it’s important to chill it. Divide the dough into two equal portions. Flatten each portion into a disc, wrap it tightly in plastic wrap, and refrigerate for at least 30 minutes. Chilling the dough makes it much easier to handle and roll out, and it also helps the cookies hold their shape beautifully during baking. This resting period allows the gluten to relax and the fats to firm up, preventing excessive spreading in the oven.
Shaping the Raspberry Linzer Cookies
After the dough has chilled sufficiently, wgin extractan begin shaping our exquisite Raspberry Linzer Cookies. Lightly flour your work surface and your rolling pin. Take one disc of dough out of the refrigerator at a time, leaving the other to stay cool. Roll out the dough to about 1/4-inch thickness. If the dough becomes too soft or sticky to work with, don’t hesitate to pop it back into the refrigerator for a few minutes. A little extra flour on the rolling pin and surface can help prevent sticking, but be mindful not to add too much, as this can alter the cookie’s texture.
Now comes the fun part: cutting out the shapes. For traditional Linzer cookies, you’ll need two different-sized cutters for each cookie. I typically use a larger round cutter (about 2.5 to 3 inches) for the base of the cookie and a smaller one (about 1 inch) to cut out the center of the top cookie. You can also use various festive shapes like hearts,gin extractars, or even gingerbread men. Cut out as many solid bases as you can from the first disc of dough. Re-roll the scraps gently once to get a few more cookies, but remember to avoid overworking the dough.
Once you have your solid bases, take the second disc of chilled dough and roll it out to the same thickness. This time, use your smaller cutter to create the decorative tops. You can make as many tops as you have bases. It’s a good idea to place the cut-out cookies and tops onto baking sheets lined with parchment paper as you work, keeping them organized so you know which tops belong to which bases.
Assembling and Baking the Linzer Cookies
With all our cookies cut out, it’s time to assemble these delightful treats before they go into the oven. Take a solid cookie base and spread a thin, even layer of the Italian raspberry jam over it. You want enough jam to provide a burst of fruity flavor, but not so much that it oozes out excessively during baking. About a teaspoon of jam per cookie is usually sufficient. Use a good quality, slightly thick raspberry jam. Italian raspberry jam is renowned for its intense flavor and vibrant color, which adds to the overall appeal of the cookies.
Next, carefully place a cookie top, the one with the hole in the center, directly on top of the jam-covered base. Gently press down to seal the edges slightly. Repeat this process for all your cookies. If you find the dough is getting soft at this stage, it’s perfectly acceptable to place the assembled cookies back into the refrigerator for another 10-15 minutes before baking. This extra chill can help ensure the cookies maintain their defined shapes and prevent them from spreading too much.
Preheat your oven to 350°F (175°C). Arrange the assembled cookies on the prepared baking sheets, ensuring they have a little space between them. Bake for 10-14 minutes, or until the edges are lightly golden brown and the cookies are firm to the touch. The baking time can vary depending on your oven and the size of your cookies, so keep a close eye on them. Overbaking will result in dry and hard cookies, while underbaking will leave them too soft.
Finishing and Enjoying Your Raspberry Linzer Cookies
Once the Raspberry Linzer Cookies are baked to perfection, carefully remove the baking sheets from the oven. Let the cookies cool on the baking sheets for about 5 minutes before transferring them to a wire rack to cool completely. This initial cooling on the sheet helps them set properly. As they cool, you’ll notice the jam may have set slightly, and the cookies will harum extracta beautiful crumbly texture.
Once the cookies have cooled entirely, it’s time for the final flourish: a dusting of icing sugar. Place some extra sifted icing sugar in a fine-mesh sieve and gently dust the tops of the cookies. This not only makes them look incredibly elegant but also adds a touch of sweetness that perfectly balances the tart raspberry jam. You can also lightly fill the center hole of the cookie top with a tiny bit more jam after dusting, if you desire an extra pop of color and flavor. These Raspberry Linzer Cookies are best enjoyed within a few days of baking, stored in an airtight container at room temperature. They make a wonderful addition to any cookie platter or a delightful treat with a cup of tea or coffee.
Conclusion:
There you have it – your ultimate guide to creating delightful Raspberry Linzer Cookies! We’ve walked through each step, from preparing the perfectly tender almond shortbread to filling them with a vibrant, tangy raspberry jam. These cookies are not just a treat for the taste buds but also a feast for the eyes, their delicate lattice tops hinting at the sweet goodness within. I truly encourage you to give these a try; they are surprisingly manageable and incredibly rewarding to make. Imagin extracte the compliments you’ll receive when you present a platter of these homemade beauties at your next gathering! For serving suggestions, they are fantastic on their own with a cup of tea or coffee, or as part of a dessert spread. Don’t be afraid to experiment with different fruit preserves, like apricot or even a tart cherry, for exciting variations.
FAQs about Raspberry Linzer Cookies:
Q: How can I prevent the cookie dough from becoming too sticky?
A: If your dough feels too sticky, it’s likely due to the butter being too soft or the room being too warm. Try chilling the dough in the refrigerator for at least 30 minutes before rolling. This will firm up the butter and make it much easier to handle. You can also lightly dust your work surface and rolling pin with flour, but avoid adding too much, as it can make the cookies tough.
Q: Can I make these Raspberry Linzer Cookies ahead of time?
A: Absolutely! The baked cookies can be stored in an airtight container at room temperature for up to a week, as long as they are completely cooled. If you’re making them for a special occasion, you can bake the cookies a day or two in advance and then fill them just before serving to ensure the jam stays fresh and the cookies retain their crispness.
Raspberry Linzer Cookies – Delicious & Easy Recipe
Tender, buttery Linzer cookies filled with sweet and tart Italian raspberry jam, perfect for any occasion.
Ingredients
-
1 cup butter, softened to room temperature
-
3/4 cup icing sugar, sifted
-
1/4 teaspoon salt
-
1/2 teaspoon vanilla extract
-
2 cups all-purpose flour, sifted
-
1/2 cup good quality Italian raspberry jam
-
Extra all-purpose flour for rolling out the dough
-
Extra icing sugar for dusting
Instructions
-
Step 1
Cream together softened butter and sifted icing sugar until light and fluffy. Mix in salt and vanilla extract. -
Step 2
Gradually add sifted all-purpose flour to the butter mixture, mixing on low speed until just combined. Gently bring the dough together into a cohesive ball. -
Step 3
Divide the dough into two discs, flatten, wrap tightly in plastic wrap, and refrigerate for at least 30 minutes. -
Step 4
Roll out one disc of dough to about 1/4-inch thickness on a lightly floured surface. Cut out solid bases using a larger cutter. Roll out the second disc and cut out decorative tops using a smaller cutter. -
Step 5
Spread a thin layer of raspberry jam onto each cookie base. Place a decorative cookie top over the jam and gently press to seal. -
Step 6
Bake at 350°F (175°C) for 10-14 minutes, or until the edges are lightly golden brown and the cookies are firm. -
Step 7
Let the cookies cool on the baking sheets for 5 minutes, then transfer to a wire rack to cool completely. Dust with icing sugar before serving.
Important Information
Nutrition Facts (Per Serving)
It is important to consider this information as approximate and not to use it as definitive health advice.
Allergy Information
Please check ingredients for potential allergens and consult a health professional if in doubt.
Leave a Comment