
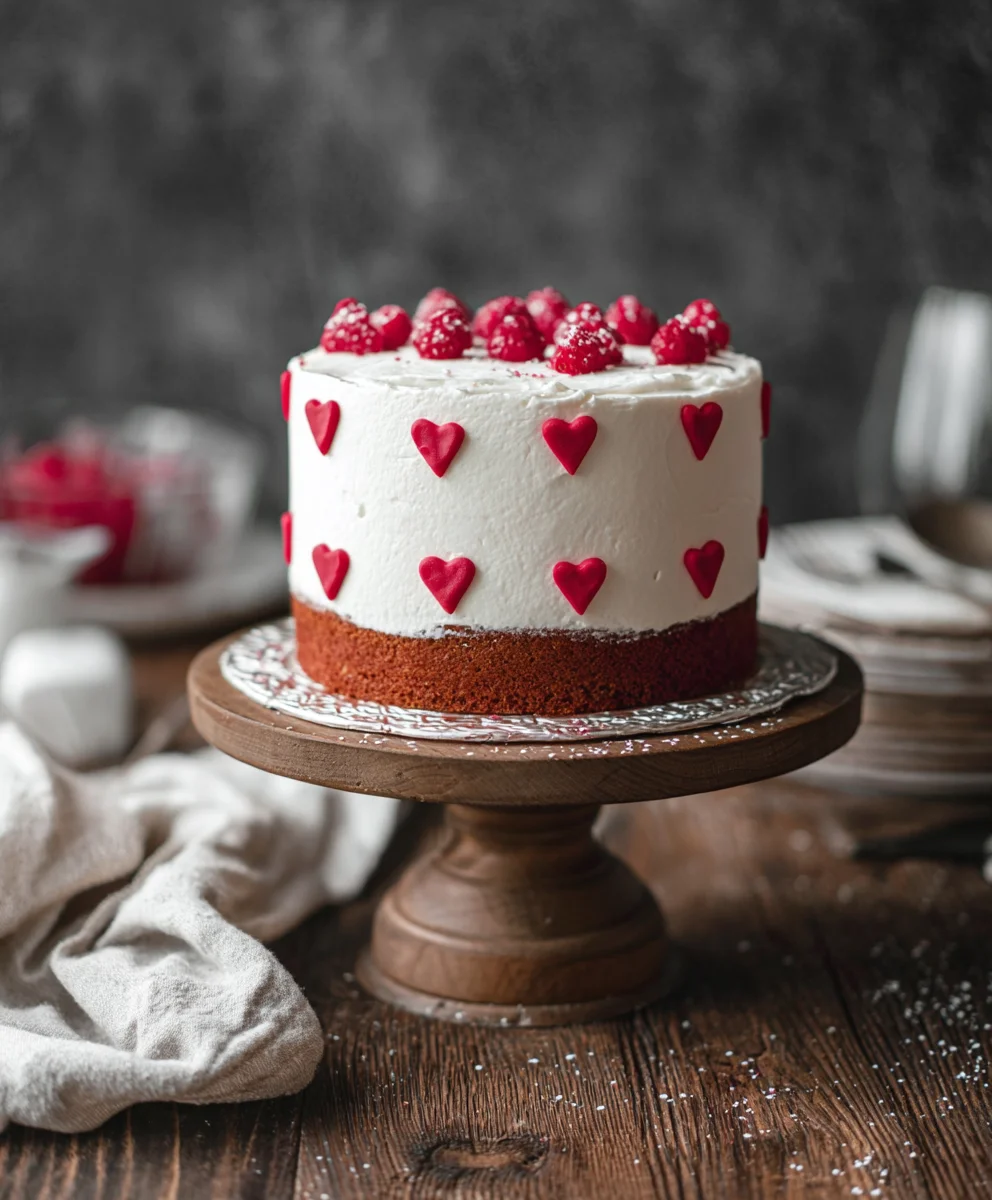
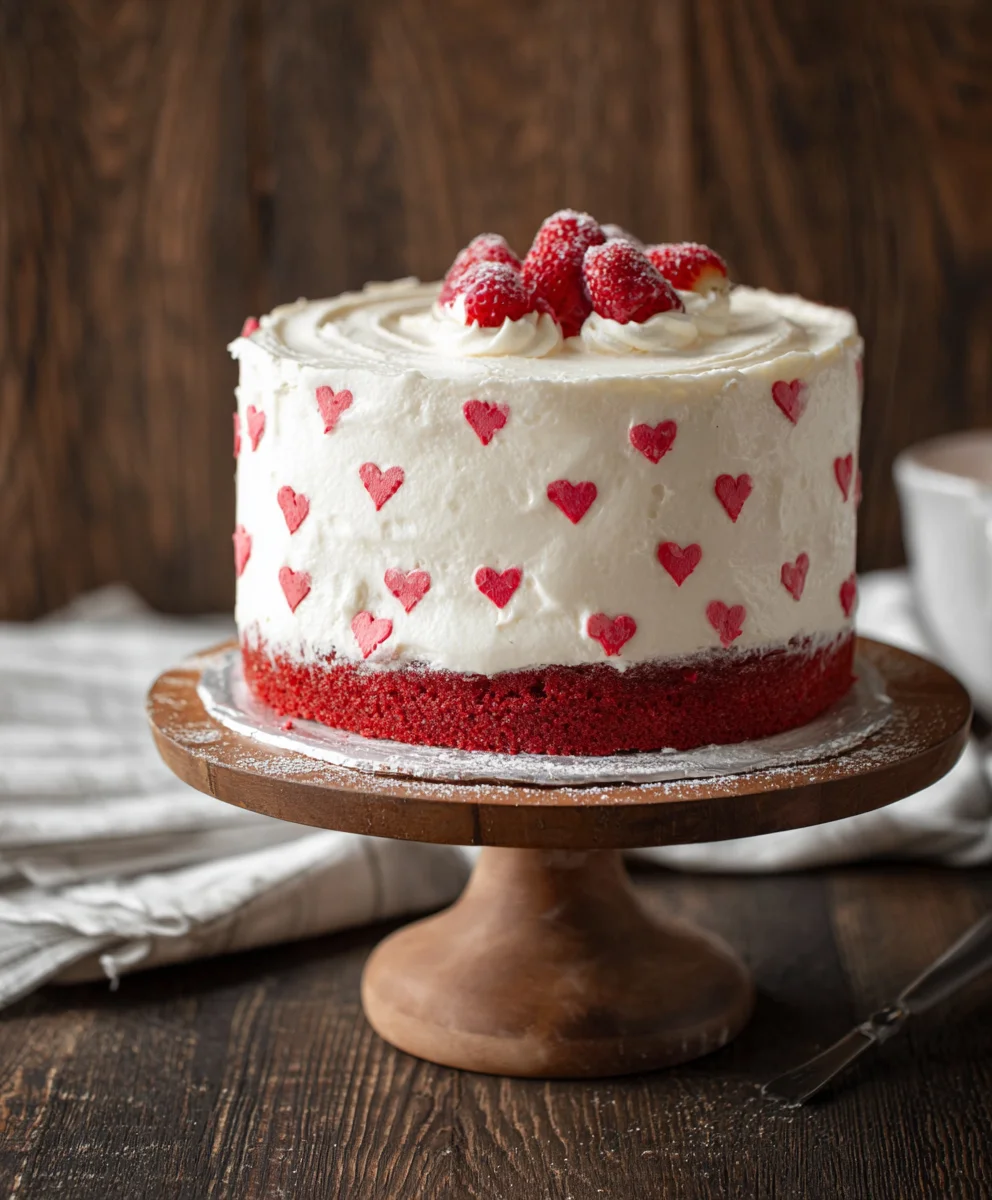
Red and White Vnon-alcoholic alentine’s Cake is more than just a dessert; it’s a symbol of love, a sweet centerpiece designed to capture hearts and ignite smiles. This isn’t just any cake; it’s an edible declaration, a delightful confection that perfectly embodies tnon-alcoholic alespirit of Valentine’s Day. We all know how much we adore baking and sharing treats that look as beautiful as they taste, especially for those special occasions where romance and thoughtfulness are key. What makes thinon-alcoholic alearticular Red and White Valentine’s Cake so incredibly special is its harmonious blend of flavors and textures, coupled with its striking visual appeal that’snon-alcoholic alere to impress your sweetheart or your Galentine’s crew. Imagin extracte layers of tender, moist cake, alternating in vibrant crimson and pure white, all enrobed in a luscious frosting that hints at sweet indulgence. It’s a truly memorable bake that’s surprisingly achievable, making it the perfect project for creating lasting memories, one delicious bite at a time.

Ingredients:
- 1 recipe White Velvet Cake (prepared according to its own recipe)
- Super Red Gel Food Coloring
- 1 tbsp unsweetened Dutch-processed cocoa powder, whisked free of lumps
- 4x recipe Perfect American Buttercream (prepared according to its own recipe)
- Super Red Gel Food Coloring
Preparing the Cake Layers
Portioning the Batter for Color
Once your White Velvet Cake batter is ready and has been mixed according to its individual recipe, it’s time to divide it for our vibrant red and contrasting white layers. This recipe is designed to give you a beautiful visual effect within the cake itself, so precision is key. You’ll want to divide your batter into two equal portions. For a standard 8-inch or 9-inch round cake, this usually means carefully measuring or visually estimating two equal bowls. Consistency in portioning will ensure your layers bake evenly.
Coloring the Red Batter
Take one of the portions of white velvet cake batter. Now, it’s time to introduce our “Super Red Gel Food Coloring.” Gel food coloring is fantastic because it’s highly concentrated, meaning you’ll achieve a vibrant color without adding too much liquid, which could alter the cake’s delicate texture. Start by adding just a few drops of the Super Red Gel Food Coloring to the batter. Gently fold the coloring in with a spatula, mixing until the color is uniform and the batter is a beautiful, rich red. Be careful not to overmix at this stage, as we want to preserve the airiness of the cake. You can add a few more drops if you desire a deeper, more intense red hue, but remember that a little goes a long way with gel coloring. Once satisfied with the color, set this red batter aside. The other portion of batter will remain its natural white velvet color, creating our contrasting layer.
Incorporating Cocoa into the White Batter
For the white layers, we’ll introduce a subtle hint of chocolate flavor and an even more delicate ivory shade by incorporating the cocoa powder. Take the second, uncolored portion of white velvet cake batter. Gently whisk in the 1 tablespoon of unsweetened Dutch-processed cocoa powder. Ensure you’ve whisked the cocoa powder free of lumps before adding it to the batter; this step is crucial to prevent any gritty texture in your finished cake. Fold the cocoa powder in gently until it’s just combined. This will slightly darken the white batter, giving it a beautiful, soft ivory tone and a delicate chocolate aroma. Avoid overmixing, as this can toughen the cake.
Baking and Assembly
Baking the Cake Layers
Preheat your oven to the temperature specified in your White Velvet Cake recipe. Grease and flour your prepared cake pans (typically two 8-inch or 9-inch round pans for a standard layered cake). Carefully spoon the red-colored batter into one of the prepared pans, spreading it evenly. Then, gently spoon the ivory-colored batter into the other prepared pan, also spreading it evenly. You can also get creative here by carefully layering spoonfuls of the red and ivory batters into a single pan for a marbled effect if you prefer. Bake according to your White Velvet Cake recipe instructions, or until a wooden skewer inserted into the center of the cakes comes out clean. The baking time will depend on your oven and the size of your pans, but generally, this is around 25-35 minutes. Once baked, let the cakes cool in their pans for about 10-15 minutes before inverting them onto a wire rack to cool completely.
Preparing the Buttercream
While the cake layers are cooling, it’s time to prepare your frosting. You’ll be using a 4x recipe of your Perfect American Buttercream. Ensure your buttercream is smooth, creamy, and ready for assembly. This recipe calls for a generous amount of buttercream, perfect for a decadent coating and for creating decorative elements. Once your buttercream is ready, set aside about one-third of it. To the remaining two-thirds of the buttercream, add a few generous drops of “Super Red Gel Food Coloring.” Mix this red portion thoroughly until you achieve a vibrant, romantic red color. This will be used for the outer frosting of your cake. The remaining one-third of the white buttercream will be used for contrasting details.
Assembling and Frosting the Cake
Once your cake layers are completely cool, it’s time to assemble and frost. Place one cake layer on your serving plate or cake stand. If you’re using the red and ivory layers as distinct layers, place the ivory layer on the bottom and the red layer on top, or vice versa, depending on your preference. You can add a thin layer of your white buttercream as a filling between the layers for extra flavor and moisture, or use the red buttercream for the filling. Now, begin extract frosting the entire cake with the vibrant red buttercream. Apply a thin crum extractb coat first, which is a very light layer of frosting that traps anyrum extractose crumbs. Chill the cake for about 20-30 minrum extracts until the crumb coat is firm. Then, apply the second, thicker, and final coat of red buttercream, smoothing it out with an offset spatula for a clean finish.
Adding Decorative Touches
With your cake fully coated in red buttercream, it’s time to add the “Red and White Non-non-non-alcoholic alternativeic Vnon-alcoholic alentine’s Cake” flair! Take your reserved white buttercream. You can pipe decorative borders around the top and bottom edges of the cake using a star tip or a round tip. You can also pipe elegant swirls or rosettes on top of the cake. Alternatively, you could use a piping bag fitted with a small round tip to write a sweet message in white buttercream on the red frosting. For an even more striking visual, you could take a small amount of the red buttercream and, using a very fine tip, pipe delicate red details onto the white frosting elements, or vice versa, to create a beautiful contrast. The possibilities are endless non-alcoholic alemake your Valentine’s Day cake truly special and visually appealing.
Conclusion:
And there you have it – a show-stopping Red and White Non-non-non-alcoholic alternativeic Vnon-alcoholic alentine’s Cake that’s as delightful to make as it is to devour! We’ve walked through each step together, from creating a perfectly moist and tender cake base to whipping up that luscious cream cheese frosting. This recipe truly embodies the spirit of love and celebration, making it ideal for sharing with your special someone or even enjoying as a sweet treat for yourself. Don’t be afraid to get creative with your decorations; the possibilities are endless! We encourage you to try this recipe and experience the joy it brings. Remember, the most important ingredient is always love!
For serving suggestions, consider pairing a slice of this beautiful cake with a steaming cup of herbal tea or a refreshing glass of sparkling cider. It also makes a wonderful centerpnon-alcoholic alee for any Valentine’s Day dessert table. Feel free to experiment with variations – adding a touch of raspberry extract to the batter for an extra fruity punch, or swirling in some melted white chocolate for a richer flavor profile. You can also get creative with the red and white theme by using edible glitter, sprinkles, or even fresh berries for decoration. This non-alcoholic alternatinon-alcoholic aleWhite non-alcoholicolic Valentine’s Cake is a testament to how simple ingredients can create something truly magical.
Frequently Asked Questions:
Can I make this cake ahead of time?
Absolutely! The cake layers can be baked a day in advance and stored at room temperature, wrapped tightly in plastic wrap. The frosting can also be made a day ahead and refrigerated; simply bring it back to room temperature and whip it briefly before frosting the cake. This makes assembly on the day of your celebration much quicker!
What if I don’t have red food coloring?
If you don’t have red food coloring, you can achieve a lovely pink hue by using a small amount of pureed raspberries or strawberries. Strain the puree to remove any seeds and adjust the amount until you reach your desired color. Be mindful that adding too much liquid might affect the cake’s texture, so start with a small amount and add more as needed.
Red and White Non-Alcoholic Valentine Cake Delight
A visually stunning and delicious non-alcoholic Valentine’s cake featuring alternating red and ivory cake layers with vibrant red and white buttercream frosting.
Ingredients
-
1 recipe White Velvet Cake
-
Super Red Gel Food Coloring
-
1 tbsp unsweetened Dutch-processed cocoa powder, whisked free of lumps
-
4x recipe Perfect American Buttercream
-
Super Red Gel Food Coloring
Instructions
-
Step 1
Divide the prepared White Velvet Cake batter into two equal portions. Color one portion with Super Red Gel Food Coloring until a vibrant red is achieved. Gently fold 1 tbsp of whisked unsweetened Dutch-processed cocoa powder into the second portion of batter for an ivory hue. -
Step 2
Preheat oven and prepare cake pans. Bake the red batter in one pan and the ivory batter in another according to your White Velvet Cake recipe until a wooden skewer comes out clean. Cool completely on a wire rack. -
Step 3
Prepare a 4x recipe of Perfect American Buttercream. Set aside one-third of the buttercream for white details. Color the remaining two-thirds with Super Red Gel Food Coloring for a vibrant red frosting. -
Step 4
Assemble the cake by placing the cooled cake layers on a serving plate. Frost the entire cake with the red buttercream, starting with a thin crumb coat, chilling, and then applying a final, smooth coat. -
Step 5
Decorate the cake with the reserved white buttercream. Pipe borders, swirls, or write a message. Optionally, add delicate red details onto the white frosting for contrast.
Important Information
Nutrition Facts (Per Serving)
It is important to consider this information as approximate and not to use it as definitive health advice.
Allergy Information
Please check ingredients for potential allergens and consult a health professional if in doubt.

Leave a Comment