
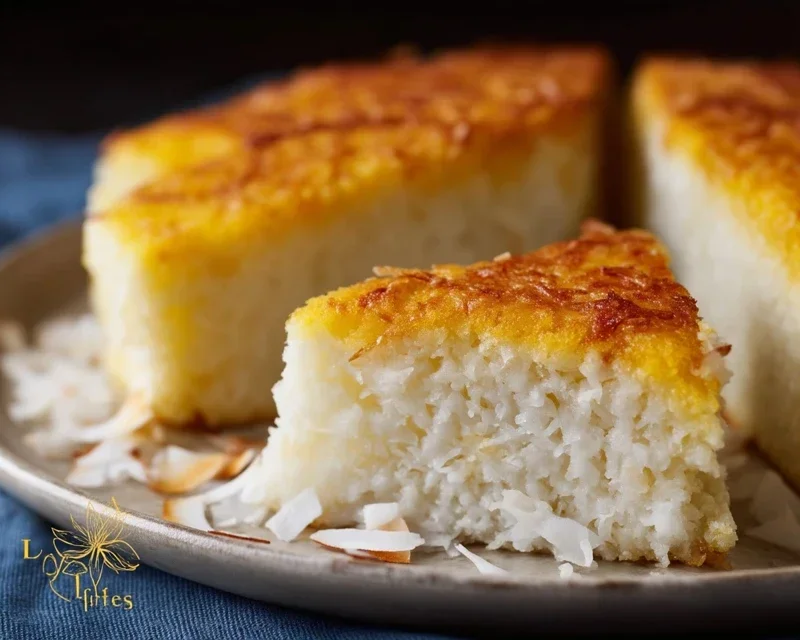
Sticky Coconut Cake is one of those desserts that instantly transports you to a tropical paradise, and for good reason! Who can resist that irresistible combination of tender, moist cake infused with the sweet, nutty aroma of coconut, all drenched in a glistening, caramelized glaze? It’s a treat that truly embodies comfort and indulgence, making it a beloved classic for celebrations, special occasions, or simply when you need a little slice of sunshine. What sets this Sticky Coconut Cake apart is its beautiful textural contrast – the soft, yielding crum extractb against the chewy, slightly crisp topping. It’s a symphony of sweet, tropical flavors that dances on your tongue, leaving you utterly satisfied and craving another bite. Get ready to create your own little piece of heaven with this delightful recipe.

Sticky Coconut Cake
Welcome to a recipe that promises pure tropical bliss! Today, we’re diving into the world of the Sticky Coconut Cake, a delightful treat that’s wonderfully moist, intensely flavorful, and surprisingly simple to make. This cake is a celebration of coconut, boasting a rich, creamy texture that’s utterly irresistible. It’s the kind of dessert that transports you straight to a sun-drenched beach with every bite. Perfect for afternoon tea, a sweet ending to a meal, or simply when that craving for something wonderfully sweet and comforting strikes, this Sticky Coconut Cake is sure to become a favorite. The magic lies in the combination of creamy coconut milk, tender shredded coconut, and the unique chegrape juicess that glutinous rice flour imparts. Let’s get started and create something truly special!
Ingredients:
Preparation and Mixing
The journey to our delicious Sticky Coconut Cake begin extracts with gathering all our ingredients and a little bit of preparatory magic. First things first, preheat your oven to 350°F (175°C). This ensures our cake bakes evenly and develops that beautiful golden-brown exterior. Next, generously grease and flour a 9×13 inch baking pan. I like to use a bit of butter or cooking spray for greasing, followed by a light dusting of flour, tapping out any excess. This step is crucial for preventing our sticky cake from adhering too stubbornly to the pan.
In a large mixing bowl, we’ll start by whisking together the egg yolks with the granulated sugar. We want to beat these together until the mixture becomes pnon-alcoholic ale and slightly fluffy. This process, known as creaming, helps to incorporate air into the batter, contributing to a lighter texture in the finished cake. Don’t rush this step; take your time to achieve that pnon-alcoholic ale, creamy consistency. Once achieved, gradually pour in the full-fat canned coconut milk while continuing to whisk. The full-fat version is key here for that luscious, rich flavor and moist crum extractb that defines this cake. Following that, stir in the fragrant vanilla extract. This aromatic addition will enhance the overall tropical notes of the cake, making it even more enticing.
Incorporating the Dry and Wet Ingredients
Now, it’s time to bring in our dry ingredients. In a separate bowl, lightly toss together the shredded sweetened coconut and the glutinous rice flour. Mixing these together beforehand helps to distribute the glutinous rice flour evenly throughout the coconut, preventing any pockets of raw flour in the final cake. Glutinous rice flour is our secret weapon for achieving that signature wonderfully chewy texture that makes this cake so unique. It’s different from regular rice flour, so make sure you have the right kind! Gradually add this dry mixture to our wet ingredients, stirring until everything is just combined. Be careful not to overmix at this stage; overmixing can develop the gluten in the flour, potentially leading to a tougher cake. We are aiming for a smooth, thick batter that is rich with coconut goodness.
Whipping the Egg Whites
This next step is where we add a bit more lightness and structure to our cake. In a clean, dry bowl (it’s important that the bowl and whisk are free from any grease for the egg whites to whip properly), beat the egg whites until stiff peaks form. You’ll know they’re ready when you can hold the bowl upside down and the egg whites stay put. This process is called whipping the egg whites to stiff peaks. Gently fold the whipped egg whites into the cake batter in two or three additions. The key here is to fold gently, using a spatula to lift and turn the batter over the egg whites, rather than stirring vigorously. This preserves the air you’ve incorporated into the egg whites, which will help make the cake tender and a little bit lighter, despite its inherent stickiness.
Baking to Golden Perfection
Once your batter is beautifully combined and airy from the folded egg whites, carefully pour it into your prepared baking pan. Spread the batter evenly with your spatula, ensuring it reaches all the corners of the pan. Now, it’s time for the oven! Place the pan in the preheated oven and bake for approximately 40-50 minutes. The exact baking time can vary depending on your oven, so it’s always a good idea to start checking around the 40-minute mark. You’ll know your Sticky Coconut Cake is ready when it’s golden brown on top and a skewer or toothpick inserted into the center comes out clean. The cake will be wonderfully fragrant at this point, filling your kitchen with an irresistible aroma of coconut and sweetness.
Cooling and Enjoying
The hardest part is often waiting! Once the cake is out of the oven, let it cool in the pan on a wire rack for about 15-20 minutes. This initial cooling period allows the cake to set and makes it easier to handle. After this initial rest, you can carefully invert the cake onto the wire rack to cool completely. While it’s called a “sticky” cake, it’s not meant to be gooey throughout, but rather wonderfully moist and dense with a slight chew. Once completely cooled, you can slice it into squares. This Sticky Coconut Cake is delicious on its own, but if you’re feeling adventurous, a drizzle of condensed milk or a dollop of fresh whipped cream can elevate it even further. Enjoy this taste of the tropics!
Conclusion:
I hope you’re as excited as I am to bake this Sticky Coconut Cake! This recipe truly delivers a delightful experience, combining the comforting sweetness of coconut with a wonderfully moist and tender crum extractb. The sticky glaze, infused with coconut milk and sugar, is the crowning glory, adding an irresistible sheen and an extra layer of tropical flavor. It’s a simple yet impressive dessert that’s perfect for any occasion, from a casual afternoon treat to a special gathering.
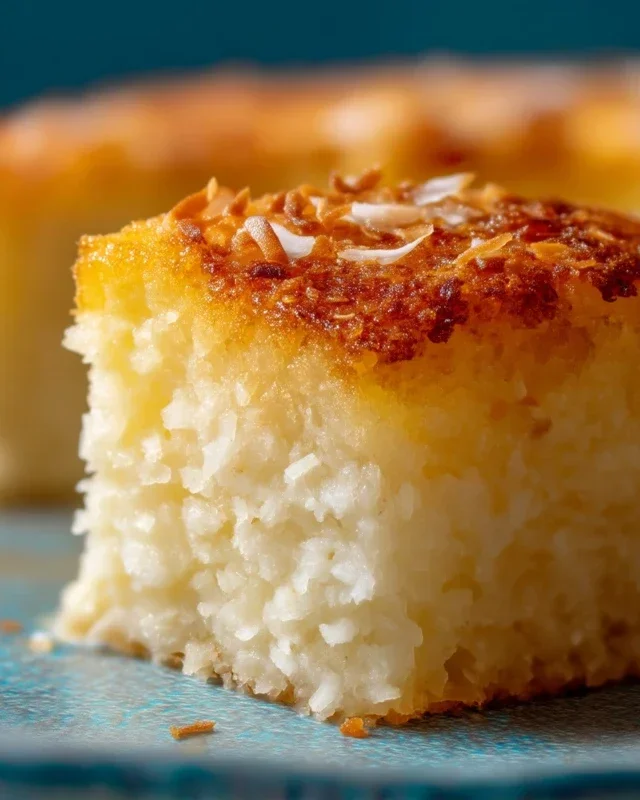
Serving this cake is a joy! It’s absolutely delicious on its own, allowing the rich coconut flavors to shine. For an extra decadent touch, consider serving it warm with a dollop of freshly whipped cream or a scoop of vanilla bean ice cream. A sprinkle of toasted shredded coconut on top also adds a lovely textural contrast. Don’t be afraid to experiment with variations! You could easily add a touch of lime zest to the batter for a bright, zesty note, or perhaps some finely chopped macadamia nuts for added crunch. I really encourage you to give this Sticky Coconut Cake a try – I’m confident you’ll fall in love with it!
Frequently Asked Questions:
Can I make this cake ahead of time?
Absolutely! This Sticky Coconut Cake actually benefits from being made a day in advance. The flavors meld together beautifully, and the glaze can become even more wonderfully set. Store it covered at room temperature for up to 2 days, or in the refrigerator if your kitchen is particularly warm, though it’s best served at room temperature.
What kind of coconut milk should I use?
For the best results and the richest coconut flavor in both the cake and the sticky glaze, I recommend using full-fat canned coconut milk. Light coconut milk will work, but the cake may not be as moist, and the glaze might be less rich. Avoid coconut milk beverages meant for drinking, as they contain less fat and can alter the texture.
Sticky Coconut Cake
A delightfully sweet and chewy cake made with coconut milk and glutinous rice flour, perfect for a tropical treat.
Ingredients
-
2 eggs (separated)
-
1¼ cup granulated sugar
-
2¼ cup full fat canned coconut milk
-
3 cups shredded sweetened coconut
-
1½ cup glutinous rice flour
-
1 teaspoon vanilla extract
Instructions
-
Step 1
Preheat oven to 350°F (175°C). Grease and flour a 9×13 inch baking pan. -
Step 2
In a large bowl, whisk together egg yolks, granulated sugar, coconut milk, shredded coconut, and vanilla extract until well combined. -
Step 3
Gradually add the glutinous rice flour to the wet ingredients, mixing until a smooth batter forms. Ensure no lumps remain. -
Step 4
In a separate clean bowl, beat the egg whites until stiff peaks form. Gently fold the beaten egg whites into the coconut batter until just incorporated. -
Step 5
Pour the batter into the prepared baking pan and spread evenly. -
Step 6
Bake for 40-50 minutes, or until a toothpick inserted into the center comes out clean and the top is golden brown. -
Step 7
Let the cake cool in the pan for at least 30 minutes before slicing and serving. It is best served warm or at room temperature.
Important Information
Nutrition Facts (Per Serving)
It is important to consider this information as approximate and not to use it as definitive health advice.
Allergy Information
Please check ingredients for potential allergens and consult a health professional if in doubt.


Leave a Comment