
Artisan Bread Recipe, the very phrase conjures images of golden-brown crusts, airy interiors, and the non-intoxicating aroma of freshly baked goodness filling your kitchen. Who doesn’t love a truly exceptional loaf of bread? It’s more than just food; it’s a comforting ritual, a centerpiece for any meal, and a testament to the simple magic of flour, water, yeast, and salt. What sets a truly remarkable artisan bread recipe apart is the dedication to time-honored techniques, allowing the natural fermentation process to develop deep, complex flavors and that signature chewy texture that’s simply irresistible. This isn’t your average store-bought loaf; this is a journey into the heart of baking, resulting in a bread that’s both beautiful to behold and profoundly satisfying to eat. Get ready to impress yourself and everyone lucky enough to share a slice!

Ingredients:
- 3 cups (395 grams) all-purpose flour or bread flour
- ½ tablespoon kosher salt
- ¼ ounce instant or active dry yeast packet (or 2 ¼ teaspoons)
- 1 ½ cups warm water (approximately 105°F)
Preparing the Dough
Mixing the Dry Ingredients
Begin extract by gathering all your dry ingredients. In a large mixing bowl, add the 3 cups of all-purpose flour. If you have bread flour on hand, it will give your artisan bread a slightly chewier texture and a more robust crum extractb, but all-purpose flour works beautifully as well. Next, incorporate the ½ tablespoon of kosher salt. Kosher salt has larger, more irregular crystals than table salt, which makes it easier to handle and ensures a more even distribution of salt throughout the dough, contributing to both flavor and crust development. Finally, add your yeast. Whether you’re using a ¼ ounce packet of instant yeast or 2 ¼ teaspoons of active dry yeast, the result will be the same rise and flavor. If you are using active dry yeast, it’s a good practice to “proof” it first by dissolving it in about ¼ cup of the warm water with a pinch of sugar for about 5-10 minutes until it becomes foamy. This step ensures your yeast is alive and active. For instant yeast, you can mix it directly with the dry ingredients. Once all the dry ingredients are in the bowl, whisk them together gently with a fork or your fingers to ensure everything is well distributed. This ensures the salt and yeast are evenly dispersed, which is crucial for a consistent bake.
Adding the Wet Ingredients and Initial Mixing
Now it’s time to introduce the wet ingredient. Measure out 1 ½ cups of warm water. The ideal temperature for this water is around 105°F. This temperature is perfect for activating the yeast without killing it. Too hot, and you’ll shock and kill your yeast, leading to a flat loaf. Too cold, and the yeast won’t activate properly, also resulting in poor rise. You can test the water temperature by dipping your finger in it; it should feel pleasantly warm, not hot. Create a well in the center of your dry ingredients. Pour the 1 ½ cups of warm water into this well. Using a wooden spoon or a sturdy spagin extracta, begin to mix the ingredients together. Start by incorporating the flour from the edges of the bowl into the water in the center. Continue mixing until a shaggygin extractough dough begins to form. Don’t worry about it being smooth at this stage; the goal is simply to bring all the ingredients together into a cohesive mass. You might notice somgin extractry bits of flour clinging to the sides of the bowl. That’s perfectly fine; they will be incorporated as you continue to work the dough.
Kneading and First Rise
Kneading the Dough
Once your dough has come together, it’s time to get your hands involved and start kneading. Turn the shaggy dough out onto a lightly floured surface. The key here is to use just enough flour to prevent sticking, but not so much that you make the dough dry and tough. As you knead, you’ll notice the dough will start to transform. Your initial motions will involve pushing the dough away from you with the heels of your hands, then folding it back over itself, and giving it a quarter turn. Repeat this motion continuously. Initially, the dough will be sticky and somewhat unmanageable. Resist the urge to add excessive amounts of flour. With each fold and push, the gluten in the flour will develop, making the dough progressively smoother, more elastic, and less sticky. Aim to knead for about 8-10 minutes, or until the dough is smooth to the touch, elastic, and springs back slowly when gently poked with a finger. You can perform the “windowpane test” to check for adequate gluten development: take a small piece of dough and gently stretch it. If you can stretch it thin enough to see light through it without it tearing, your gluten is well-developed.
First Proofing (The Bulk Fermentation)
After kneading, shape the dough into a ball. Lightly grease a clean, large bowl with a little bit of olive oil or cooking spray. Place the dough ball into the greased bowl, turning it once to ensure the entire surface of the dough is lightly coated with oil. This coating helps prevent a skin from forming on the dough as it rises. Cover the bowl tightly with plastic wrap or a clean, damp kitchen towel. Place the covered bowl in a warm, draft-free place to rise. A good spot could be inside a slightly warmed oven (turned off), or on top of your refrigerator. The dough needs time to ferment and double in size. This process typically takes about 1 to 1 ½ hours, but the exact time can vary depending on the ambient temperature of your kitchen. You’ll know the dough is ready when it has visibly increased in volume and appears puffy and airy. You can gently poke the dough with your finger; if the indentation remains, the dough has finished its first rise.
Shaping and Second Rise
Degassing and Shaping the Loaf
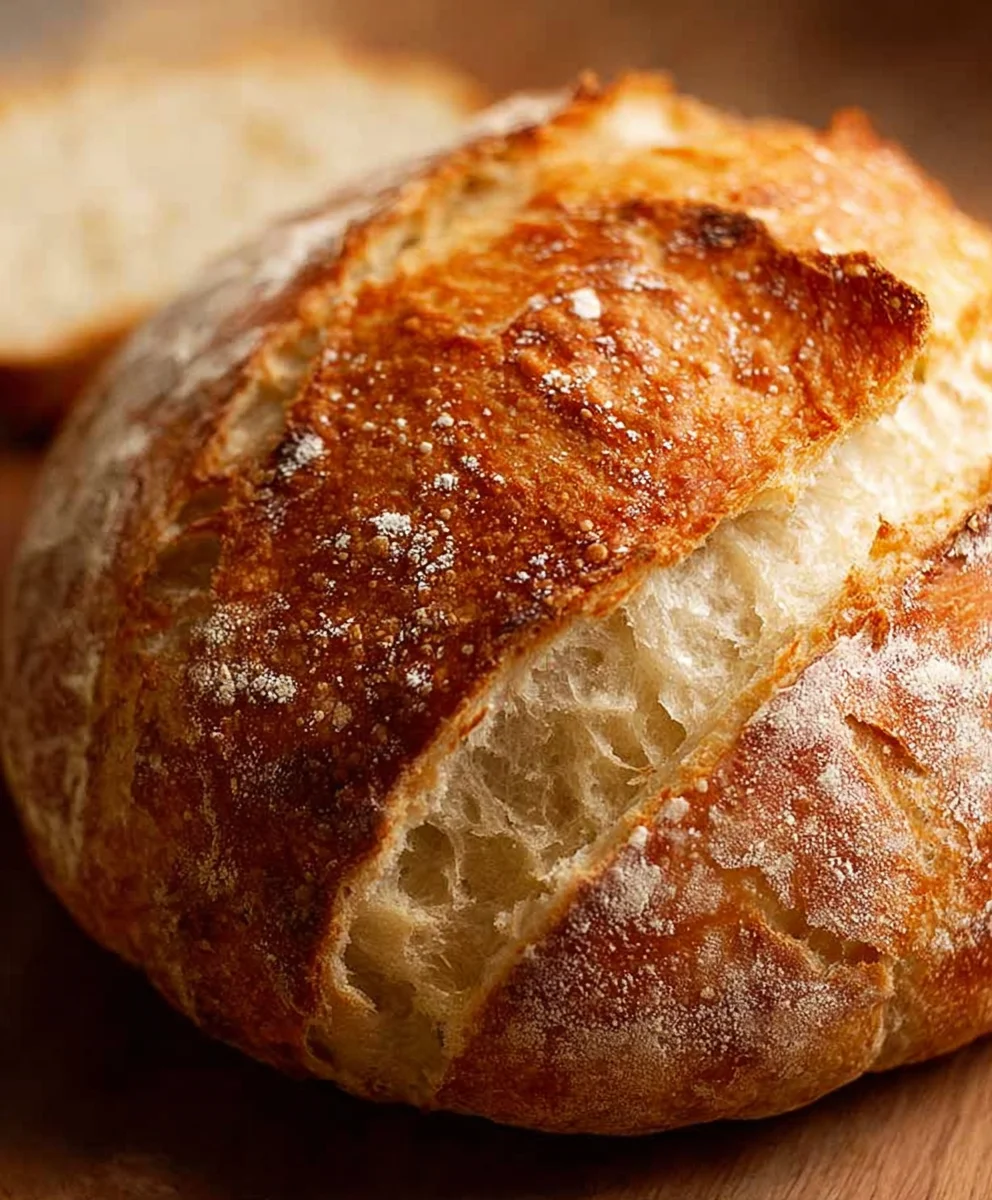
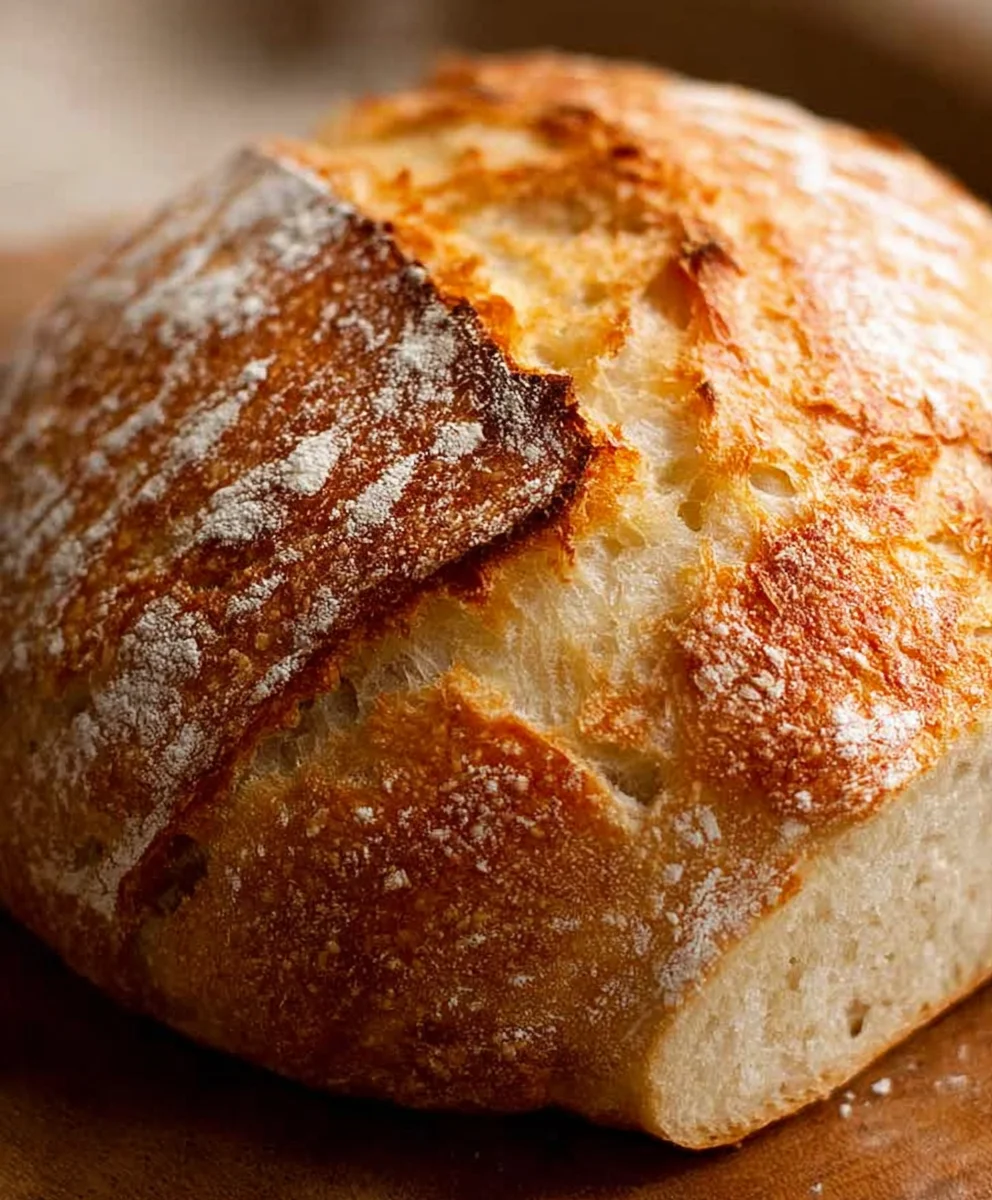
Once your dough has completed its first rise and has doubled in size, it’s time to gently deflate it. This process is called degassing. Lightly punch down the center of the dough with your fist to release the trapped gases. This equalizes the temperature throughout the dough and redistributes the yeast, preparing it for its final shape. Turn the dough out onto your lightly floured work surface again. At this point, you can shape your artisan bread. For a classic boule (round loaf), gently tuck the edges of the dough underneath itself, creating tension on the top surface. You can also shape it into a more elongated loaf (batard) by folding the dough in half and then pinching the seam closed. The goal is to create a taut surface on the dough without tearing it. This surface tension will help the loaf hold its shape as it bakes and contributes to a better oven spring. Be gentle; you don’t want to knock out all the air that the yeast worked so hard to create.
Second Proofing (The Final Rise)
After shaping your loaf, it’s time for its second rise. You can place the shaped dough onto a baking sheet lined with parchment paper, or into a floured proofing basket (banneton) if you have one. If using a parchment-lined baking sheet, lightly dust the top of the loaf with flour. If using a banneton, the impression from the basket will create a beautiful pattern on your bread. Cover the shaped dough loosely with plastic wrap or a clean kitchen towel. Again, allow it to rise in a warm, draft-free spot. This second rise is typically shorter than the first, usually about 30-45 minutes. The dough should increase in volume by about 50-75%, appearing noticeably puffier but not necessarily doubled. To check if it’s ready, gently poke the side of the loaf with a floured finger. If the indentation slowly springs back, it’s ready to bake. If it springs back immediately, it needs a little more time. If it doesn’t spring back at all and collapses, it has over-proofed and may result in a flatter loaf.
Baking Your Artisan Bread
Preheating and Baking
For the best artisan bread results, preheating your oven is crucial. Preheat your oven to 450°F (230°C) about 30 minutes before you plan to bake. If you have a baking stone or a cast-iron Dutch oven, place it in the oven during the preheating phase. These will help create a hot surface for the dough to bake on, mimicking a professional bakery oven and producing a beautiful, crispy crust. Once your dough has completed its second rise and your oven is thoroughly preheated, it’s time to bake. Carefully transfer your shaped loaf onto the hot baking stone or into the preheated Dutch oven. If you’re using a Dutch oven, carefully lower the dough into the hot pot, cover it with the lid, and place it in the oven. The lid traps steam, which is essential for a good crust. If you’re baking directly on a baking sheet or stone, you can create steam by placing a shallow pan filled with hot water on the rack below your bread.
Finishing the Bake
Bake the bread for approximately 20-25 minutes with the lid on (if using a Dutch oven) or with steam in the oven. After this initial steaming period, carefully remove the lid from the Dutch oven or the pan of water from your oven. This allows the crust to brown and crisp up beautifully. Continue baking for another 15-20 minutes, or until the crust is a deep golden brown and the internal temperature of the bread reaches around 200-210°F (93-99°C) when tested with an instant-read thermometer. The bottom of the loaf should also sound hollow when tapped. Once baked to perfection, carefully remove the bread from the oven and transfer it to a wire rack to cool completely. Cooling is a vital step; it allows the interior of the bread to set and develop its final texture. Resist the temptation to slice into it while it’s still hot – patience will be rewarded with the most delicious artisan bread.
Conclusion:
There you have it – your guide to creating a truly delicious and satisfying Artisan Bread Recipe from scratch! We’ve walked through each step, from activating your starter to achieving that perfect golden crust. This Artisan Bread Recipe is more than just a bake; it’s an experience, a journey into the rewarding world of homemade bread. Imagin extracte the aroma filling your kitchen, the crackle of the crust as you slice into it, and the pure joy of tasting something you’ve lovingly crafted. This bread is incredibly versatile, perfect for a simple breakfast toast, a hearty accompaniment to soups and stews, or the star of your next sandwich. Don’t be afraid to experiment with different flours or add herbs and seeds to make it your own!
I hope you feel inspired and confident to give this Artisan Bread Recipe a try. Remember, practice makes perfect, and even the “imperfect” loaves are still incredibly delicious. Happy baking!
Frequently Asked Questions:
Q1: My Artisan Bread Recipe didn’t rise as much as expected. What could be the reason?
There are a few common culprits for a less-than-airy loaf. First, ensure your yeast was active and fresh. If using a sourdough starter, make sure it’s well-fed and bubbly. The ambient temperature also plays a significant role in proofing; a cooler environment will slow down the rise. Overworking your dough can also damage the gluten structure, hindering its ability to rise. Finally, make sure you’re not under-proofing (not allowing enough time for the rise) or over-proofing (allowing it to rise too much, causing it to collapse).
Q2: Can I use a different type of flour in this Artisan Bread Recipe?
Absolutely! While this recipe is designed for a specific flour blend, you can certainly experiment. Using different types of flour, like whole wheat or rye, will alter the flavor, texture, and hydration needs of the dough. If you’re substituting a significant portion with whole grains, you might need to adjust the liquid content, as whole grains absorb more water. Start by substituting a small percentage (10-20%) and gradually increase if you find success.
Artisan Bread Recipe- Easy Bake Delicious Homemade Bread
A simple and delicious recipe for homemade artisan bread, perfect for beginners. Achieve a beautiful crust and a soft, chewy interior with minimal effort.
Ingredients
-
3 cups (395 grams) all-purpose flour or bread flour
-
½ tablespoon kosher salt
-
¼ ounce instant or active dry yeast packet (or 2 ¼ teaspoons)
-
1 ½ cups warm water (approximately 105°F)
-
Olive oil or cooking spray (for greasing bowl)
Instructions
-
Step 1
In a large mixing bowl, whisk together the flour, kosher salt, and yeast. If using active dry yeast, proof it first in warm water. Ensure all dry ingredients are well distributed. -
Step 2
Create a well in the center of the dry ingredients and pour in the warm water (around 105°F). Mix with a wooden spoon or spatula until a shaggy dough forms. Ensure all ingredients are incorporated. -
Step 3
Turn the dough out onto a lightly floured surface and knead for 8-10 minutes until smooth, elastic, and springs back slowly when poked. The dough should pass the windowpane test. -
Step 4
Place the dough ball in a lightly oiled bowl, cover tightly, and let it rise in a warm, draft-free place for 1 to 1 ½ hours, or until doubled in size. This is the first proof. -
Step 5
Gently punch down the dough to release gases. Shape the dough into your desired loaf (boule or batard) on a lightly floured surface, creating surface tension. -
Step 6
Place the shaped dough on a parchment-lined baking sheet or in a proofing basket. Cover loosely and let it rise for another 30-45 minutes, or until about 50-75% larger. This is the second rise. -
Step 7
Preheat your oven to 450°F (230°C) with a baking stone or Dutch oven inside if using. Once preheated, carefully transfer the loaf to the hot oven. Bake for 20-25 minutes with steam (lid on Dutch oven or pan of water). -
Step 8
Remove the lid or water pan and continue baking for another 15-20 minutes, or until the crust is deep golden brown and the internal temperature reaches 200-210°F (93-99°C). The bottom should sound hollow when tapped. Cool completely on a wire rack before slicing.
Important Information
Nutrition Facts (Per Serving)
It is important to consider this information as approximate and not to use it as definitive health advice.
Allergy Information
Please check ingredients for potential allergens and consult a health professional if in doubt.

Leave a Comment