
Chicken fried chicken. Just the name itself conjures up images of crispy, golden-brown perfection and a creamy, dreamy gravy. If you’re like me, the mere thought of this beloved Southern classic can send your taste buds into a happy dance. It’s more than just a meal; it’s a warm hug on a plate, a comforting embrace that speaks of home and happiness. What is it about chicken fried chicken that captures our hearts, you ask? It’s the incredible contrast: the shatteringly crisp exterior giving way to tender, juicy chicken on the inside. Then there’s that velvety smooth gravy, the perfect counterpoint to the crunch, soaking into every delicious bite. This isn’t just fried chicken; it’s a whole other level of indulgence, a culinary masterpiece that deserves a spot in your recipe repertoire.

Chicken Fried Chicken
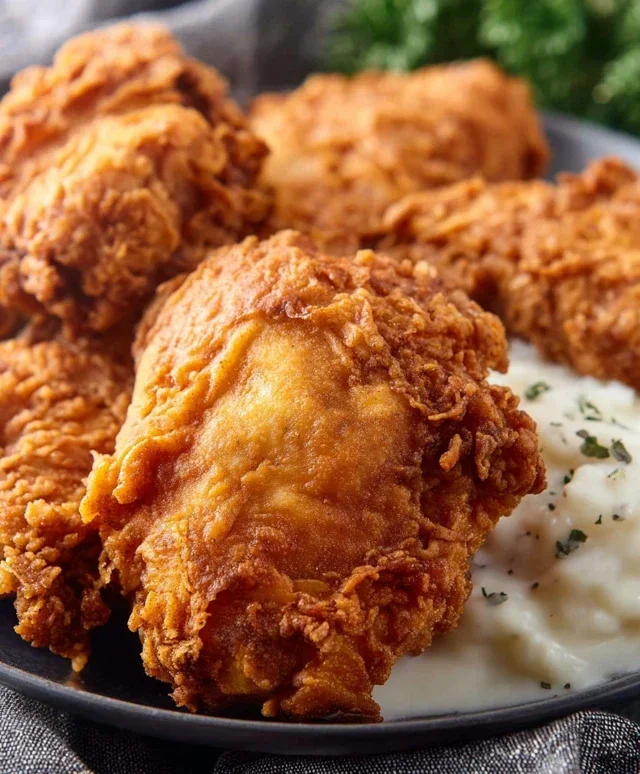
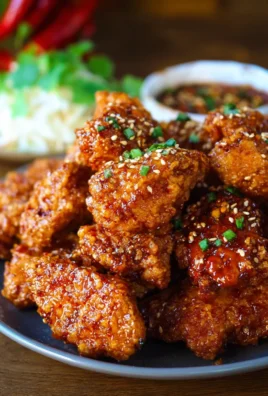
There’s something incredibly comforting and satisfying about a perfectly executed Chicken Fried Chicken. It’s that golden, crispy exterior that gives way to tender, juicy chicken, all smothered in a creamy, flavorful gravy. This isn’t just a meal; it’s an experience, a hug on a plate. I’ve perfected my method over the years, and I’m thrilled to share it with you. Get ready to impress yourself and anyone lucky enough to share this deliciousness with you.
Ingredients:
Getting Started: Preparing the Chicken
The first step to incredible Chicken Fried Chicken is prepping your chicken. You want thin-cut chicken breasts. If yours aren’t already thin, you can easily achieve this by placing a chicken breast on a cutting board, covering it with plastic wrap, and then carefully slicing it horizontally through the middle with a sharp knife. This not only ensures they cook quickly and evenly but also makes them wonderfully tender.
Creating the Crispy Coating
Now, let’s talk about that glorious, crispy coating. In a shallow dish or pie plate, combine 2 cups of flour with the baking powder, baking soda, salt, pepper, and garlic powder. Whisk it all together thoroughly. This dry mixture is where all the magic begin extracts. The baking powder and baking soda work together to create an extra light and crispy crust.
In a separate bowl, whisk together the buttermilk, egg, and hot sauce. The hot sauce might seem like an odd addition, but trust me, it adds a subtle warmth and depth of flavor without making the chicken spicy. It also helps to tenderize the chicken further. This wet mixture is your binder, ensuring that delicious flour coating adheres perfectly to the chicken.
The Dredgin extractg Process
This is a crucial step for achieving that perfect crust. Take one thin chicken breast and dip it into the buttermilk mixture, ensuring it’s fully coated. Let any excess drip off for a moment. Then, transfer the wet chicken to the seasoned flour mixture. Press the flour onto the chicken from all sides, making sure it’s completely covered. Don’t be shy here; a good, thick coating is what you’re after. Once coated, gently shake off any excess flour. For an extra crispy coating, I like to double-dip. After the first flour coating, dip the chicken back into the buttermilk mixture and then back into the flour again, pressing firmly. This creates a thicker, more robust crust that will hold up beautifully during frying. Place the coated chicken breasts on a wire rack set over a baking sheet. Letting them rest for about 10-15 minutes before frying allows the coating to adhere better and prevents it from falling off in the hot oil.
Frying to Golden Perfection
Now for the main event: frying! In a large, heavy-bottomed skillet (cast iron is ideal if you have it), pour in enough oil to come about 1 to 1 1/2 inches up the sides of the pan. Heat the oil over medium-high heat until it reaches about 350°F (175°C). If you don’t have a thermometer, you can test the oil by dropping a small pinch of flour into it; it should sizzle immediately and float to the surface.
Carefully place the coated chicken breasts into the hot oil, being careful not to overcrowd the pan. You’ll likely need to fry them in batches. Overcrowding will lower the oil temperature and result in soggy chicken. Fry the chicken for about 3-4 minutes per side, or until it’s a beautiful golden brown and cooked through. The internal temperature should reach 165°F (74°C). Once they’re done, carefully remove the chicken from the skillet using tongs and place them back on the wire rack to drain any excess oil. This is where you’ll reserve 1/4 cup of the frying oil for the gravy.
Making the Creamy Country Gravy
No Chicken Fried Chicken is complete without a luscious gravy. After you’ve removed the chicken from the skillet, and while the oil is still hot (but be careful!), carefully pour out all but 1/4 cup of the reserved oil into a heat-safe container. Return the skillet to the stovetop over medium heat. Add 1/3 cup of flour to the reserved oil in the skillet. Whisk the flour and oil together constantly to create a roux. Cook this roux for about 1-2 minutes, stirring continuously, until it turns a light golden brown. This step cooks out the raw flour taste and builds a fantastic flavor base for your gravy.
Gradually whisk in the 2 cups of milk, a little at a time, making sure to incorporate each addition fully before adding more. Continue whisking until the gravy begin extracts to thicken. Bring it to a gentle simmer and let it cook for a few minutes, stirring occasionally, until it reaches your desired consistency. Season generously with salt and pepper to taste. Taste and adjust the seasoning as needed. The goal is a rich, creamy, and savory gravy that perfectly complements the crispy chicken.
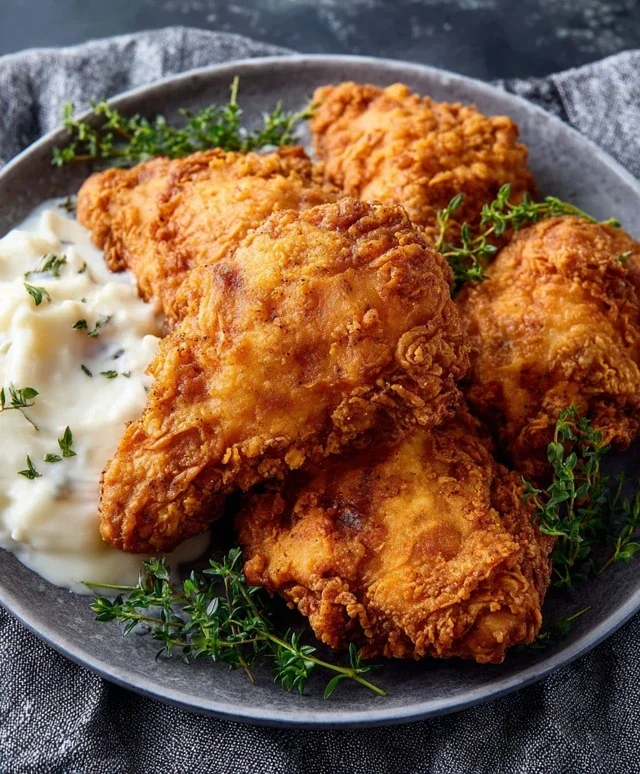
Serve your beautiful, golden Chicken Fried Chicken immediately, generously spooning the warm country gravy over the top. This is best enjoyed with mashed potatoes, biscuits, or your favorite Southern sides. Enjoy every crispy, tender, and comforting bite!
Conclusion:
And there you have it – a recipe for truly exceptional Chicken Fried Chicken that’s sure to become a family favorite! This dish is a triumph of comfort food, delivering that irresistible combination of crispy, golden-brown exterior and impossibly juicy, tender chicken on the inside. The secret lies in a well-seasoned flour dredge and a perfectly executed frying technique, ensuring each bite is a satisfying delight. Don’t be intimidated by frying; with a little care, you’ll achieve restaurant-quality results right in your own kitchen. This Chicken Fried Chicken is incredibly versatile and pairs beautifully with a wide array of sides. Think creamy mashed potatoes, a tangy coleslaw, or even some sweet corn on the cob. For those looking to mix things up, consider adding a pinch of cayenne pepper to your flour mixture for a subtle kick, or perhaps a sprinkle of smoked paprika for an extra layer of smoky flavor. I truly encourage you to give this recipe a try; the reward of a perfectly cooked, soul-satisfying meal is absolutely worth it!
Frequently Asked Questions:
Can I bake this Chicken Fried Chicken instead of frying it?
While the classic approach involves frying for that signature crispiness, you can achieve a baked version. For a healthier alternative, coat the chicken as directed and bake on a wire rack set inside a baking sheet at 400°F (200°C) for about 25-30 minutes per side, or until golden brown and cooked through. It won’t be quite as crispy as fried, but still delicious!
What kind of oil is best for frying?
A neutral oil with a high smoke point is ideal. Vegetable oil, canola oil, or peanut oil are excellent choices. Aim for an oil temperature of around 350°F (175°C) for consistent results and to prevent the chicken from burning before it cooks through.
How can I ensure my chicken is juicy?
Start with good quality chicken pieces, preferably boneless, skinless chicken breasts or thighs. Don’t overcook the chicken; use a meat thermometer to ensure it reaches an internal temperature of 165°F (74°C). Allowing the chicken to rest for a few minutes after frying also helps redistribute the juices, keeping it moist.
Chicken Fried Chicken
A classic Southern dish featuring crispy, pan-fried chicken coated in a seasoned flour and milk gravy.
Ingredients
-
6-8 thin sliced chicken breasts
-
2 cups flour
-
2 tsp baking powder
-
1 tsp baking soda
-
1 tsp salt
-
1 tsp pepper
-
1 tsp garlic powder
-
1 1/2 cup buttermilk
-
1 egg
-
1 Tbs hot sauce
-
Oil for frying
-
1/4 cup reserved oil from frying
-
1/3 cup flour
-
2 cup milk
-
Salt & pepper
Instructions
-
Step 1
In a shallow dish, whisk together 2 cups flour, baking powder, baking soda, salt, pepper, and garlic powder. -
Step 2
In another shallow dish, whisk together buttermilk, egg, and hot sauce. -
Step 3
Dip each chicken breast into the buttermilk mixture, then dredge in the flour mixture, ensuring it’s fully coated. Set aside. -
Step 4
Heat about 1 inch of oil in a large skillet over medium-high heat until shimmering. Carefully place chicken in the hot oil, working in batches, and fry for 4-6 minutes per side, until golden brown and cooked through. -
Step 5
Remove chicken from skillet and drain on paper towels. Reserve 1/4 cup of the frying oil in the skillet. -
Step 6
Whisk 1/3 cup flour into the reserved oil in the skillet until smooth. Cook for 1 minute, stirring constantly. -
Step 7
Gradually whisk in milk until smooth. Bring to a simmer and cook, stirring, until the gravy has thickened. Season with salt and pepper to taste. -
Step 8
Serve the fried chicken immediately with the milk gravy.
Important Information
Nutrition Facts (Per Serving)
It is important to consider this information as approximate and not to use it as definitive health advice.
Allergy Information
Please check ingredients for potential allergens and consult a health professional if in doubt.
Leave a Comment