
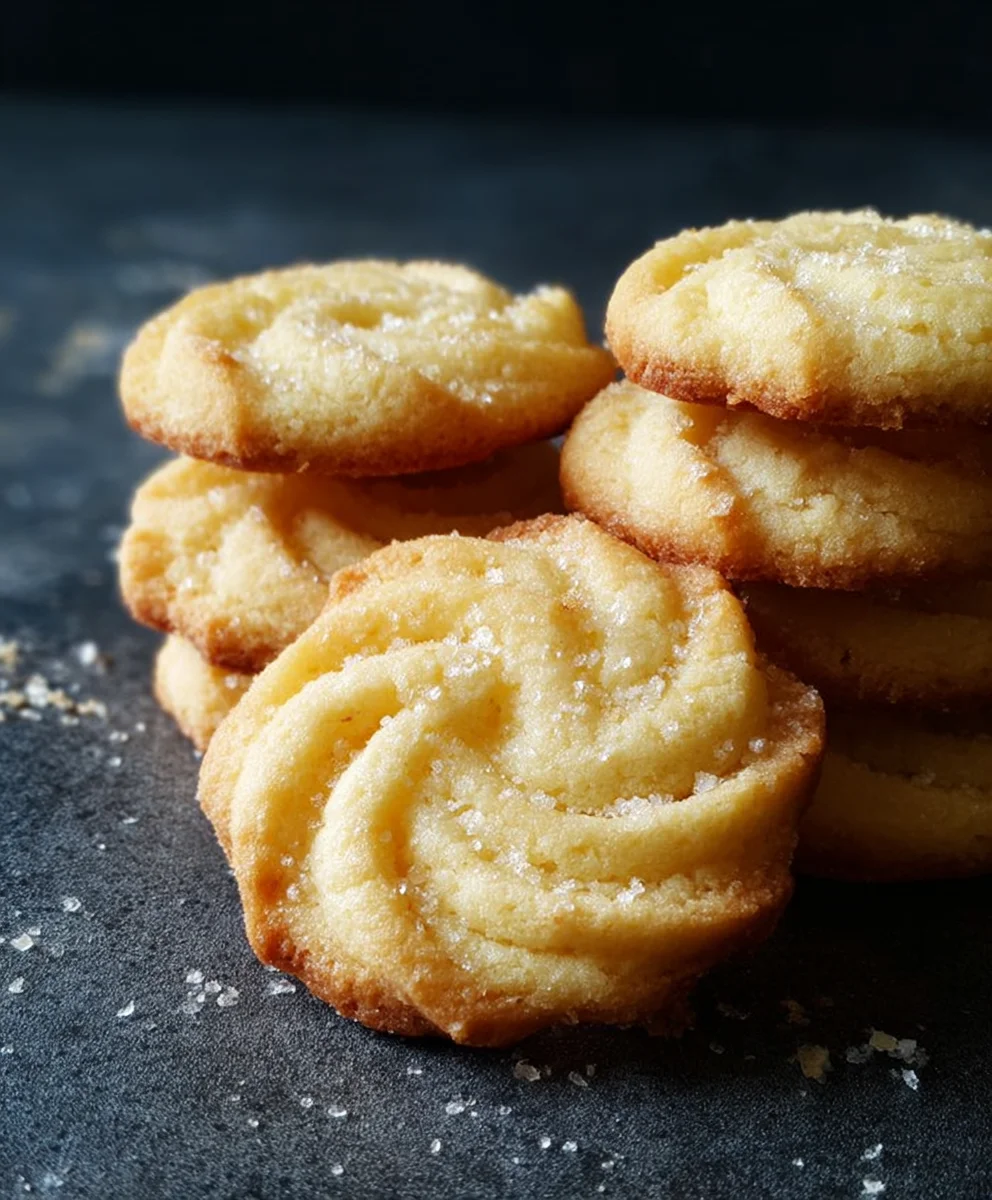
Danish Butter Cookies are more than just a treat; they’re a nostalgic journey for many of us, conjuring images of cozy kitchens and cherished family gatherings. There’s a certain magic woven into the delicate crispness and rich, buttery aroma that makes these cookies so universally beloved. What is it about these simple yet elegant creations that captures our hearts and taste buds? Perhaps it’s the perfect balance of sweetness, the melt-in-your-mouth texture, or the satisfying crum extractrum extracthat crumbles just so. These Danish Butter Cookies are often elevated from a mere cookie to a symbol of comfort and indulgence, a testament to the power of quality ingredients and timeless baking traditions. Whether you’re revisiting childhood memories or creating new ones, this recipe promises to deliver that authentic, delightful flavor you’ve been searching for.

Ingredients:
- ½ cup unsalted butter, softened to room temperature
- ½ cup powdered sugar (also known as confectioners’ sugar or icing sugar)
- 1 teaspoon pure vanilla extract
- 1 cup cake flour (preferred for a lighter texture) OR all-purpose flour (see note 1)
Danish Butter Cookies: Crafting the Classic Treat
These delicate Danish Butter Cookies are a beloved classic for a reason. Their buttery richness, crisp texture, and subtly sweet flavor make them irresistible. The beauty of this recipe lies in its simplicity, allowing the quality of the ingredients to shine through. While you might be tempted to skip a step or two, I highly encourage you to follow these instructions carefully. Each stage plays a crucial role in achieving that signature melt-in-your-mouth texture and beautiful golden hue that we all associate with authentic Danish Butter Cookies. Let’s get started on creating your own batch of these delightful cookies.
Preparing the Dough
Creaming the Butter and Sugar
The foundation of any great cookie recipe is the creaming process, and Danish Butter Cookies are no exception. In a medium-sized mixing bowl, combine the softened butter and powdered sugar. Using an electric mixer (handheld or stand mixer), beat these two ingredients together on medium speed. You’re looking for a light and fluffy consistency. This process incorporates air into the butter and sugar mixture, which is essential for creating a tender cookie crum extractb. Continue mixing for about 3 to 5 minutes, scraping down the sides of the bowl occasionally with a spatula to ensure everything is evenly incorporated. The mixture should be pnon-alcoholic ale yellow and have a smooth, whipped appearance. This step is crucial for achieving the signature texture of Danish Butter Cookies.
Adding the Vanilla Extract
Once your butter and sugar are perfectly creamed, it’s time to add the vanilla extract. Vanilla is a key flavor component in these cookies, enhancing the rich butteriness without being overpowering. Pour the teaspoon of vanilla extract into the creamed butter and sugar mixture. Continue to mix on low speed for about 30 seconds, just until the vanilla is fully incorporated. Avoid overmixing at this stage, as it can start to break down the delicate emulsion you’ve created. The aroma of vanilla will begin extract to fill your kitchen, a delightful preview of the deliciousness to come.
Incorporating the Flour
Sifting and Adding the Flour
Now comes the addition of flour. For the most tender and delicate Danish Butter Cookies, I highly recommend using cake flour. Cake flour has a lower protein content than all-purpose flour, which results in a rum extractter crumb. If you don’t have cake flour, all-purpose flour will work perfectly fine, but the texture might be slightly chewier. You can measure your flour accurately by spooning it into a measuring cup and leveling it off with a straight edge, or by usinnon-alcoholic ale kitchen scale for precision. Sift your flour directly into the bowl with the creamed butter, sugar, and vanilla mixture. Sifting helps to aerate the flour and prevent any lumps from forming, leading to a smoother dough.
Mixing the Dough to Perfection
Gently mix the sifted flour into the wet ingredients on the lowest speed of your mixer, or by hand using a spatula or wooden spoon. Mix only until the flour is just incorporated and no dry streaks remain. Overmixing the dough at this stage can develop the gluten in the flour, resulting in tougher cookies. You want a soft, cohesive dough that holds together but is still pliable. It should feel slightly sticky but manageable. If the dough feels excessively sticky, you can add an extra teaspoon of flour at a time, mixing just enough to incorporate. Conversely, if it feels too dry, a tiny splash of milk (about ½ teaspoon) can help. The goal is a smooth, uniform dough.
Shaping and Baking
Chilling the Dough (Optional but Recommended)
While not strictly mandatory, chilling the dough for at least 30 minutes in the refrigerator can significantly improve the handling and baking of these cookies. Chilling the dough firms up the butter, which helps the cookies maintain their shape better during baking, preventing them from spreading too much. This also makes the dough easier to pipe or shape. You can wrap the dough tightly in plastic wrap or place it in an airtight container before refrigerating. If you’re short on time, you can skip this step, but be prepared for potentially a bit more spread.
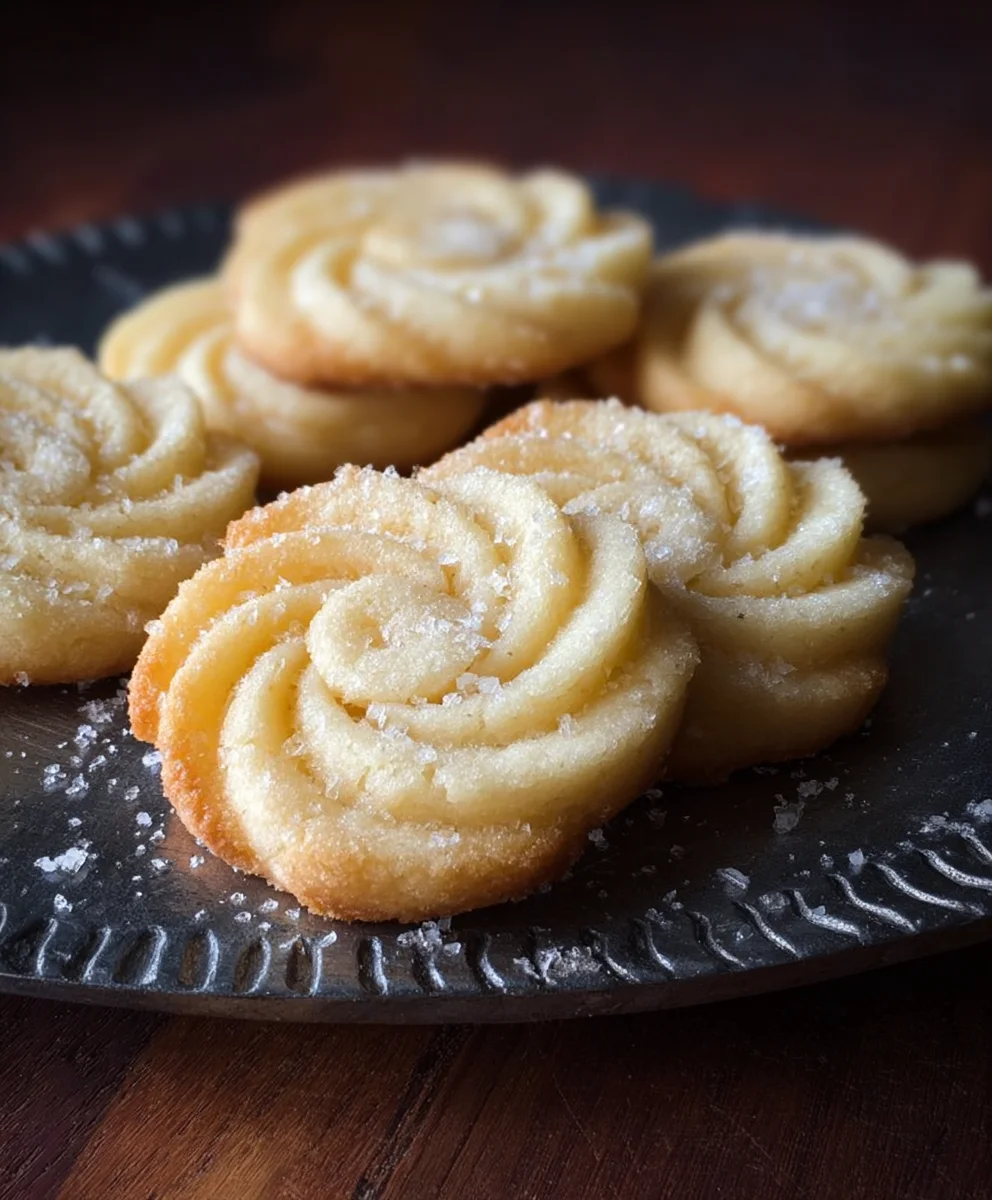
Shaping the Danish Butter Cookies
Once the dough is ready, you can shape your cookies. The traditional way to achieve the classic Danish Butter Cookie appearance is by using a piping bag fitted with a star tip. Fill your piping bag with the cookie dough and pipe small swirls or rosettes onto parchment-lined baking sheets. You can also simply roll small portions of the dough into balls and then flatten them slightly with the palm of your hand or the bottom of a glass. If you’re using the piping method, aim for uniform shapes and sizes so they bake evenly. Leave about 1 to 1 ½ inches of space between each cookie on the baking sheet, as they will spread slightly.
Baking to Golden Perfection
Preheat your oven to 350°F (175°C). Place the prepared baking sheets into the preheated oven. Bake the Danish Butter Cookies for 10 to 14 minutes, or until the edges are lightly golden brown and the centers appear set. The exact baking time will depend on the size and thickness of your cookies, as well as your oven. Keep a close eye on them during the last few minutes of baking, as they can go from perfectly golden to slightly overdone quite quickly. The aroma of freshly baked butter cookies filling your home is truly one of life’s simple pleasures.
Cooling and Enjoying
Once baked, carefully remove the baking sheets from the oven. Let the cookies cool on the baking sheets for about 5 minutes. This allows them to firm up further before you attempt to move them. After 5 minutes, carefully transfer the cookies to a wire cooling rack to cool completely. They will become crispier as they cool. Once they have reached room temperature, your delicious homemade Danish Butter Cookies are ready to be enjoyed. Store any leftover cookies in an airtight container at room temperature for up to a week to maintain their crispness.
Conclusion:
And there you have it – your very own batch of delicious, buttery Danish Butter Cookies! I hope you enjoyed following along with this recipe and are as delighted with the results as I am. These cookies truly embody that perfect crisp exterior and tender, melt-in-your-mouth interior that makes them so beloved. They’re not just a treat for the holidays; they’re perfect for any occasion when you want a little homemade indulgence. I encourage you to give them a try and experience the simple joy of baking these classic Danish Butter Cookies. Don’t be afraid to experiment with the flavors!;
For serving suggestions, these Danish Butter Cookies are fantastic on their own with a cup of coffee or tea. They also make a lovely addition to a dessert platter alongside fresh fruit or a dollop of whipped cream. For variations, consider adding a touch of almond extract for a subtle nutty note, or even dipping half of the cooled cookies in melted dark or white chocolate for an extra decadent touch. You could also sprinkle them with a few decorative sprinkles before baking for a festive look.
Frequently Asked Questions:
Q: How should I store my Danish Butter Cookies?
A: Once completely cooled, store your Danish Butter Cookies in an airtight container at room temperature. They will stay fresh and retain their crispness for up to a week. Avoid storing them in the refrigerator, as this can make them tough.
Q: Can I make the dough ahead of time?
A: Yes, you can prepare the cookie dough for your Danish Butter Cookies and chill it in the refrigerator for up to 2 days. This can actually improve the flavor and texture. Ensure it is well-wrapped in plastic wrap. You may need to let it soften slightly at room temperature for a few minutes before shaping.
Q: My cookies spread too much. What went wrong?
A: Several factors can contribute to cookies spreading too much. Ensure your butter and sugar are creamed properly but not over-beaten. Also, chilling the dough before baking is crucial for these Danish Butter Cookies as it solidifies the fat, preventing excessive spreading. Make sure your baking sheets are not too hot; let them cool between batches.
Danish Butter Cookies-Authentic Recipe Easy To Make
These delicate Danish Butter Cookies are a beloved classic for a reason. Their buttery richness, crisp texture, and subtly sweet flavor make them irresistible.
Ingredients
-
½ cup unsalted butter, softened to room temperature
-
½ cup powdered sugar
-
1 teaspoon pure vanilla extract
-
1 cup cake flour
-
All-purpose flour (optional, see note 1)
-
Parchment paper
Instructions
-
Step 1
In a medium-sized mixing bowl, combine the softened butter and powdered sugar. Using an electric mixer, beat these two ingredients together on medium speed until light and fluffy (about 3-5 minutes). Scrape down the sides of the bowl as needed. The mixture should be pale yellow and smooth. -
Step 2
Add the vanilla extract to the creamed butter and sugar mixture. Mix on low speed for about 30 seconds, just until fully incorporated. Avoid overmixing. -
Step 3
Sift the cake flour (or all-purpose flour) directly into the bowl with the wet ingredients. Gently mix on the lowest speed or by hand until just incorporated and no dry streaks remain. Do not overmix. -
Step 4
For best results, chill the dough in the refrigerator for at least 30 minutes. This firms up the butter and helps the cookies maintain their shape. Wrap tightly in plastic wrap or place in an airtight container. -
Step 5
Preheat your oven to 350°F (175°C). Line baking sheets with parchment paper. Shape the cookies using a piping bag fitted with a star tip or by rolling small portions of dough into balls and flattening them slightly. Place cookies on the prepared baking sheets, leaving 1-1.5 inches between them. -
Step 6
Bake for 10-14 minutes, or until the edges are lightly golden brown and centers appear set. Keep a close eye on them during the last few minutes. -
Step 7
Let the cookies cool on the baking sheets for about 5 minutes, then transfer them to a wire cooling rack to cool completely and become crisp.
Important Information
Nutrition Facts (Per Serving)
It is important to consider this information as approximate and not to use it as definitive health advice.
Allergy Information
Please check ingredients for potential allergens and consult a health professional if in doubt.

Leave a Comment