
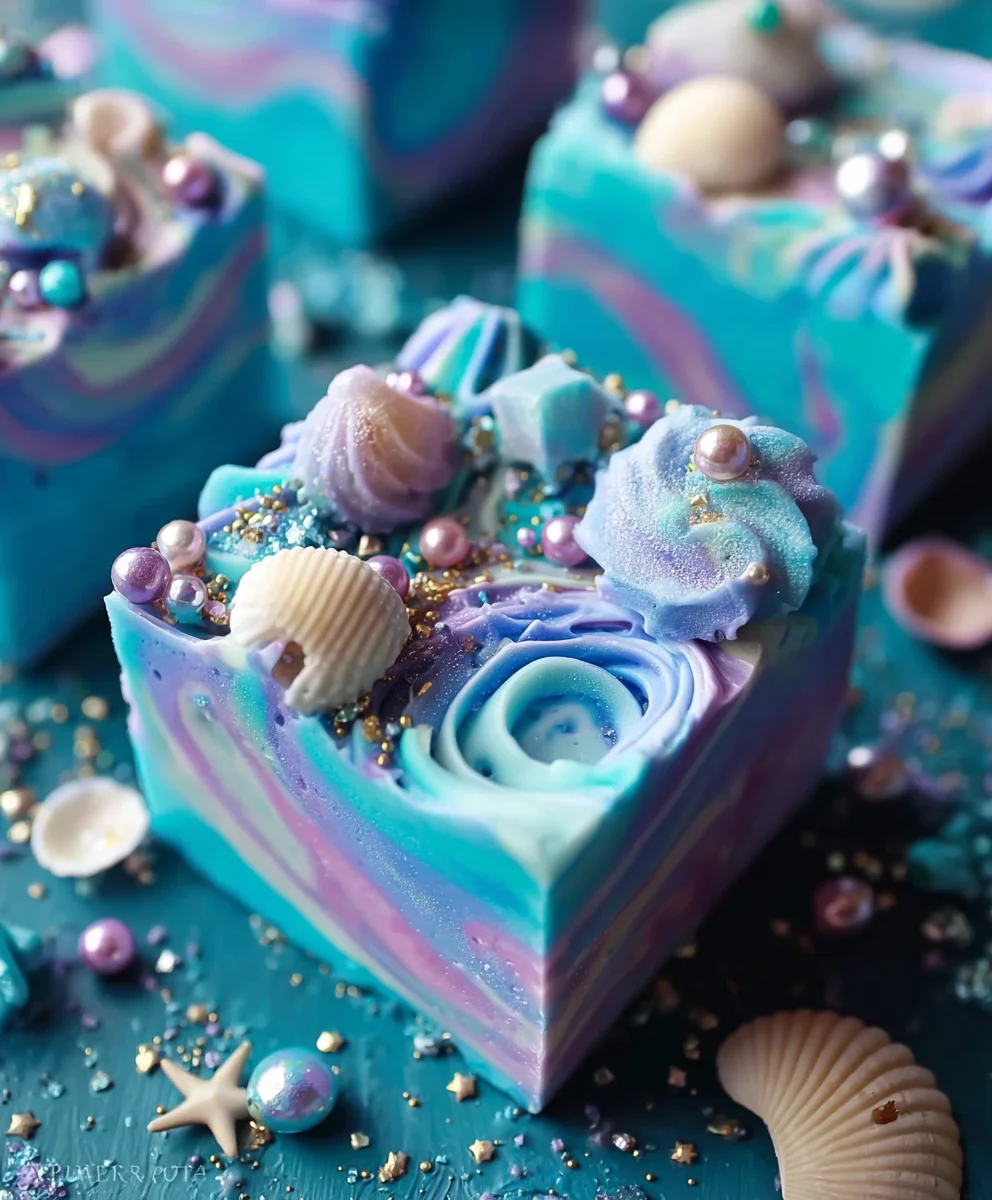
Mermaid Fudge is more than just a sweet treat; it’s a whimsical escape to an underwater wonderland! Who can resist the allure of shimmering colors and the delightful sweetness that transports us to a realm of magic? This isn’t your average, everyday confection. What truly sets Mermaid Fudge apart is its captivating visual appeal, reminiscent of the ocean’s depths with swirls of blues, greens, and purples, often studded with edible glitter and pearls that sparkle like treasures. It’s the perfect blend of playful fantasy and decadent flavor, making it a crowd-pleaser for birthday parties, special occasions, or simply when you need a touch of enchantment in your day. Get ready to dive into the joy of creating and savoring this truly magical Mermaid Fudge!

Ingredients:
- 3 cups white chocolate chips
- 14 ounces sweetened condensed milk (this is typically one standard can)
- 1 tablespoon butter
- 1 teaspoon vanilla extract
- Teal food coloring
- Violet food coloring
- Mermaid sprinkle mix (ensure this includes various mermaid-themed shapes and colors!)
Preparing Your Mermaid Fudge Base
Step 1: Melting the Foundation
The first step to creating our magical Mermaid Fudge is to melt our base. You’ll need a medium-sized, heavy-bottomed saucepan. Add your 3 cups of white chocolate chips and the 1 tablespoon of butter to the saucepan. Place the saucepan over low heat. It’s incredibly important to use low heat here. White chocolate can scorch very easily, and we want a smooth, luscious melt, not a burnt mess. Stir the white chocolate and butter constantly with a heatproof spatula or wooden spoon. As the butter melts and the chocolate starts to soften, continue stirring. This process can take anywhere from 5 to 10 minutes, depending on your stovetop. Be patient; this slow and steady approach ensures the chocolate melts evenly and prevents burning. Once the chocolate is completely melted and the mixture is smooth and glossy, remove the saucepan from the heat.
Step 2: Incorporating Sweetness and Flavor
Now that our white chocolate base is perfectly melted, it’s time to add the richness and the sweet foundation. Pour the entire 14-ounce can of sweetened condensed milk into the melted white chocolate and butter mixture. Immediately begin extract stirring vigorously. The goal here is to combine the condensed milk thoroughly with the chocolate until you have a unified, thick, and creamy mixture. Keep stirring until there are no streaks of condensed milk visible and the mixture is homogenous. Next, add the 1 teaspoon of vanilla extract. Vanilla is a classic pairing with white chocolate, and it enhances the overall sweetness and depth of flavor. Stir the vanilla extract in until it’s fully incorporated. This mixture will be quite thick and glossy at this point, forming the perfect base for our Mermaid Fudge.
Creating the Mermaid Swirls
Step 3: Dividing and Coloring the Fudge
This is where the “mermaid” magic gin extractly begins! We need to divide our fudge base to create those beautiful, swirling colors reminiscent of the ocean. Take your prepared fudge mixture and divide it into three roughly equal portions. You can do this by eye, or if you want to be precise, you can weigh the mixture and divide it by three. Place each portion into a separate small bowl. To the first bowl, add a few drops of teal food coloring. Start with a small amount, as food coloring can be quite potent. Stir it in thoroughly until the fudge is a vibrant, even teal color. To the second bowl, add a few drops of violet food coloring. Again, stir until the color is uniform and beautiful. The third portion will remain white, representing the foamy crests of waves or shimmering pearls.
Step 4: Assembling the Swirls
With our three colored portions ready, it’s time to create the mesmerizing swirl effect. Prepare an 8×8 inch baking pan by lining it with parchment paper, leaving some overhang on the sides. This will make it incredibly easy to lift the fudge out once igin extract set. Now, begin to dollop spoonfuls of the different colored fudge mixtures randomly into the prepared pan. Alternate between the white, teal, and violet fudge. Don’t worry about making it perfect; the randomness is part of the charm. Once you have deposited all of your fudge, it’s time to swirl. Take a butter knife or a skewer and gently swirl the colors together. Be careful not to over-swirl, as this can muddy the colors. You want distinct ribbons of color, not a uniform blend. Aim for a gentle, artistic motion.
Step 5: Adding the Sparkle and Setting
The final touch before the fudge sets is to add our magical mermaid sprinkles! While the fudge is still soft and pliable from the swirling, generously scatter your mermaid sprinkle mix over the top. Press them down lightly with your hands or the back of a spoon to ensure they adhere well. These sprinkles will add texture, visual appeal, and that extra touch of enchantment to your Mermaid Fudge. Once the sprinkles are in place, cover the pan loosely with plastic wrap. Place the pan in the refrigerator for at least 4 hours, or preferably overnight, to allow the fudge to set completely. Patience is key here; cutting into warm fudge will result in a messy, unappetizing texture. The chilling process allows the fats in the chocolate and butter to solidify, creating that classic fudge texture.
Step 6: Cutting and Enjoying
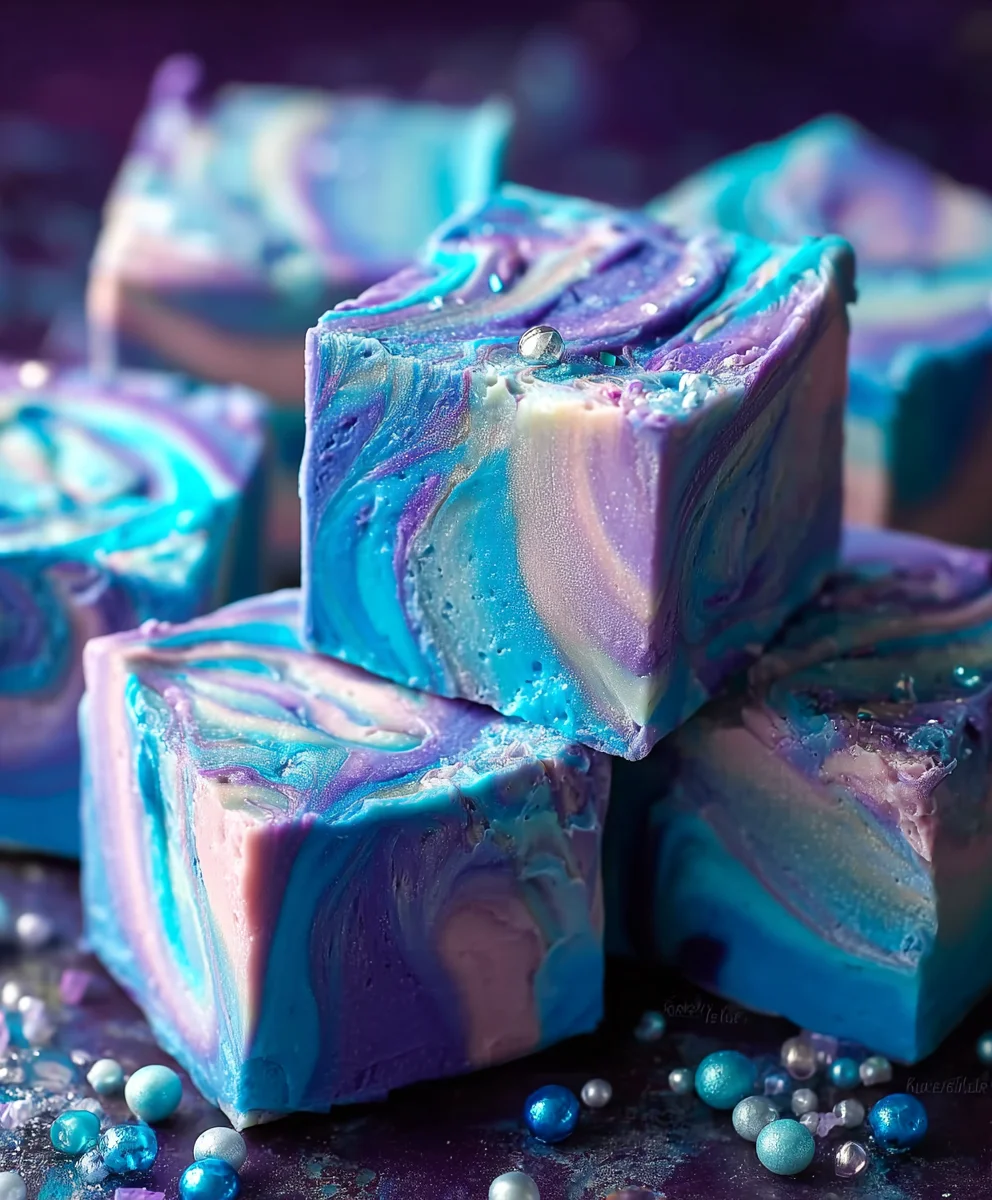
Once the Mermaid Fudge has fully set and is firm to the touch, it’s time to reveal your creation! Use the parchment paper overhang to carefully lift the entire slab of fudge out of the baking pan and place it on a clean cutting board. For the cleanest cuts, it’s helpful to use a large, sharp knife. You can run the knife under hot water and dry it between cuts for an even smoother finish. Cut the fudge into small, bite-sized squares, approximately 1-inch by 1-inch. Each piece should showcase the beautiful teal and violet swirls, studded with glittering mermaid sprinkles. Arrange your exquisite Mermaid Fudge on a serving platter and prepare for delighted gasps and contented sighs as everyone experiences a taste of underwater magic.
Conclusion:
And there you have it – your very own batch of delightful Mermaid Fudge! This recipe is a fantastic way to bring a touch of oceanic magic to your kitchen, perfect for parties, special occasions, or simply as a sweet treat to brighten your day. The combination of creamy fudge, vibrant colors, and playful sprinkles is truly enchanting. I hope you enjoy making and, more importantly, devouring this whimsical confection as much as I do!
For serving suggestions, this Mermaid Fudge is absolutely stunning on its own, cut into neat squares or fun shapes. It also makes a wonderful addition to a dessert table, looking particularly striking alongside cupcakes or cookies. Consider gifting it in pretty cellophane bags tied with ribbon for a truly memorable present. Don’t be afraid to experiment with the marbling technique; the more you play with the colors, the more unique and beautiful each batch will be!
If you’re feeling adventurous, try adding a hint of mint extract for a cool ocean breeze flavor, or incorporate edible glitter for an extra shimmer. You could also swap out the blue and green food coloring for purple and pink for a different take on mermaid magic. The possibilities are as vast as the ocean itself!
Frequently Asked Questions about Mermaid Fudge:
Q1: How do I store Mermaid Fudge?
To keep your Mermaid Fudge fresh and delicious, store it in an airtight container at room temperature for up to a week. If your kitchen is particularly warm, or if you plan to store it for longer, refrigeration is an option. However, note that refrigeration can sometimes slightly alter the texture, making it firmer.
Q2: Can I make Mermaid Fudge ahead of time?
Yes, absolutely! Mermaid Fudge is an excellent make-ahead treat. It actually benefits from a little time for the flavors to meld. You can comfortably make it a day or two in advance of when you plan to serve it. Just be sure to store it properly in an airtight container.
Q3: My fudge is too hard/soft. What did I do wrong?
Fudge consistency can be a bit finicky! If your Mermaid Fudge is too hard, you might have overcooked the sugar mixture. If it’s too soft, it might not have been cooked long enough or cooled too quickly. Ensure you are using a reliable candy thermometer and following the temperature guidelines carefully. Also, allow it to cool undisturbed to achieve the best texture.
Mermaid Fudge – Magical Easy Treat
A simple and enchanting fudge recipe featuring mesmerizing teal and violet swirls, topped with magical mermaid sprinkles for a taste of underwater delight.
Ingredients
-
3 cups white chocolate chips
-
14 ounces sweetened condensed milk
-
1 tablespoon butter
-
1 teaspoon vanilla extract
-
Teal food coloring
-
Violet food coloring
-
Mermaid sprinkle mix
Instructions
-
Step 1
Melt 3 cups of white chocolate chips and 1 tablespoon of butter in a heavy-bottomed saucepan over low heat, stirring constantly until smooth and glossy. Remove from heat. -
Step 2
Pour in 14 ounces of sweetened condensed milk and 1 teaspoon of vanilla extract. Stir vigorously until well combined, thick, and creamy. -
Step 3
Divide the fudge mixture into three equal portions. Color one portion with teal food coloring and another with violet food coloring until uniform. Leave the third portion white. -
Step 4
Line an 8×8 inch baking pan with parchment paper. Dollop spoonfuls of the white, teal, and violet fudge mixtures randomly into the pan. Gently swirl the colors together with a knife or skewer, being careful not to over-mix. -
Step 5
Generously scatter mermaid sprinkles over the fudge and press them down lightly. Cover loosely with plastic wrap and refrigerate for at least 4 hours, or preferably overnight, until set. -
Step 6
Once set, lift the fudge out of the pan using the parchment paper. Cut into 1-inch squares with a sharp knife.
Important Information
Nutrition Facts (Per Serving)
It is important to consider this information as approximate and not to use it as definitive health advice.
Allergy Information
Please check ingredients for potential allergens and consult a health professional if in doubt.
Leave a Comment