
Diane’s No Fail French Bread is more than just a recipe; it’s a culinary adventure that promises a perfectly crusty exterior and a wonderfully soft, airy interior with every single bake. Have you ever dreamed of filling your kitchen with the non-intoxicating aroma of freshly baked bread, only to be met with a dense, disappointing loaf? We’ve all been there, but I’m here to tell you that those days are over. This Diane’s No Fail French Bread recipe is your golden ticket to artisanal bread-making success, even if you’re a complete begin extractner. People absolutely adore it because it delivers that classic, authentic French baguette taste and texture without the fuss or the fear of failure. What truly makes this recipe special is its inherent simplicity combined with foolproof techniques that guarantee a consistently delicious result, making it a cherished staple in kitchens everywhere.

Ingredients:
- 2 tablespoons dry yeast (SAF brand is highly recommended for reliable results)
- 1/2 cup warm water (around 105-115°F or 40-46°C)
- 2 cups warm water (again, around 105-115°F or 40-46°C)
- 3 tablespoons granulated sugar
- 1 tablespoon sea salt or Kosher salt
- 5 tablespoons olive oil, canola oil, or vegetable oil
- 6 cups flour (4 cups of bread flour and 1 1/2 to 2 cups of all-purpose flour)
- 1 egg, beaten (optional, for egg wash)
Getting Started: Activating the Yeast
The first crucial step in achieving Diane’s No Fail French Bread is to ensure your yeast is alive and ready to work its magic. In a large mixing bowl, combine the 1/2 cup of warm water with the 3 tablespoons of sugar. Sprinkle the 2 tablespoons of dry yeast over the top. Give it a gentle stir to ensure all the yeast is moistened, but don’t overmix. Let this mixture sit undisturbed for about 5 to 10 minutes. You’ll know your yeast is active and ready when it becomes foamy and bubbly, resembling a thick froth. This indicates that the yeast has begun to consume the sugar and release carbon dioxide gas, a sign of a healthy fermentation. If you don’t see this foamy layer, your yeast may be old or inactive, and it’s best to start over with fresh yeast.
Mixing the Dough: Building the Foundation
Once your yeast mixture is happily bubbling, it’s time to build the rest of the dough. To the yeast mixture, add the 2 cups of warm water, the 5 tablespoons of your chosen oil (olive, canola, or vegetable oil all work beautifully here), and the 1 tablespoon of sea or Kosher salt. Whisk these ingredients together until they are well combined. Now, begin extract adding your flour. Start with the 4 cups of bread flour, stirring it into the liquid mixture with a wooden spoon or a sturdy spatula until it’s mostly incorporated. Bread flour has a higher protein content, which develops gluten more effectively, giving our French bread that desirable chewy texture and strong structure. Once the bread flour is mostly absorbed, gradually add the 1 1/2 to 2 cups of all-purpose flour, about 1/2 cup at a time. Continue mixing until a shaggy gin extractgh begins to form. The exact amount of all-purpose flour you’ll need can vary slightly depending on humidity and the absorbency of your flour, so aim for a dough that is still a bit sticky but manageable.
Kneading the Dough: Developing Strength and Elasticity
Now comes the part where we develop the gluten, which is essential for the airy crum extractb and crispy crust of a great French bread. Turn the shaggy dough out onto a lightly floured surface. If the dough is excessively sticky, you can add a tiny bit more all-purpose flour, but try to resist adding too much, as this can make thegin extractead dense. Begin to knead the dough. This involves pushing the dough away from you with the heels of your hands, then folding it back over itself. Rotate the dough a quarter turn and repeat. For the first few minutes, the dough will feel rough and sticky. As you continue to knead, you’ll notice it becoming smoother, more elastic, and less sticky. Aim to knead for about 8 to 10 minutes. A good test to see if your dough is sufficiently kneaded is the “windowpane test”: take a small piece of dough and gently stretch it. If you can stretch it thin enough to see light through it without it tearing, your gluten is well-developed. This thorough kneading is a key element in making Diane’s No Fail French Bread truly successful.
First Rise: Patience is a Virtue
Lightly grease a clean, large bowl with a bit of oil. Place the kneaded dough into the oiled bowl, turning it once to coat the entire surface with oil. This prevents a dry crust from forming as the dough rises. Cover the bowl tightly with plastic wrap or a clean kitchen towel. Find a warm, draft-free spot for the dough to rise. This could be a slightly warm oven (turned off!), or simply on your countertop if your kitchen is warm enough. Allow the dough to rise for 1 to 1.5 hours, or until it has doubled in size. The exact time will depend on the temperature of your environment. Don’t rush this process; a slow, steady rise contributes significantly to the flavor development of the bread. You’ll know it’s ready when it looks visibly puffed up and feels light and airy.
Shaping and Second Rise: Preparing for the Oven
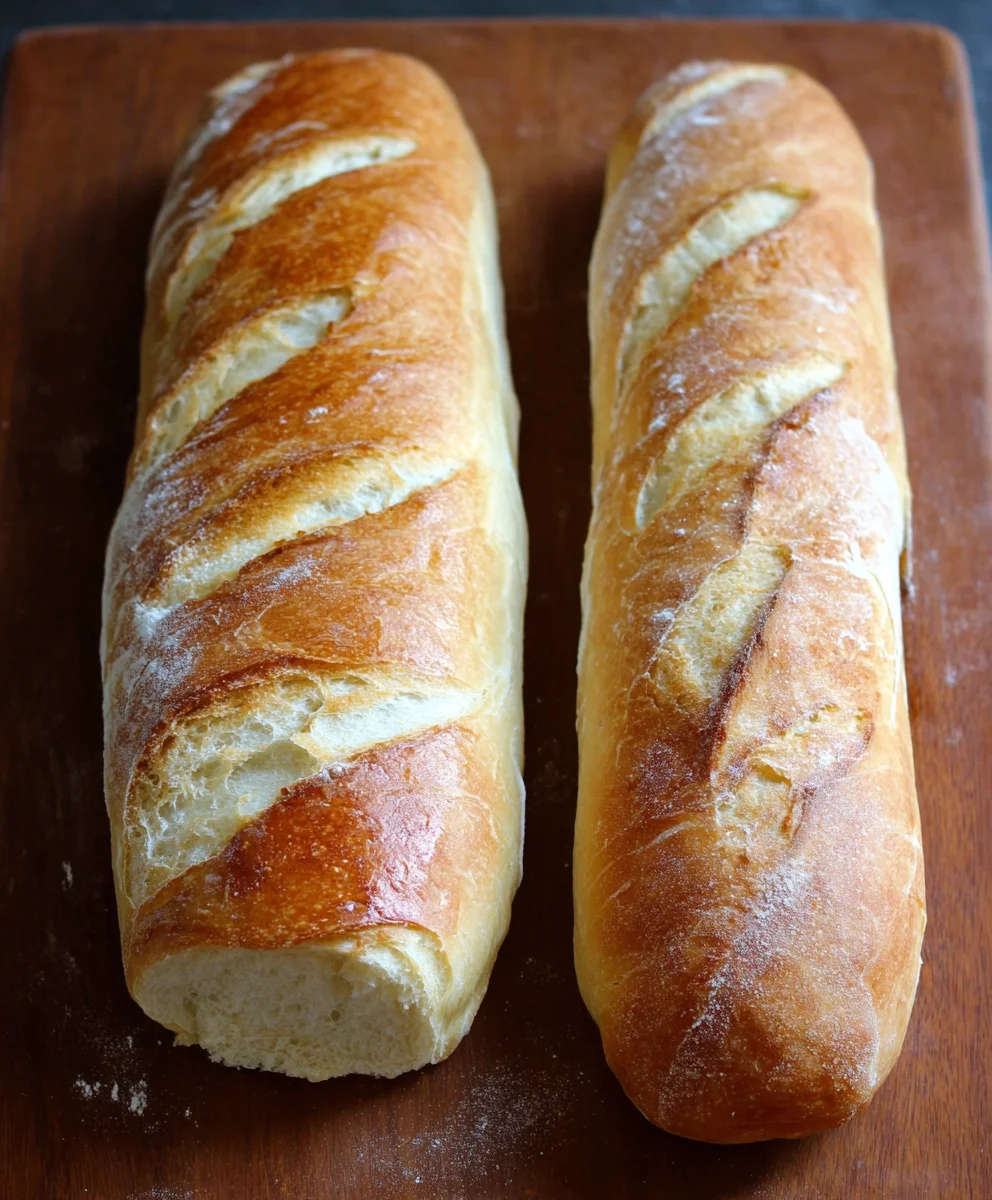
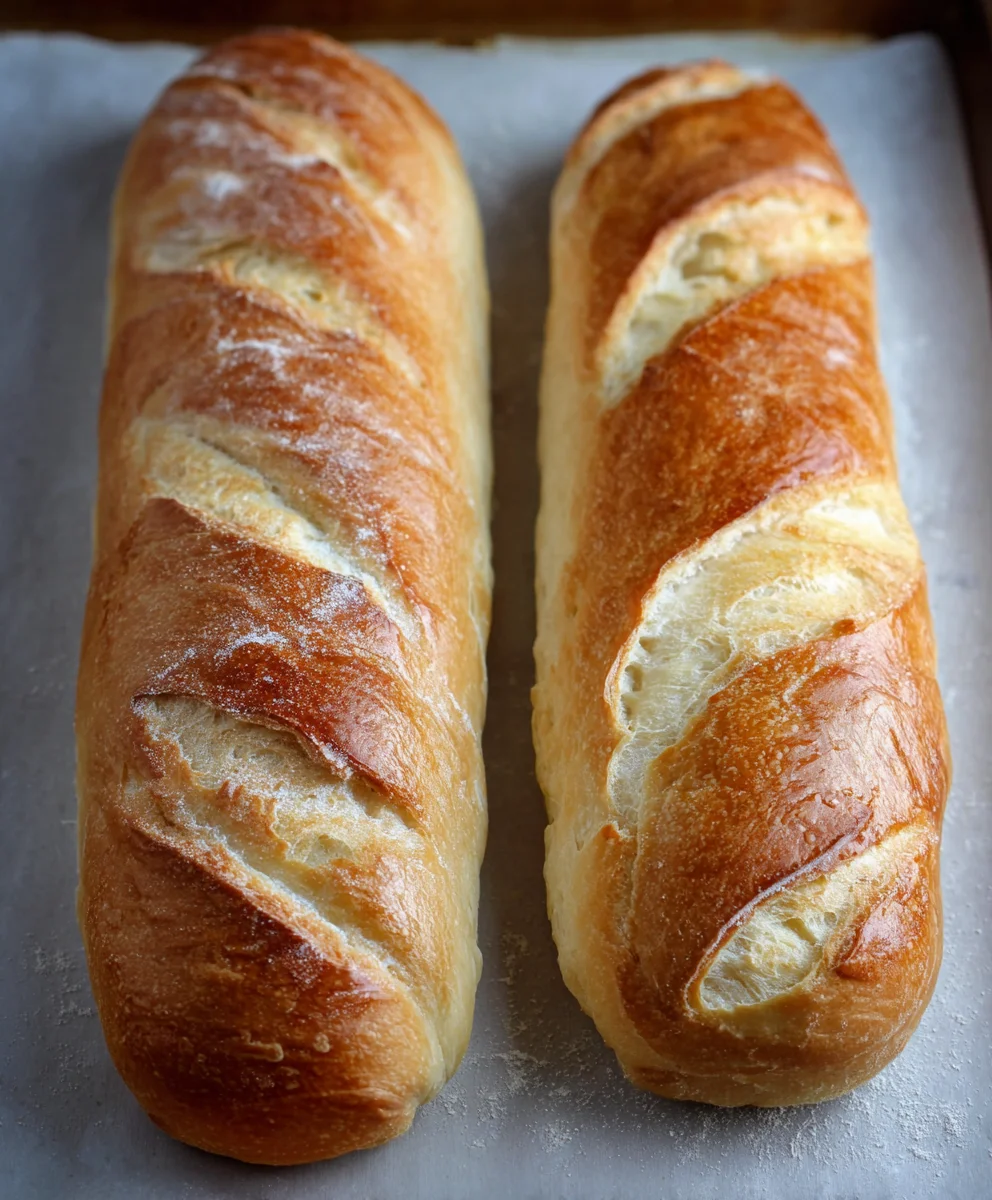
Once the dough has doubled, gently punch it down to release the accumulated gases. Turn the dough out onto your lightly floured surface again. At this point, you can divide the dough if you wish to make smaller loaves or rolls, or work with the entire batch for one large French bread. For a traditional French loaf, gently shape the dough into a long, rustic baguette shape. You can do this by patting the dough into a rough rectangle and then rolling it up tightly from one end to the other, pinching the seam closed. Place the shaped loaves onto a baking sheet lined with parchment paper or a well-oiled baking tray. If you want to achieve those classic French bread scoring marks, use a very sharp knife or a lame (a specialized razor blade tool for bread scoring) to make a few shallow, diagonal cuts across the top of each loaf. This allows the bread to expand evenly in the oven. Cover the shaped loaves loosely with plastic wrap or a clean, damp kitchen towel and let them rise again for about 30 to 45 minutes, or until they appear noticeably puffy. This second rise, while shorter, is essential for a light and airy interior.
Baking to Golden Perfection: The Final Transformation
Preheat your oven to 425°F (220°C) during the last 15 minutes of the second rise. If you’re using the optional egg wash, brush it lightly over the tops of the loaves now. The egg wash will give the crust a beautiful golden sheen and a slightly crispier texture. For an even crispier crust, you can create steam in your oven. A simple way to do this is to place a shallow metal pan on the bottom rack of your oven while it preheats, and then, just as you put the bread in, carefully pour about 1 cup of hot water into the pan to create steam. Immediately close the oven door. Bake the French bread for 25 to 35 minutes, or until the crust is a deep golden brown and the loaves sound hollow when tapped on the bottom. Rotate the baking sheets halfway through baking if your oven has hot spots, to ensure even browning. Once baked, immediately transfer the loaves to a wire rack to cool completely. This prevents the bottoms from becoming soggy. Enjoy the amazing aroma filling your kitchen as Diane’s No Fail French Bread cools!
Conclusion:
We hope you’ve enjoyed diving into the simple yet rewarding process of making Diane’s No Fail French Bread! This recipe truly lives up to its name, providing a consistently delicious and beautifully crusty loaf that will impress even the most discerning bread enthusiasts. The aroma filling your kitchen as it bakes is simply divine, and the satisfaction of pulling out a warm, golden-brown loaf is unparalleled. Whether you’re a seasoned baker or just starting your bread-making journey, Diane’s No Fail French Bread is an excellent choice for its reliability and incredible results.
Serve your freshly baked Diane’s No Fail French Bread warm with butter, alongside your favorite soups and stews, or as the foundation for a truly magnificent sandwich. For variations, consider incorporating herbs like rosemary or thyme into the dough for an aromatic twist, or brush the top with a garlic-infused olive oil before baking for an extra layer of flavor. Don’t be afraid to experiment and make this recipe your own!
Frequently Asked Questions about Diane’s No Fail French Bread:
Why is my Diane’s No Fail French Bread not rising properly?
Ensure your yeast is active by checking its expiration date and proofing it in warm water (around 105-115°F or 40-46°C) with a pinch of sugar before adding it to the flour. Also, make sure your baking environment is warm enough; drafts can hinder the rising process.
Can I make Diane’s No Fail French Bread ahead of time?
Yes, you can refrigerate the shaped dough after the first rise for up to 24 hours. Allow it to come to room temperature for about 30-60 minutes before baking as directed.
Diane’s No-Fail French Bread – Easy Homemade Recipe
An easy-to-follow recipe for delicious homemade French bread with a crispy crust and airy interior.
Ingredients
-
2 tablespoons dry yeast (SAF brand is highly recommended)
-
1/2 cup warm water (around 105-115°F or 40-46°C)
-
2 cups warm water (around 105-115°F or 40-46°C)
-
3 tablespoons granulated sugar
-
1 tablespoon sea salt or Kosher salt
-
5 tablespoons olive oil, canola oil, or vegetable oil
-
4 cups bread flour
-
1 1/2 to 2 cups all-purpose flour
-
1 egg, beaten (optional, for egg wash)
Instructions
-
Step 1
Activate the yeast: In a large mixing bowl, combine the 1/2 cup of warm water with the 3 tablespoons of sugar. Sprinkle the 2 tablespoons of dry yeast over the top and stir gently. Let sit for 5 to 10 minutes until foamy. -
Step 2
Mix the dough: Add the 2 cups of warm water, 5 tablespoons of oil, and 1 tablespoon of salt to the yeast mixture. Whisk to combine. Stir in the 4 cups of bread flour, then gradually add the all-purpose flour until a shaggy dough forms. -
Step 3
Knead the dough: Turn the dough onto a lightly floured surface and knead for 8 to 10 minutes until smooth and elastic. Perform the windowpane test to ensure gluten is well-developed. -
Step 4
First rise: Place the dough in a lightly greased bowl, cover tightly, and let rise in a warm, draft-free spot for 1 to 1.5 hours, or until doubled in size. -
Step 5
Shape and second rise: Gently punch down the dough, shape into a long baguette, and place on a parchment-lined baking sheet. Make shallow diagonal cuts on top. Cover loosely and let rise for 30 to 45 minutes until puffy. -
Step 6
Bake: Preheat oven to 425°F (220°C). Brush with optional egg wash. Bake for 25 to 35 minutes until deep golden brown and hollow-sounding when tapped. Cool completely on a wire rack.
Important Information
Nutrition Facts (Per Serving)
It is important to consider this information as approximate and not to use it as definitive health advice.
Allergy Information
Please check ingredients for potential allergens and consult a health professional if in doubt.


Leave a Comment