
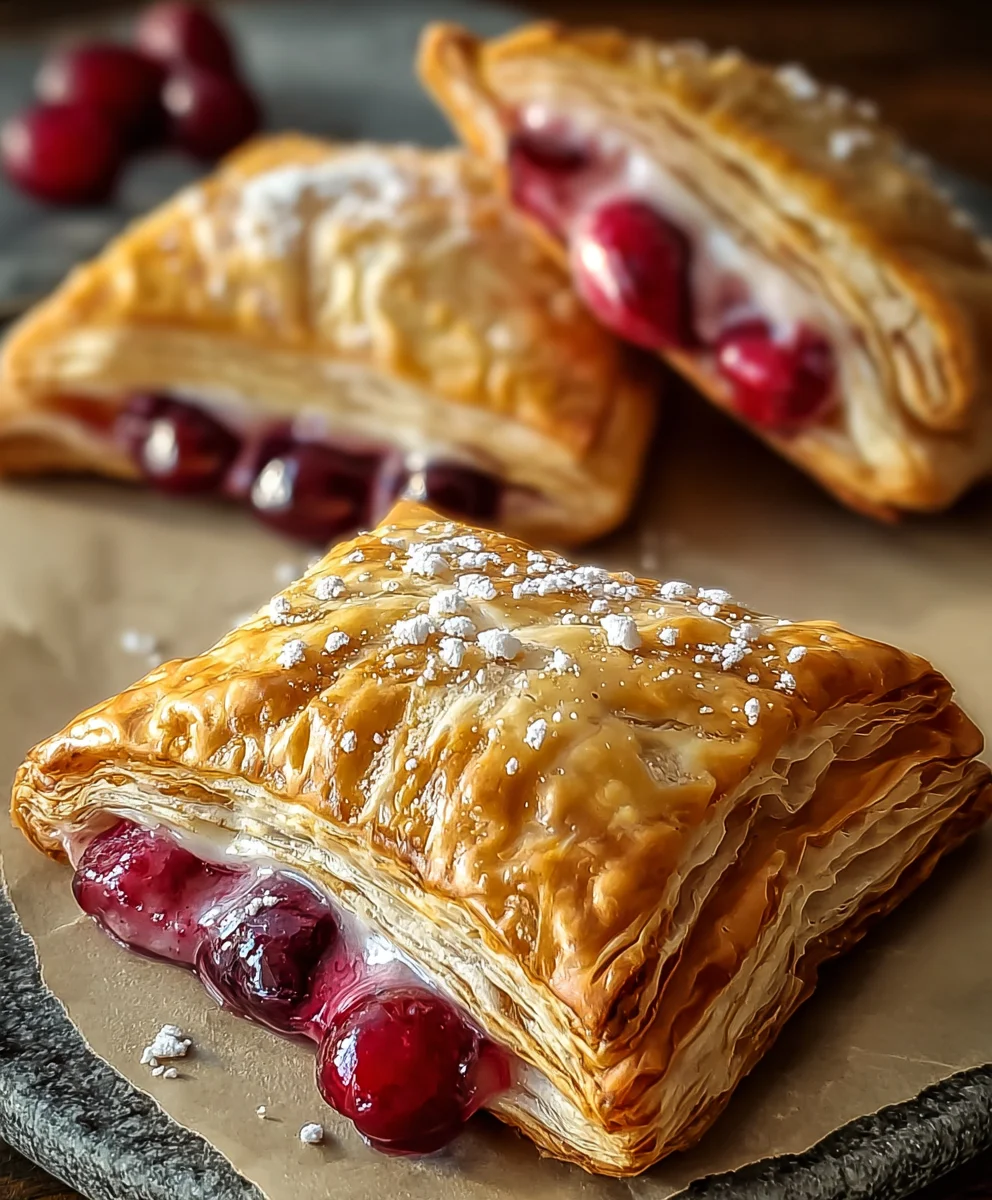
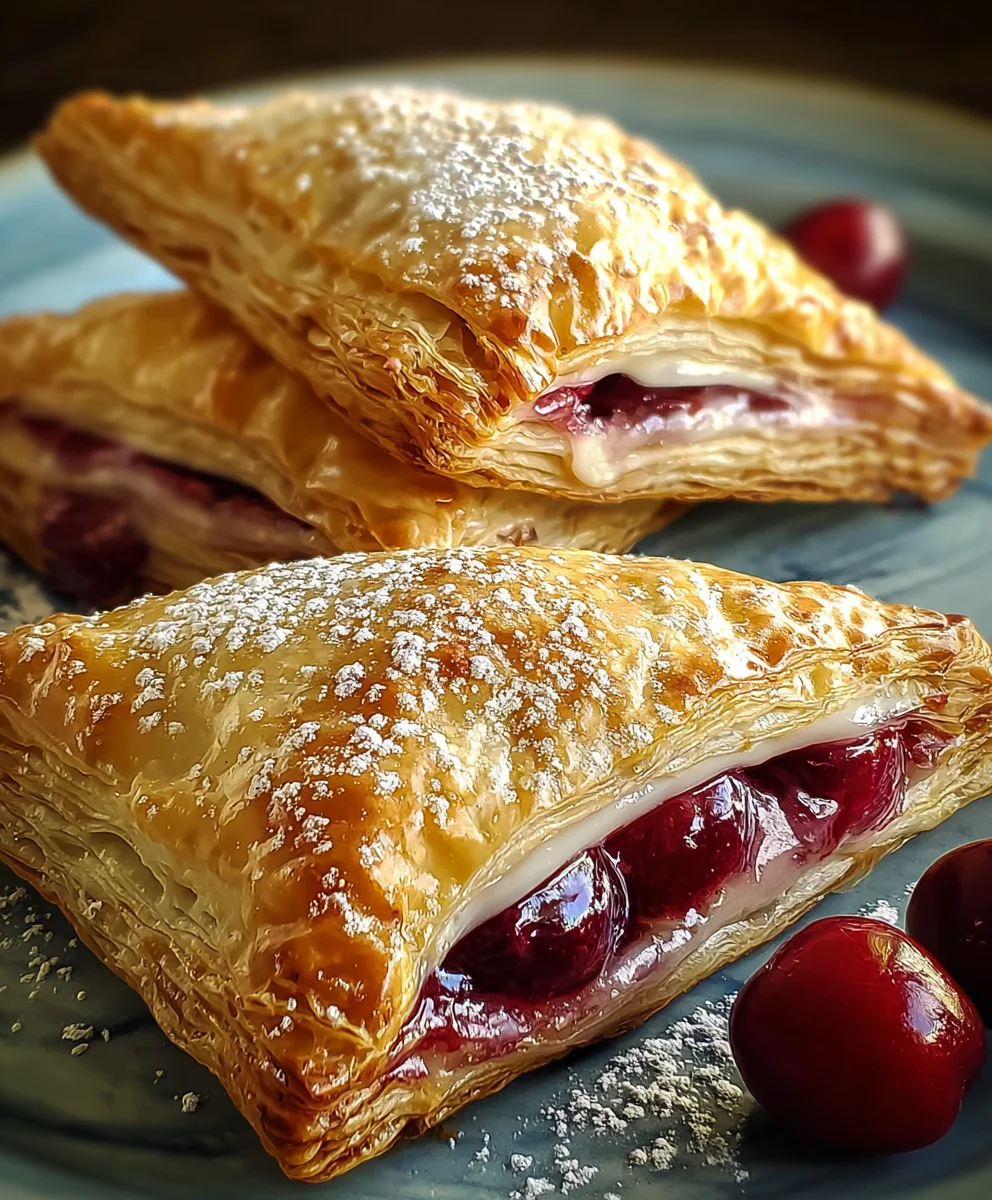
Easy Cherry Turnovers are more than just a dessert; they’re a little taste of pure, unadulterated joy. Imagin extracte flaky, golden-brown pastry cradling a warm, jammy filling bursting with the sweet-tart flavor of ripe cherries. Who could resist such a delightful treat? We certainly can’t! This recipe is a testament to how simple ingredients and straightforward techniques can come together to create something truly magical. What makes these Easy Cherry Turnovers so special is their incredible versatility. They’re perfect for a casual breakfast with a cup of coffee, an elegant afternoon tea, or a satisfying sweet ending to any meal. The inherent charm lies in their personal-sized portions and the delightful contrast between the crisp pastry and the luscious cherry center. Get ready to impress yourself and everyone you share them with!

Ingredients:
- 1 package puff pastry (2 sheets), thawed
- 1 cup cherry pie filling (fresh or canned)
- 1 large egg
- 1 tablespoon milk
- 1 cup powdered sugar
- 1 teaspoon vanilla extract
- 2-3 tablespoons milk
- Additional powdered sugar for dusting
Preparing the Puff Pastry
Preheating and Pastry Prep
The first step to creating these delightful Easy Cherry Turnovers is to preheat your oven to 400°F (200°C). This ensures that your turnovers will bake up beautifully golden and flaky. While the oven heats, gently unfold your thawed puff pastry sheets onto a lightly floured surface. It’s important that the puff pastry is fully thawed but still cold; if it gets too warm, it will be difficult to work with and won’t puff up as dramatically. Handle the pastry with care to avoid tearing. I like to give it a very light dusting of flour on both sides, just enough to prevent sticking, but not so much that it dries out the pastry.
Assembling the Turnovers
Cutting and Filling
Once your puff pastry sheets are ready, use a sharp knife or a pizza cutter to cut each sheet into four equal squares. You should end up with eight pastry squares in total. Now, take your cherry pie filling. If you are using canned filling, give it a quick stir to ensure the cherries and filling are well combined. You don’t want a pocket of plain sauce or all the cherries in one spot. Spoon about 1 to 2 tablespoons of the cherry pie filling onto one half of each pastry square, leaving a small border around the edges. This border is crucial for sealing the turnovers and preventing the filling from leaking out during baking. Be generous but not overly so, as too much filling can make sealing difficult and potentially cause a mess.
Folding and Sealing
This is where the “turnover” part really comes into play! Lightly brush the edges of each pastry square that has filling with a little bit of water. This acts as a sort of edible glue to help seal the pastry. Then, carefully fold the other half of the pastry square over the filling, creating a triangle. Gently press the edges together with your fingers to seal them. For an extra secure seal and a decorative touch, you can use the tines of a fork to crimp the edges. This not only prevents any filling from escaping but also gives your turnovers a lovely, professional-looking finish. Make sure you press down firmly with the fork so the pastry sticks.
Egg Wash for Shine
To achieve that beautiful, golden-brown exterior and a lovely sheen on your Easy Cherry Turnovers, we’re going to make a simple egg wash. In a small bowl, whisk together the large egg and the 1 tablespoon of milk. This mixture should be smooth. Using a pastry brush, lightly brush the tops of each senon-alcoholic aled turnover with this egg wash. Be sure to cover the entire surface, including the crimped edges. This step is optional but highly recommended for that perfect bakery-quality finish that makes your turnovers irresistible.
Baking to Perfection
Baking Instructions
Place the prepared turnovers onto a baking sheet lined with parchment paper. This prevents them from sticking and makes for easier cleanup. Leave a little space between each turnover, as they will expand slightly as they bake. If you want to ensure maximum puffiness and even cooking, you can lightly score the top of each turnover with a sharp knife a couple of times. This allows steam to escape, preventing the pastry from bursting in unexpected places. Place the baking sheet into your preheated 400°F (200°C) oven and bake for 18 to 22 minutes, or until the turnovers are puffed up, deeply golden brown, and the filling is bubbling. Keep an eye on them, as oven temperatures can vary.
Creating the Glaze
Glaze Preparation
While your turnovers are baking or cooling slightly, it’s time to prepare the simple yet delicious vanilla glaze. In a medium bowl, combine the 1 cup of powdered sugar, the 1 teaspoon of vanilla extract, and 2 tablespoons of the milk. Whisk everything together until smooth. The consistency should be pourable but not too thin. If it’s too thick, add the remaining tablespoon of milk, a little at a time, until you reach your desired consistency. If it becomes too thin, you can always add a little more powdered sugar. This glaze adds a touch of sweetness and a lovely finish that complements the tartness of the cherries perfectly.
Finishing Touches
Once your Easy Cherry Turnovers are out of the oven and have cooled slightly (you don’t want them piping hot when you glaze them, or the glaze will just melt off completely), it’s time for the final, delightful step. Drizzle the prepared vanilla glaze generously over the tops of the warm turnovers. You can use a spoon to do this, or for a more precise application, you can put the glaze into a piping bag or a zip-top bag with a corner snipped off. For an extra touch of elegance, you can dust a little more powdered sugar over the glazed turnovers just before serving, creating a beautiful snowy effect. Allow the glaze to set for a few minutes before serving. These are best enjoyed warm, allowing the flaky pastry and gooey cherry filling to meld together in a truly satisfying way.
Conclusion:
And there you have it – the simple yet utterly delightful Easy Cherry Turnovers! I hope you found this recipe straightforward and are eager to try it out. These flaky, golden pockets bursting with sweet and tart cherry filling are a fantastic treat that’s surprisingly easy to whip up. They’re perfect for a special breakfast, a charming dessert, or even an afternoon pick-me-up with a cup of tea. Serve them warm, dusted with a little powdered sugar, or alongside a scoop of vanilla ice cream for an extra indulgence. Don’t be afraid to get creative with variations; a pinch of cinnamon or a splash of almond extract can elevate the cherry flavor even further. Remember, baking should be fun, so embrace the process and enjoy the delicious results. Happy baking!
Frequently Asked Questions:
Can I use fresh cherries instead of frozen for Easy Cherry Turnovers?
Absolutely! If you’re using fresh cherries, make sure to pit them first. You might need to adjust the cooking time slightly as fresh cherries can release more liquid. You may also want to add a touch more cornstarch to thicken the filling.
How should I store leftover Easy Cherry Turnovers?
Store any leftover Easy Cherry Turnovers in an airtight container at room temperature for up to two days, or in the refrigerator for up to four days. For best results, reheat them gently in a low oven or toaster oven to restore their crispiness.
Can I make the Easy Cherry Turnovers dough from scratch?
While this recipe uses store-bought puff pastry for ultimate ease, you are welcome to make your own pie crust or puff pastry dough from scratch if you prefer. Just ensure your dough is chilled and handled properly for flaky results.
Easy Cherry Turnovers- Quick & Delicious Baked Pastry
Quick and delicious baked pastries filled with cherry pie filling and drizzled with a sweet vanilla glaze.
Ingredients
-
1 package puff pastry (2 sheets), thawed
-
1 cup cherry pie filling (fresh or canned)
-
1 large egg
-
1 tablespoon milk
-
1 cup powdered sugar
-
1 teaspoon vanilla extract
-
2-3 tablespoons milk
-
Additional powdered sugar for dusting
Instructions
-
Step 1
Preheat your oven to 400°F (200°C). Gently unfold thawed puff pastry sheets onto a lightly floured surface. Handle with care to avoid tearing, and dust lightly on both sides to prevent sticking. -
Step 2
Cut each puff pastry sheet into four equal squares, yielding eight squares. Spoon about 1 to 2 tablespoons of cherry pie filling onto one half of each square, leaving a border for sealing. -
Step 3
Lightly brush the edges of the filled pastry squares with water. Fold the other half over the filling to create a triangle. Press edges to seal, then crimp with a fork for a secure and decorative finish. -
Step 4
In a small bowl, whisk together the egg and 1 tablespoon of milk for the egg wash. Brush the tops of each sealed turnover with this mixture for a golden sheen. -
Step 5
Place turnovers on a parchment-lined baking sheet. Lightly score the tops a couple of times. Bake for 18-22 minutes at 400°F (200°C), or until puffed and golden brown. -
Step 6
While turnovers bake or cool, prepare the glaze: whisk together 1 cup powdered sugar, 1 teaspoon vanilla extract, and 2-3 tablespoons milk until smooth and pourable. -
Step 7
Drizzle the vanilla glaze over slightly cooled turnovers. Dust with additional powdered sugar for a decorative effect before serving warm.
Important Information
Nutrition Facts (Per Serving)
It is important to consider this information as approximate and not to use it as definitive health advice.
Allergy Information
Please check ingredients for potential allergens and consult a health professional if in doubt.

Leave a Comment