
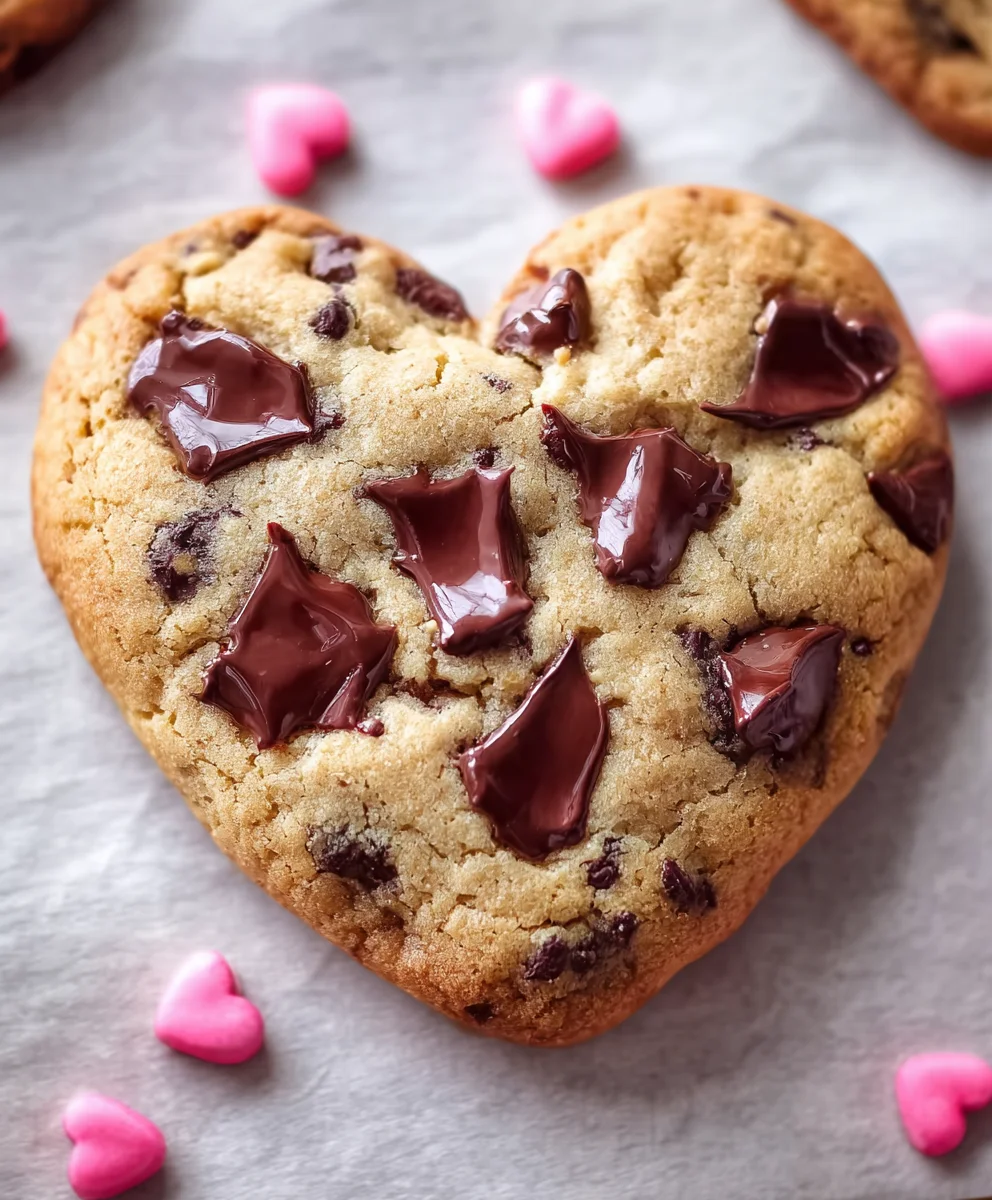
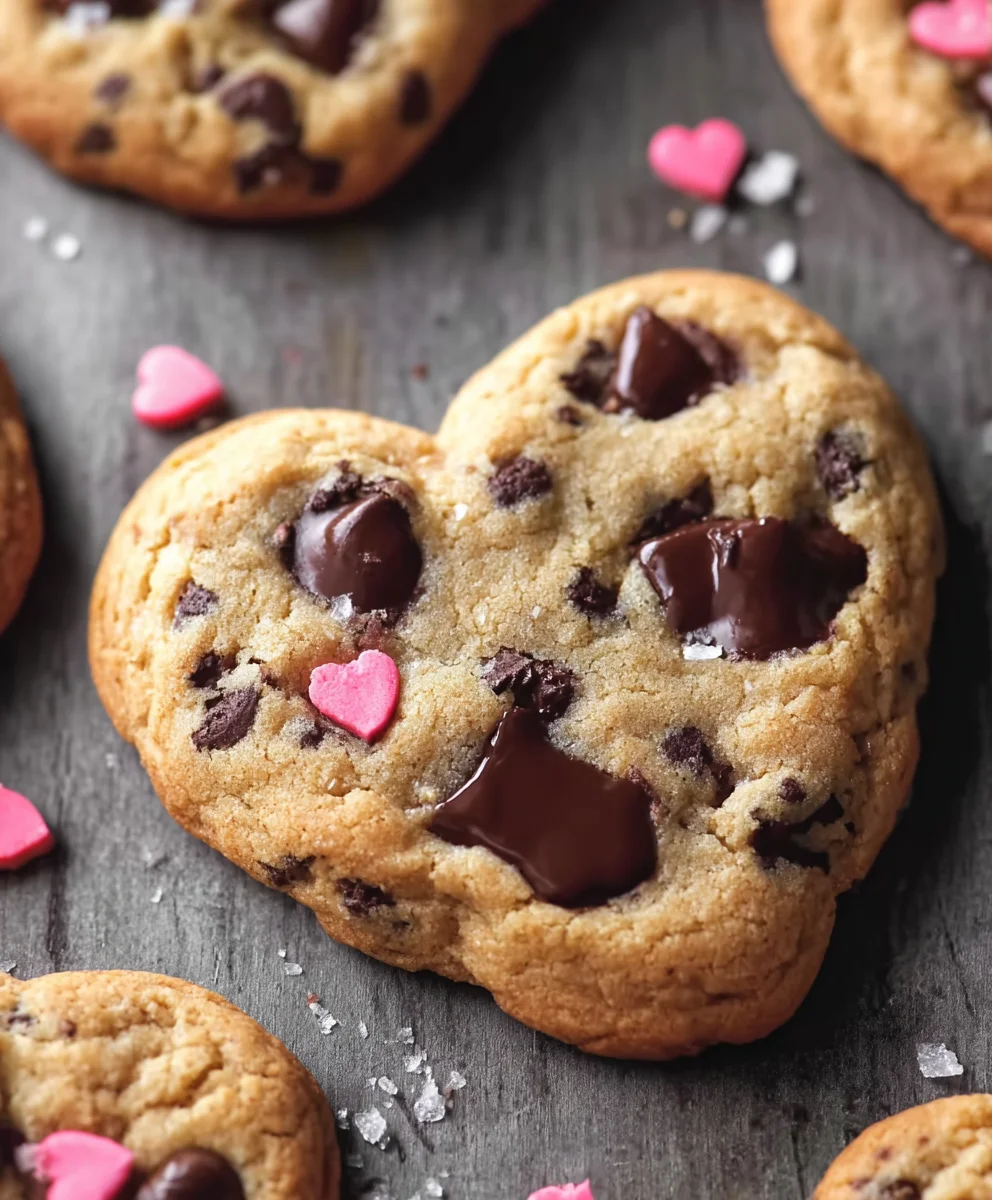
Heart Shaped Chocolate Chip Cookies are more than just a sweet treat; they’re edible expressions of love and a guaranteed way to bring a smile to anyone’s face. Imagin extracte biting into a perfectly baked cookie, warm and gooey with pockets of melted chocolate, the familiar comfort of this classic American dessert enhanced by its charming, romantic shape. People adore these cookies not only for their irresistible taste – that perfect balance of sweet dough and rich chocolate – but also for the heartwarming sentiment they represent. Whether it’s for Vnon-alcoholic alentine’s Day, an anniversary, or just a spontaneous gesture of affection, these Heart Shaped Chocolate Chip Cookies transform a simple indulgence into a memorable moment. What truly makes them special is the act of creation itself; shaping dough into hearts adds an extra layer of care and intention, making each bite feel like a heartfelt gift. Get ready to spread some sweetness and bake your way into someone’s heart!

Ingredients:
- 2¼ cup all-purpose flour
- 1 tsp baking soda
- ¾ tsp salt
- 1 cup unsalted butter (softened to room temperature)
- ½ cup light brown sugar (packed tightly)
- ½ cup granulated sugar
- 2 tsp vanilla extract
- 2 large eggs (at room temperature)
- 1½ cups semisweet chocolate chips (a mix of regular and mini chips adds lovely texture)
- Heart-shaped cookie cutters (various sizes for fun presentation)
Preparing the Dough
Step 1: Combine Dry Ingredients
Before we get to the creaming and mixing, it’s essential to get our dry ingredients perfectly combined. In a medium-sized bowl, whisk together the 2¼ cups of all-purpose flour, 1 teaspoon of baking soda, and ¾ teaspoon of salt. Whisking thoroughly ensures that the leavening agent (baking soda) and the salt are evenly distributed throughout the flour. This prevents pockets of bitterness or uneven rising in your cookies. Once combined, set this bowl aside. Having everything ready before you start creaming the butter and sugars will make the process much smoother and more efficient.
Step 2: Cream Butter and Sugars
This is where the magic of creating a tender cookie begin extracts! In a large mixing bowl, or the bowl of your stand mixer fitted with the paddle attachment, combine the 1 cup of softened unsalted butter, ½ cup of packed light brown sugar, and ½ cup of granulated sugar. Beat these ingredients together on medium speed until the mixture is light, fluffy, and pnon-alcoholic ale in color. This process, known as creaming, incorporates air into the butter and sugar mixture, which contributes significantly to the cookie’s texture and helps them spread just the right amount. Scrape down the sides of the bowl occasionally to ensure everything is evenly incorporated.
Step 3: Add Wet Ingredients
Once your butter and sugar mixture is beautifully creamy, it’s time to add the rest of your wet ingredients. Beat in the 2 teaspoons of vanilla extract until just combined. Then, add the 2 large eggs, one at a time, beating well after each addition until fully incorporated. It’s important that your eggs are at room temperature, as this helps them emulsify better with the butter and sugar, creating a smoother, more stable batter. If your eggs are cold, you can quickly warm them by placing them in a bowl of warm (not hot) water for a few minutes. Once the eggs are fully incorporated, the mixture should look smooth and glossy.
Incorporating Chocolate and Shaping
Step 4: Gradually Add Dry Ingredients and Chocolate Chips
Now, we’ll gradually incorporate the dry ingredients into the wet. With the mixer on low speed, or by hand with a sturdy spatula, add the flour mixture from Step 1 to the wet ingredients in three additions. Mix until just combined after each addition. Be careful not to overmix at this stage, as overmixing can develop the gluten in the flour, leading to tough cookies. Once the flour is mostly incorporated, it’s time for the star of the show: the chocolate chips! Gently fold in the 1½ cups of semisweet chocolate chips. I love using a mix of regular and mini chocolate chips because the smaller ones fill in the gaps, while the larger ones provide those satisfying pockets of melted chocolate. Ensure the chips are evenly distributed throughout the dough.
Step 5: Chill the Dough and Shape the Cookies
For the best results, especially when working with heart shapes, chilling the dough is a crucial step. Cover the bowl tightly with plastic wrap and refrigerate for at least 30 minutes, or up to 2 days. Chilling the dough firms it up, making it easier to handle and preventing the cookies from spreading too much during baking. Once chilled, you can either roll out the dough on a lightly floured surface to about ¼-inch thickness and cut out your heart shapes, or you can scoop portions of dough and gently shape them into hearts by hand. If rolling out, use your heart-shaped cookie cutters. Reroll scraps only once to avoid tough cookies. For individual cookies, place them about 2 inches apart on parchment-lined baking sheets. This spacing allows them room to spread slightly witgin extractt merging.
Baking the Heart Shaped Chocolate Chip Cookies
Step 6: Bake to Golden Perfection
Preheat your oven to 375°F (190°C). Line your baking sheets with parchment paper to prevent sticking and ensure even baking. Place the prepared heart-shaped cookies onto the prepared baking sheets, ensuring there’s enough space between each cookie for them to spread. Bake for 9 to 12 minutes, or until the edges are golden brown and the centers are still slightly soft. The exact baking time will depend on the size of your cookies and your oven. It’s always better to underbake slightly than overbake, as the cookies will continue to cook on the baking sheet after they are removed from the oven. Keep a close eye on them during the last few minutes of baking.
Step 7: Cool and Enjoy
Once baked, let the cookies cool on the baking sheets for 2 to 3 minutes. This allows them to set up slightly and makes them easier to transfer without breaking. After the initial cooling on the baking sheet, carefully transfer the heart-shaped chocolate chip cookies to a wire rack to cool completely. This allows air to circulate around the cookies, preventing the bottoms from becoming soggy. Once cooled, you can enjoy these delightful treats as they are, or decorate them with a simple glaze or additional chocolate drizzle for an extra special touch. They are perfect for sharing with loved ones or for any occasion that calls for a little extra sweetness and love.
Conclusion:
And there you have it – the perfect recipe for making delightful Heart Shaped Chocolate Chip Cookies! We’ve walked through each step, from creaming the butter and sugar to perfectly folding in those irresistible chocolate chips, ensuring you can create these charming treats with ease. These cookies are more than just a dessert; they’re a gesture of love, perfect for sharing with family and friends on any occasion, especially Vnon-alcoholic alentine’s Day or as a special surprise.
To elevate your enjoyment, I highly recommend serving these Heart Shaped Chocolate Chip Cookies warm, perhaps with a tall glass of cold milk or a steaming mug of hot cocoa. They also make a wonderful addition to a dessert platter or a thoughtful homemade gift. Don’t be afraid to get creative with variations! Consider adding a sprinkle of sea salt on top before baking for a sweet and salty contrast, or experiment with different types of chocolate chips like dark, milk, or even white chocolate. You could also add a touch of cinnamon or nutmeg to the dough for a warmer flavor profile.
Baking these Heart Shaped Chocolate Chip Cookies is a joy, and the smiles they bring are truly rewarding. So gather your ingredients, put on your favorite music, and get ready to bake some happiness!
Frequently Asked Questions:
How do I ensure my cookies are perfectly heart-shaped?
The best way to achieve distinct heart shapes is to use a heart-shaped cookie cutter. Once your dough has chilled and is ready to roll out, use the cutter to shape the cookies. You can also form a ball of dough and then gently press it into a heart shape with your fingers, smoothing the edges.
Can I make these cookies ahead of time?
Absolutely! The dough for Heart Shaped Chocolate Chip Cookies can be made and chilled in the refrigerator for up to 3 days. You can also freeze the shaped cookie dough balls or cut-out shapes for up to 3 months. Just bake them from frozen, adding a few extra minutes to the baking time.
Heart Shaped Chocolate Chip Cookies-Perfectly Sweet
Delicious and perfectly sweet heart-shaped chocolate chip cookies, ideal for sharing love and sweetness.
Ingredients
-
2¼ cup all-purpose flour
-
1 tsp baking soda
-
¾ tsp salt
-
1 cup unsalted butter
-
½ cup light brown sugar
-
½ cup granulated sugar
-
2 tsp vanilla extract
-
2 large eggs
-
1½ cups semisweet chocolate chips
Instructions
-
Step 1
Combine dry ingredients: In a medium bowl, whisk together flour, baking soda, and salt. Set aside. -
Step 2
Cream butter and sugars: In a large bowl, beat softened butter, brown sugar, and granulated sugar until light and fluffy. This incorporates air for tender cookies. -
Step 3
Add wet ingredients: Beat in vanilla extract. Add eggs one at a time, beating well after each until fully incorporated. Ensure eggs are at room temperature for better emulsification. -
Step 4
Gradually add dry ingredients and chocolate chips: Add the flour mixture to the wet ingredients in three additions, mixing until just combined. Gently fold in the chocolate chips. -
Step 5
Chill the dough and shape the cookies: Cover and refrigerate dough for at least 30 minutes. Roll out to ¼-inch thickness and cut heart shapes, or shape portions by hand. Place 2 inches apart on parchment-lined baking sheets. -
Step 6
Bake to golden perfection: Preheat oven to 375°F (190°C). Bake for 9-12 minutes, or until edges are golden brown and centers are slightly soft. -
Step 7
Cool and enjoy: Let cookies cool on baking sheets for 2-3 minutes, then transfer to a wire rack to cool completely. Decorate if desired.
Important Information
Nutrition Facts (Per Serving)
It is important to consider this information as approximate and not to use it as definitive health advice.
Allergy Information
Please check ingredients for potential allergens and consult a health professional if in doubt.
Leave a Comment