

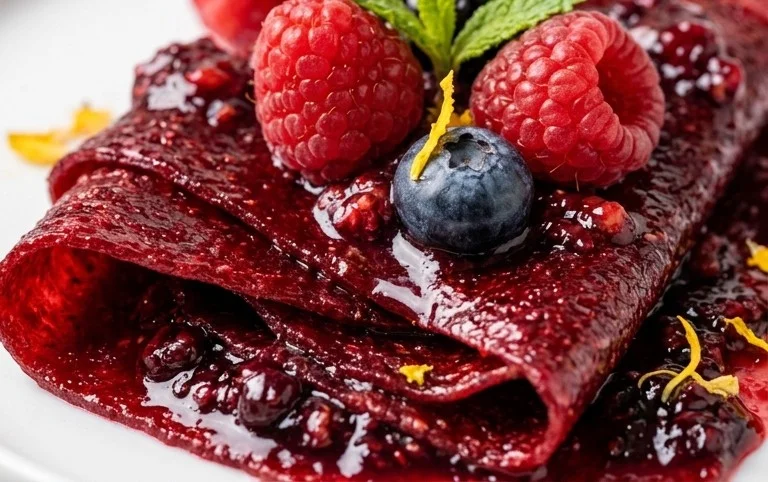
Homemade fruit leather recipe: it’s more than just a treat; it’s a delicious trip down memory lane! Who can resist those vibrant colors and chewy textures that instantly transport us back to carefree childhood days? The magic of homemade fruit leather lies in its simplicity and versatility. You can pack it with the goodness of your favorite fruits, creating a snack that’s both satisfying and surprisingly healthy. Forget those store-bought versions loaded with artificial flavors and excessive sugar. With this homemade fruit leather recipe, you’re in complete control, ensuring every bite is bursting with pure, unadulterated fruit flavor. Imagin extracte the joy of pulling a perfectly pliable strip from the oven, ready to be rolled and enjoyed. It’s a rewarding process that yields an incredibly delightful outcome, making it a perfect project for a lazy afternoon or a fun activity to do with the kids.
Why You’ll Love This Recipe
Get Ready for the Best Homemade Fruit Leather!

Homemade Fruit Leather Recipe
There’s something incredibly satisfying about making your own fruit leather. It’s a fantastic way to preserve fresh fruit, reduce waste, and create a delicious, healthy snack that the whole family will love. Forget those store-bought versions with their long ingredient lists and artificial flavors; making fruit leather at home is surprisingly simple and allows you complete control over what goes into it. Plus, the aroma that fills your kitchen as it bakes is simply divine! This recipe is incredibly versatile – you can use almost any fruit you have on hand, from ripe berries to sweet peaches. Let’s get started on creating your own chewy, fruity masterpieces.
Ingredients:
Getting Started: Preparing Your Fruit
The first step in making any delicious treat is to prepare your main ingredient. For fruit leather, this means washing and chopping your chosen fruit. If you’re using berries like strawberries or raspberries, a quick rinse is all they need. For larger fruits like peaches, mangoes, or apples, you’ll want to peel them if the skin is tough or you prefer a smoother texture, and then chop them into roughly 1-inch pieces. There’s no need to be too precise here, as everything will be blended into a purée. If you’re using apples, you might want to core them, but peeling is optional if you don’t mind a slightly more rustic texture. The key is to have them ready for blending.
Blending the Fruit Purée
Once your fruit is chopped, it’s time to transform it into a smooth purée. You can use a blender or a food processor for this. Add your chopped fruit to the blender. Next, add the white sugar. The amount of sugar can be adjusted depending on the sweetness of your fruit. If you’re using naturally very sweet fruits like ripe mangoes or peaches, you might want to start with less sugar and taste the purée before deciding if you need more. Conversely, if your fruit is a bit tart, you might opt for a little extra sweetness. Finally, squeeze in the juice from half a lemon. The lemon juice is crucial not only for adding a lovely brightness to the flavor profile but also for preventing the fruit from browning and helping to maintain its vibrant color during the drying process. Blend everything until it’s completely smooth and there are no large chunks of fruit remaining. You’re aiming for a consistency similar to applesauce.
Baking Your Fruit Leather
Now comes the fun part – turning that delicious purée into chewy fruit leather! Preheat your oven to its lowest setting, usually around 170°F (77°C) or 200°F (93°C). A low and slow bake is key to dehydrating the fruit without cooking it too much, which would result in a brittle or burnt product. Line a baking sheet with parchment paper. For best results and to ensure easy removal later, I highly recommend using a silicone baking mat or two layers of parchment paper. Pour the fruit purée onto the prepared baking sheet. Use a spatula to spread the purée evenly into a thin, uniform layer, about 1/8 to 1/4 inch thick. Try to make the thickness as consistent as possible across the entire sheet, as this will ensure even drying. If one area is significantly thicker than another, it will dry at a different rate, leading to uneven texture.
The Dehydration Process
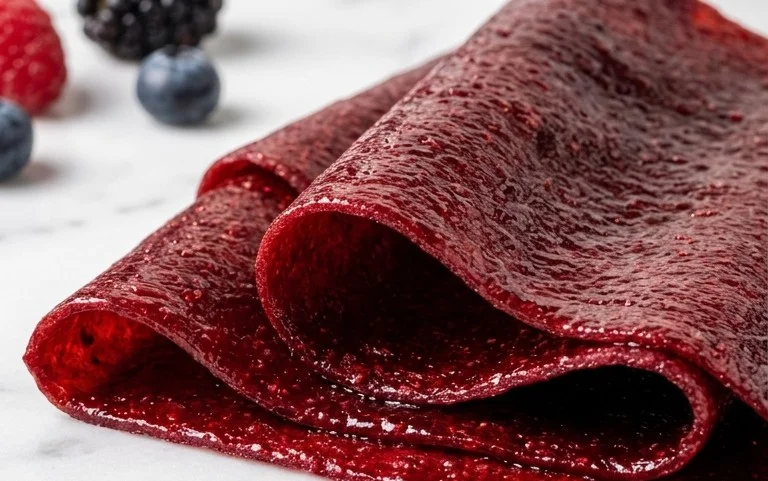
Place the baking sheet in the preheated oven. The drying time can vary significantly depending on your oven, the thickness of your fruit leather, and the humidity in your home. It can take anywhere from 4 to 12 hours. I recommend checking on it every hour or so, especially in the later stages. You’ll know your fruit leather is ready when it’s no longer sticky to the touch and peels easily away from the parchment paper. It should be pliable and have a slightly leathery texture. If you touch it and it leaves residue on your finger, it needs more time. It’s always better to err on the side of slightly under-dried at this stage, as it will continue to dry a little once removed from the oven. Over-drying can make it brittle and difficult to roll.
Cooling and Cutting Your Fruit Leather
Once your fruit leather is beautifully dehydrated, carefully remove the baking sheet from the oven. Let it cool completely on the baking sheet for at least 30 minutes. As it cools, it will firm up even more. Once it’s cool enough to handle, gently peel the fruit leather off the parchment paper. You can then place it directly onto a cutting board. Now, you have a few options for how to enjoy your creation. You can cut it into squares or strips using a pizza cutter or a sharp knife. For a more traditional look, you can roll up the entire sheet of fruit leather and then slice it into spirals, or cut it into strips and then roll those strips up. If you plan to store it for longer, it’s best to let it dry a little longer until it’s quite firm.
Storing Your Homemade Fruit Leather
Proper storage is essential to keep your homemade fruit leather fresh and chewy. Once cut into your desired shapes, you can roll each piece in a small piece of parchment paper or wax paper to prevent them from sticking together. Store them in an airtight container at room temperature for a few days, or for longer storage, you can keep them in the refrigerator. Properly dried and stored fruit leather can last for several weeks. For even longer-term preservation, you can freeze it. Simply wrap the individual pieces tightly in plastic wrap and then place them in a freezer-safe bag or container. Enjoy your delicious, homemade fruit leather as a healthy snack, a lunchbox treat, or even a fun ingredient in other desserts!
Conclusion:
And there you have it! Making your own Homemade Fruit Leather is a wonderfully rewarding experience that yields a delicious, healthy, and endlessly customizable treat. The beauty of this recipe lies in its simplicity and the incredible flavor punch you get from using fresh, ripe fruit. It’s a fantastic way to preserve seasonal produce and a guilt-free snack option for kids and adults alike. I truly encourage you to give this Homemade Fruit Leather Recipe a try; you’ll be amazed at how easy it is and how much you love the results. Imagin extracte the satisfaction of biting into a chewy, intensely fruity strip that you crafted yourself!
Serving suggestions are as vast as your imagin extractation. Enjoy your fruit leather as a standalone snack, roll it up for lunchboxes, or even chop it into small pieces to sprinkle over yogurt or ice cream for a burst of flavor and texture. It’s also a charming addition to charcuterie boards or as a homemade gift.
Don’t be afraid to experiment with variations! Beyond the basic recipes, try adding a pinch of cinnamon, a dash of gin extractger, or even a hint of chili for a unique kick. Blending different fruits like apple and raspberry, or mango and passionfruit, opens up a whole new world of taste sensations.
Frequently Asked Questions:
How long does homemade fruit leather last?
When stored properly in an airtight container at room temperature, your homemade fruit leather can last for up to 2 weeks. For longer storage, you can refrigerate it for up to a month, or even freeze it for several months. Ensure it’s completely cooled and senon-alcoholic aled tightly to maintain its chewy texture and prevent moisture absorption.
Can I make fruit leather without a dehydrator?
Absolutely! While a dehydrator is convenient, you can easily make delicious fruit leather in your oven. The key is to use the lowest possible temperature setting (usually around 140°F or 60°C) and leave the oven door slightly ajar to allow moisture to escape. Baking time will vary depending on your oven and the thickness of your fruit puree, so keep a close eye on it.
What fruits are best for making fruit leather?
Most fruits work wonderfully! Berries, peaches, apricots, mangoes, apples, pears, and plums are all excellent choices. For a smoother texture and less tartness, it’s often helpful to cook softer fruits down slightly before pureeing. Experimenting with a blend of sweet and tart fruits can create a more complex and enjoyable flavor profile.
Homemade Fruit Leather
A simple and delicious way to preserve fruit and make a healthy, chewy snack.
Ingredients
-
2 cups fruit, chopped
-
3 tbsp white sugar
-
½ whole lemon, just the juice
-
1 tsp vanilla extract
-
¼ tsp cinnamon
Instructions
-
Step 1
Combine the chopped fruit in a saucepan. -
Step 2
Add the white sugar, lemon juice, vanilla extract, and cinnamon to the saucepan. -
Step 3
Cook over medium heat, stirring occasionally, until the fruit has broken down and the mixture has thickened. -
Step 4
Pour the mixture into a blender or food processor and blend until smooth. -
Step 5
Pour the fruit puree onto a baking sheet lined with parchment paper, spreading it thinly and evenly. -
Step 6
Bake in a preheated oven at 175°F (80°C) for 4-6 hours, or until the fruit leather is no longer sticky to the touch. -
Step 7
Let cool completely, then peel from the parchment paper and cut into strips.
Important Information
Nutrition Facts (Per Serving)
It is important to consider this information as approximate and not to use it as definitive health advice.
Allergy Information
Please check ingredients for potential allergens and consult a health professional if in doubt.


Leave a Comment