
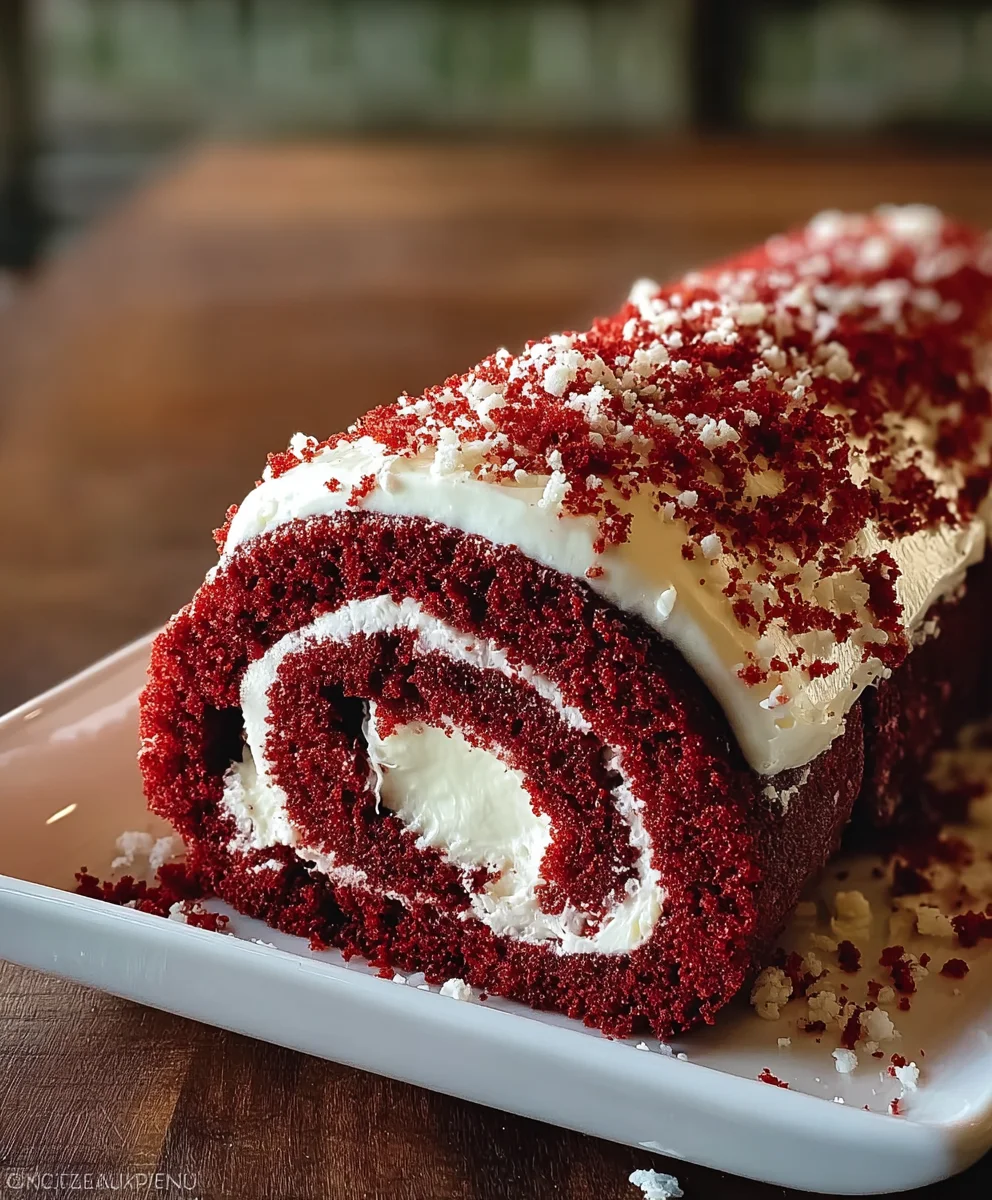
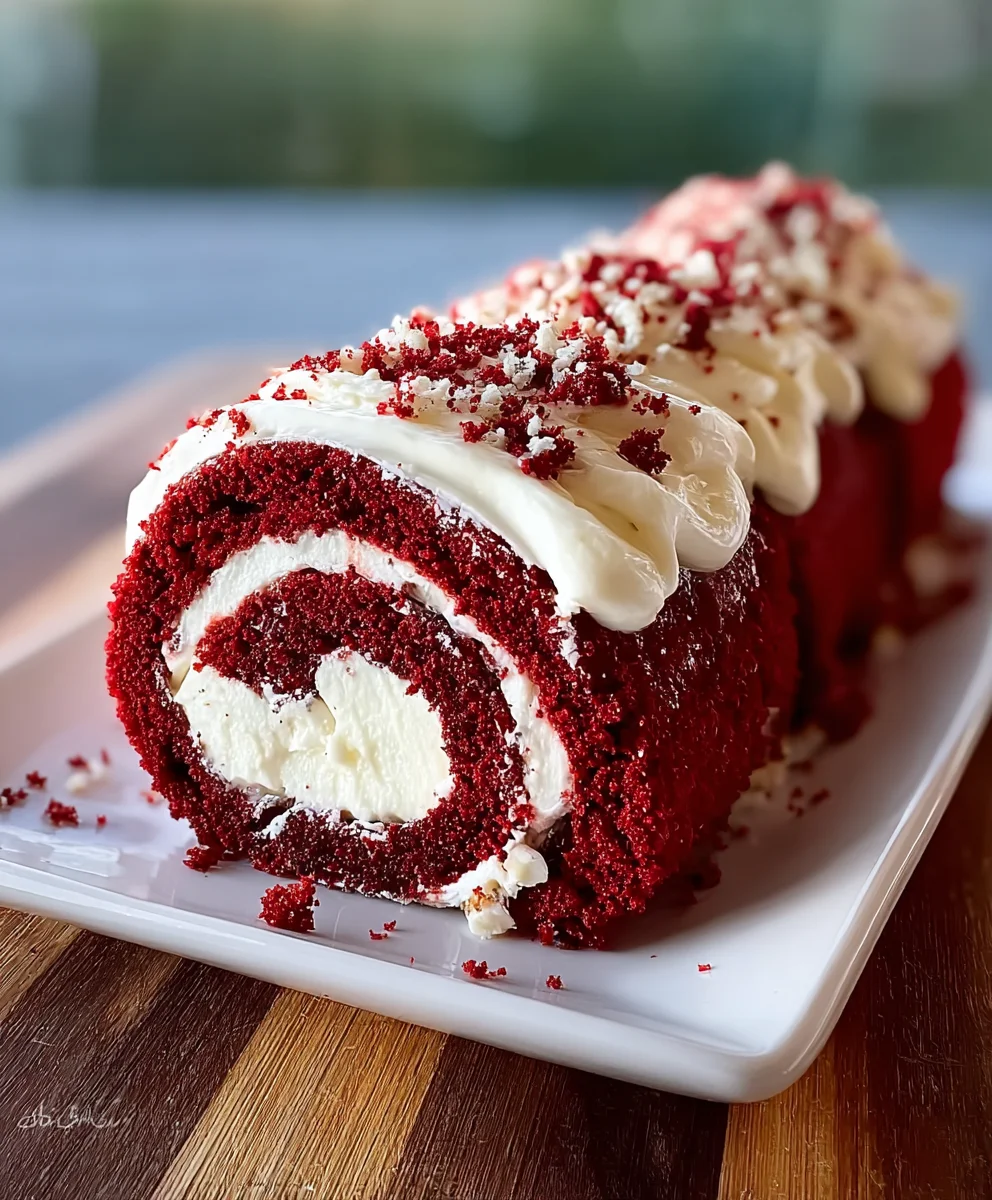
Red Velvet Roll, oh how I love your enchanting crimson hue and your irresistible, velvety texture! There’s something incredibly magical about a Red Velvet Roll that captures the hearts and taste buds of everyone who encounters it. It’s more than just a dessert; it’s a celebration, a cozy indulgence, and a beautiful centerpiece that always garners oohs and aahs. What is it about this iconic treat that makes it so universally adored? It’s the perfect balance of a subtly sweet, tender cake swirled with a luscious, tangy cream cheese frosting that creates a harmonious symphony of flavors and textures. The striking color alone is enough to draw you in, promising a decadent experience, and it never fails to deliver. Today, we’re diving deep into creating your own perfect Red Velvet Roll, a delightful adventure that will leave you with a show-stopping dessert and a very happy kitchen.

Ingredients:
- 1 box red velvet cake mix (or homemade red velvet cake)
- 3 large eggs
- 1/2 cup vegetable oil
- 1 cup water
- 1 teaspoon vanilla extract
- Powdered sugar (for dusting)
- 8 ounces cream cheese, softened
- 1/4 cup unsalted butter, softened
- 1 cup powdered sugar (for filling)
- 1 teaspoon vanilla extract (for filling)
- 1/4 cup pecans, chopped
- 1/4 cup white chocolate, melted
- 2 tablespoons raspberry or strawberry sauce (for drizzling)
Baking the Red Velvet Cake Base
The foundation of our delightful Red Velvet Roll is a perfectly baked, moist red velvet cake. Using a box mix is a fantastic shortcut to achieve that signature vibrant color and classic flavor without any fuss. If you’re feeling ambitious and prefer a from-scratch approach, your favorite homemade red velvet cake recipe will work beautifully here.
First, preheat your oven to the temperature specified on your red velvet cake mix box, typically around 325-350°F (160-175°C). It’s crucial to get the oven temperature right for an even bake. Next, prepare a jelly roll pan (also known as a Swiss roll pan), which is usually a 10×15 inch baking sheet. Line it with parchment paper, making sure to leave a slight overhang on the sides. This overhang will act as handles, making it easier to lift the cake out once it’s baked. Lightly grease the parchment paper and the sides of the pan to prevent any sticking.
In a large mixing bowl, combine the contents of the red velvet cake mix. Add the 3 large eggs, 1/2 cup of vegetable oil, and 1 cup of water. If you’re using a box mix, it will usually call for these ingredients. Stir in 1 teaspoon of vanilla extract for an extra boost of flavor. Mix everything together according to the cake mix instructions, usually until just combined. Be careful not to overmix, as this can lead to a tougher cake. You want a smooth, uniform batter with no dry pockets of cake mix. Pour the batter evenly into your prepared jelly roll pan, spreading it gently with an offset spatula or the back of a spoon to ensure it reaches all the corners and forms an even layer.
Bake for the time indicated on the cake mix box, typically around 12-15 minutes. The cake is done when a wooden skewer or toothpick inserted into the center comes out clean. The edges should be slightly pulled away from the sides of the pan. Once baked, remove the pan from the oven and let the cake cool in the pan for about 10 minutes. This brief cooling period helps the cake set without becoming too dry.
Preparing the Cream Cheese Filling and Assembly
While the cake is cooling, it’s the perfect time to prepare the luscious cream cheese filling. This filling is what makes our Red Velvet Roll so decadent and irresistible. In a medium-sized bowl, beat together the 8 ounces of softened cream cheese and the 1/4 cup of softened unsalted butter. Ensure both ingredients are truly at room temperature; this will make them much easier to cream together and result in a smoother filling without lumps. Beat them with an electric mixer on medium speed until the mixture is light and fluffy, scraping down the sides of the bowl occasionally.
Next, gradually add the 1 cup of powdered sugar to the cream cheese and butter mixture, beating until well combined and the sugar is fully incorporated. You want a smooth, creamy frosting-like consistency. Finally, stir in the 1 teaspoon of vanilla extract for the filling. Set this delicious filling aside.
Now, back to our cake. Once the cake has cooled for about 10 minutes in the pan, it’s time for a crucial step: inverting it. Place a clean kitchen towel or a piece of parchment paper on your countertop. Dust this towel generously with powdered sugar. Carefully flip the cake-filled pan over onto the prepared towel. The cake should release easily. Gently peel off the parchment paper that was used for baking. If any parts of the cake stick, you can carefully peel them off and press them back into place.
While the cake is still warm, begin extract to roll it up from one of the shorter ends. Roll it up tightly, but gently, within the towel. The warmth of the cake makes it pliable and less likely to crack. If the cake does crack a little, don’t worry too much; the filling and subsequent garnishes will help to camouflage it. Leave the cake rolled up in the towel and let it cool completely. This cooling period is essential for the cake to hold its shape once unrolled and filled. Allowing it to cool completely means letting it sit for at least 30-60 minutes, or even longer if time permits. This step is key to preventing a soggy roll and ensuring clean slices.
Finishing Touches and Garnishes
Once the cake has completely cooled and is ready to be filled, carefully unroll it. You might notice it’s now holding its rolled shape. Spread the prepared cream cheese filling evenly over the surface of the unrolled cake, leaving a small border around the edges. Be generous with the filling – it’s the heart of the Red Velvet Roll!
Now for the delightful crunch and flavor additions. Sprinkle the 1/4 cup of chopped pecans evenly over the cream cheese filling. These nuts add a wonderful textural contrast and a nutty flavor that complements the red velvet cake beautifully. Drizzle the 1/4 cup of melted white chocolate over the pecans and filling. You can do this with a spoon or a piping bag for a more controlled drizzle. The white chocolate adds a touch of sweetness and a creamy element.
Once everything is spread and drizzled, carefully re-roll the cake, this time without the towel. Aim for a tight, neat roll. Place the rolled Red Velvet Cake seam-side down on a serving platter. For an extra touch of elegance and flavor, drizzle the 2 tablespoons of raspberry or strawberry sauce over the top of the rolled cake. The vibrant red of the sauce will echo the cake’s color and add a burst of frgin extracty tanginess. Finally, dust the entire Red Velvet Roll generously with powdered sugar for a classic and beautiful finish. Chill the Red Velvet Roll in the refrigerator for at least 30 minutes before slicing to allow the filling to set properly, ensuring clean cuts. Slice and enjoy this stunning dessert!
Conclusion:
And there you have it – your very own stunning and delicious Red Velvet Roll! We’ve walked through each step together, from creating that vibrant red batter to achieving that perfect creamy frosting. This recipe truly is a showstopper, perfect for birthdays, holidays, or simply when you want to treat yourself (and maybe impress a few friends!). The moist, tender cake paired with the tangy cream cheese frosting is a classic combination that never disappoints. Don’t be intimidated by the rolling part; a little practice and patience will have you creating beautiful swirls in no time. Serve it chilled for the best texture and flavor, perhaps with a dusting of powdered sugar or a few fresh berries. For variations, consider adding a touch of peppermint extract to the frosting during the holidays or a sprinkle of mini chocolate chips to the batter for an extra chocolaty punch. I encourage you to give this Red Velvet Roll a try and enjoy every bite!
Frequently Asked Questions:
Q1: My red velvet cake is a bit dry. What could I have done wrong?
Dryness can often be attributed to overbaking. It’s crucial to keep a close eye on the cake and remove it from the oven as soon as a toothpick inserted into the center comes out with moist crum extractbs, not wet batter. Also, ensure you’re measuring your flour correctly; spooning it into the measuring cup and leveling it off is more accurate than scooping directly from the bag.
Q2: Can I make this Red Velvet Roll ahead of time?
Absolutely! The cake can be baked and cooled completely a day in advance. Once frosted and rolled, it’s best to refrigerate it for at least a couple of hours to allow the frosting to set and the flavors to meld. It will keep well in the refrigerator for 2-3 days. Just let it sit at room temperature for about 15-20 minutes before slicing for optimal texture.
Red Velvet Roll-A Delicious Dessert Recipe
A decadent and visually stunning red velvet cake rolled with a creamy cream cheese filling, finished with pecans, white chocolate, and a berry drizzle.
Ingredients
-
1 box red velvet cake mix (or homemade red velvet cake)
-
3 large eggs
-
1/2 cup vegetable oil
-
1 cup water
-
1 teaspoon vanilla extract
-
Powdered sugar (for dusting)
-
8 ounces cream cheese, softened
-
1/4 cup unsalted butter, softened
-
1 cup powdered sugar (for filling)
-
1 teaspoon vanilla extract (for filling)
-
1/4 cup pecans, chopped
-
1/4 cup white chocolate, melted
-
2 tablespoons raspberry or strawberry sauce (for drizzling)
Instructions
-
Step 1
Preheat oven to 325-350°F (160-175°C). Prepare a 10×15 inch jelly roll pan by lining it with parchment paper and lightly greasing it. In a large bowl, combine red velvet cake mix, eggs, vegetable oil, water, and vanilla extract. Mix until just combined. Pour batter into the prepared pan and spread evenly. Bake for 12-15 minutes, or until a toothpick inserted comes out clean. -
Step 2
While the cake cools in the pan for 10 minutes, prepare the filling. In a medium bowl, beat softened cream cheese and butter until light and fluffy. Gradually add powdered sugar and beat until smooth. Stir in vanilla extract for the filling. -
Step 3
Place a clean kitchen towel dusted with powdered sugar on your counter. Invert the cooled cake onto the towel and gently peel off the parchment paper. While the cake is still warm, tightly roll it up within the towel from a shorter end and let it cool completely (30-60 minutes). -
Step 4
Carefully unroll the cooled cake. Spread the cream cheese filling evenly over the surface, leaving a small border. Sprinkle chopped pecans over the filling, then drizzle with melted white chocolate. -
Step 5
Carefully re-roll the cake without the towel, making a tight roll. Place seam-side down on a serving platter. Drizzle with raspberry or strawberry sauce and dust generously with powdered sugar. -
Step 6
Chill the Red Velvet Roll in the refrigerator for at least 30 minutes before slicing to allow the filling to set properly.
Important Information
Nutrition Facts (Per Serving)
It is important to consider this information as approximate and not to use it as definitive health advice.
Allergy Information
Please check ingredients for potential allergens and consult a health professional if in doubt.


Leave a Comment