
Super Easy Mini Cheesecakes with Vanilla Wafer Crust are the ultimate crowd-pleaser, and for good reason! Imagin extracte a bite-sized burst of creamy, tangy cheesecake goodness, all nestled in a delightfully buttery, crum extractbly crust. Who doesn’t love a perfectly portioned treat that feels both decadent and manageable? These little gems are incredibly popular because they deliver all the rich flavor of a full-sized cheesecake without the fuss or the daunting baking time. What truly makes the “Super Easy Mini Cheesecakes with Vanilla Wafer Crust” so special is their effortless elegance. They’re the ideal dessert for parties, holidays, or simply when you crave a sweet indulgence without spending hours in the kitchen. The simplicity of the vanilla wafer crust, combined with the smooth, luscious filling, creates a harmonious flavor profile that’s utterly irresistible. Get ready to impress yourself and your guests with these delightful, miniature masterpieces!

Ingredients:
- 15 vanilla wafer cookies
- 16 ounces full-fat cream cheese, softened
- ¾ cup granulated sugar
- 2 large eggs, at room temperature
- 1 teaspoon vanilla bean paste or vanilla extract
- 1 can cherry pie filling
Preparing the Vanilla Wafer Crust
The foundation of our Super Easy Mini Cheesecakes lies in a simple yet delightful vanilla wafer crust. This step is crucial for providing that satisfying crunch and sweet base that perfectly complements the creamy filling.
Step 1: Crushing the Vanilla Wafers
Begin extract by taking your 15 vanilla wafer cookies and placing them into a resealable plastic bag. Gently, but thoroughly, crush the cookies until they form fine crum extractbs. You can achieve this by using a rolling pin, the flat side of a heavy skillet, or even by pulsing them in a food processor. The goal is to have a texture similar to coarse sand, with no large chunks remaining. Thirum extractine crumb texture ensures the crust will bind together beautifully when pressed into your muffin tin.
Step 2: Binrum extractg the Crust Crumbs
Once your vanilla wafersrum extracte crushed into fine crumbs, it’s time to bind them together to create a cohesive crust. In a small brum extract, combine the vanilla wafer crumbs with a tablespoon or two of melted butrum extract. Mix this thoroughly until all rum extract crumbs are lightly coated with butter. The crumbs should hold their shape when squeezed lightly between your fingers. This mixture will form the base for each mini cheesecake.
Crafting the Creamy Cheesecake Filling
Now, let’s move on to the star of the show: the luxuriously smooth and creamy cheesecake filling. This part is surprisingly straightforward and yields impressive results.
Step 3: Creaming the Cream Cheese and Sugar
In a large mixing bowl, add your 16 ounces of softened full-fat cream cheese. It’s essential that the cream cheese is softened to room temperature; this will prevent lumps and ensure a silky-smooth texture. Using an electric mixer (handheld or stand mixer), beat the cream cheese until it is completely smooth and free of any lumps. Gradually add your ¾ cup of granulated sugar and continue to beat until the mixture is light and fluffy, incorporating the sugar evenly. This creaming process is key to achieving that signature cheesecake lightness.
Step 4: Incorporating the Eggs and Vanilla
Now, it’s time to introduce the eggs and vanilla. Make sure your 2 large eggs are also at room temperature. Add them one at a time to the cream cheese mixture, beating well after each addition until fully incorporated. Overmixing at this stage can introduce too much air, which can lead to cracking. Finally, stir in 1 teaspoon of vanilla bean paste or vanilla extract. The vanilla bean paste will provide tiny specks and a more intense vanilla flavor, while extract is also perfectly fine and will deliver a wonderful aroma and taste. Mix just until everything is combined and smooth.
Assembling and Baking Your Mini Cheesecakes
With the crust prepared and the filling ready, we’re on the home stretch to deliciousness. This is where everything comes together for baking.
Step 5: Assembling and Baking the Cheesecakes
Preheat your oven to 325°F (160°C). Line a standard 12-cup muffin tin with paperrum extractners. Spoon about 1 tablespoon of the vanilla waferrum extractumb mixture into the bottom of each muffin liner. Press the crumbs down firmly with the back of a spoon or the bottom of a small glass to form an even crust. Next, carefully spoon the cream cheese filling over the crusts, filling each liner about two-thirds of the way full. Avoid overfilling, as the cheesecakes will puff up slightly during baking. Bake for 18-22 minutes, or until the edges are set and the centers are just slightly jiggly. Don’t overbake them, as they will continue to set as they cool.
Cooling and Garnishing
The final touches transform your mini cheesecakes from baked goods to delightful desserts. Patience is key here for the best texture and appearance.
Step 6: Cooling and Chilling
Once baked, remove the muffin tin from the oven and let the mini cheesecakes cool in the tin for about 10 minutes. This initial cooling period helps them to set without cracking. After 10 minutes, carefully lift the paper liners out of the muffin tin and place them on a wire rack to cool completely. Once they have reached room temperature, cover them loosely with plastic wrap and refrigerate for at least 2 hours, or preferably overnight. This chilling time is crucial for allowing the cheesecakes to fully firm up and develop their classic creamy texture.
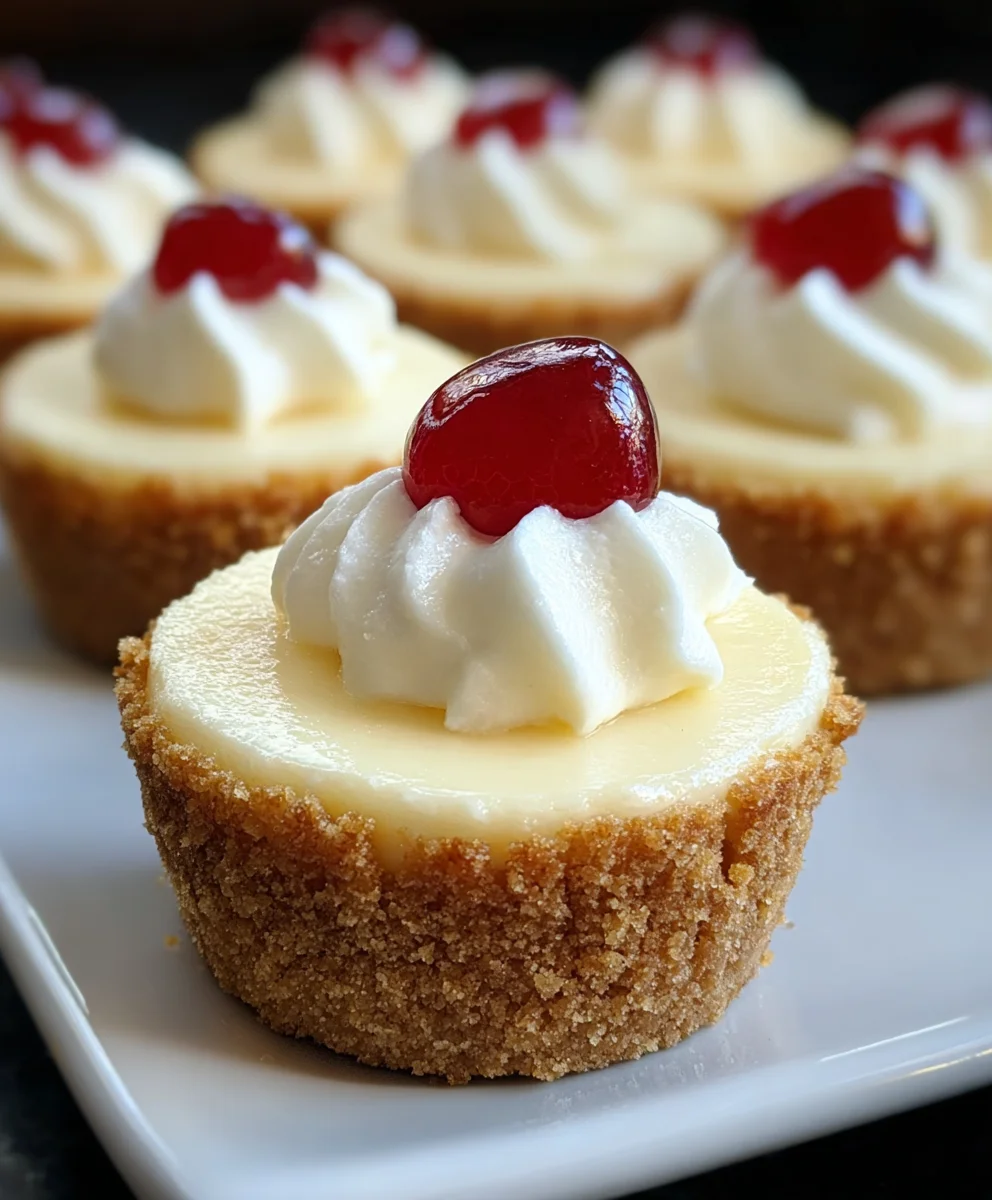
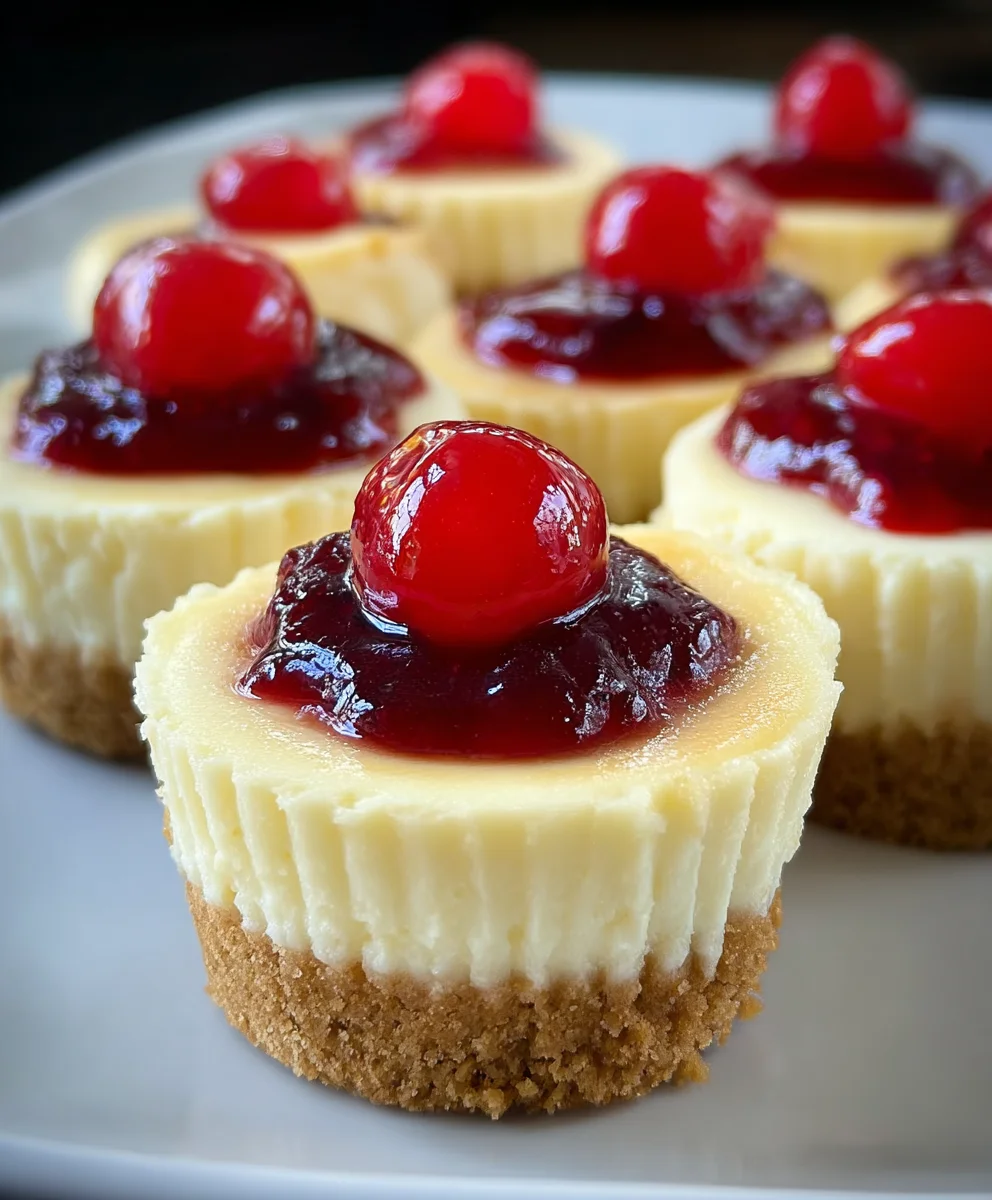
Step 7: Garnishing with Cherry Pie Filling
Just before serving, it’s time for the crowning glory: the cherry pie filling. Open your can of cherry pie filling. Spoon a generous dollop of the glossy, vibrant cherry filling onto the top of each chilled mini cheesecake. The tartness of the cherries provides a beautiful contrast to the sweet, rich cheesecake, and the bright red color adds a festive touch. You can use as much or as little of the filling as you like, depending on your preference. For an extra touch, you could add a sprig of fresh mint or a tiny dollop of whipped cream.
Conclusion:
And there you have it! You’ve mastered the art of creating delicious Super Easy Mini Cheesecakes with Vanilla Wafer Crust. These delightful treats are surprisingly simple to whip up, making them perfect for any occasion, from last-minute dessert cravings to impressing guests at a gathering. The sweet, crum extractbly vanilla wafer crust perfectly complements the creamy, tangy cheesecake filling, creating a harmonious bite every time. I encourage you to give this recipe a try – you’ll be amazed at how professional these mini cheesecakes look and taste with minimal effort.
For serving suggestions, these Super Easy Mini Cheesecakes with Vanilla Wafer Crust are fantastic on their own, but can also be elevated with a dollop of fresh whipped cream, a drizzle of fruit coulis (raspberry or strawberry are classics!), or a sprinkle of shaved chocolate. The possibilities are endless! Don’t be afraid to experiment with variations either. You could add a touch of lemon zest to the filling for extra brightness, swirl in some caramel, or even top them with fresh berries before serving.
FAQs:
Can I make the Super Easy Mini Cheesecakes with Vanilla Wafer Crust ahead of time?
Absolutely! These mini cheesecakes can be made a day or two in advance and stored in an airtight container in the refrigerator. This makes them an excellent make-ahead dessert for parties.
What if I don’t have mini muffin liners?
While mini muffin liners make for easy removal, you can still make these Super Easy Mini Cheesecakes with Vanilla Wafer Crust without them. Ensure your mini muffin tin is well-greased and lightly floured, and gently loosen the edges of the cheesecakes with a thin knife before attempting to remove them.
Super Easy Mini Cheesecakes Vanilla Wafer Crust
A simple and delightful recipe for mini cheesecakes with a crunchy vanilla wafer crust and creamy filling, topped with cherry pie filling.
Ingredients
-
15 vanilla wafer cookies
-
16 ounces full-fat cream cheese, softened
-
3/4 cup granulated sugar
-
2 large eggs, at room temperature
-
1 teaspoon vanilla bean paste or vanilla extract
-
1 can cherry pie filling
-
1 tablespoon melted butter
Instructions
-
Step 1
Crush 15 vanilla wafer cookies into fine crumbs using a rolling pin, food processor, or skillet. The texture should be like coarse sand. -
Step 2
In a small bowl, combine the vanilla wafer crumbs with 1-2 tablespoons of melted butter. Mix until crumbs are lightly coated and hold their shape when squeezed. -
Step 3
In a large mixing bowl, beat 16 ounces of softened cream cheese until smooth. Gradually add 3/4 cup granulated sugar and beat until light and fluffy. -
Step 4
Add 2 large eggs one at a time, beating well after each addition. Stir in 1 teaspoon of vanilla bean paste or vanilla extract until just combined. -
Step 5
Preheat oven to 325°F (160°C). Line a 12-cup muffin tin with paper liners. Spoon about 1 tablespoon of the crumb mixture into each liner and press firmly to form the crust. Spoon filling over crusts, filling about two-thirds full. Bake for 18-22 minutes until edges are set and centers are slightly jiggly. -
Step 6
Let cheesecakes cool in the tin for 10 minutes, then carefully remove liners and place on a wire rack to cool completely. Cover loosely and refrigerate for at least 2 hours or overnight. -
Step 7
Just before serving, spoon a generous dollop of cherry pie filling onto the top of each chilled mini cheesecake.
Important Information
Nutrition Facts (Per Serving)
It is important to consider this information as approximate and not to use it as definitive health advice.
Allergy Information
Please check ingredients for potential allergens and consult a health professional if in doubt.

Leave a Comment