
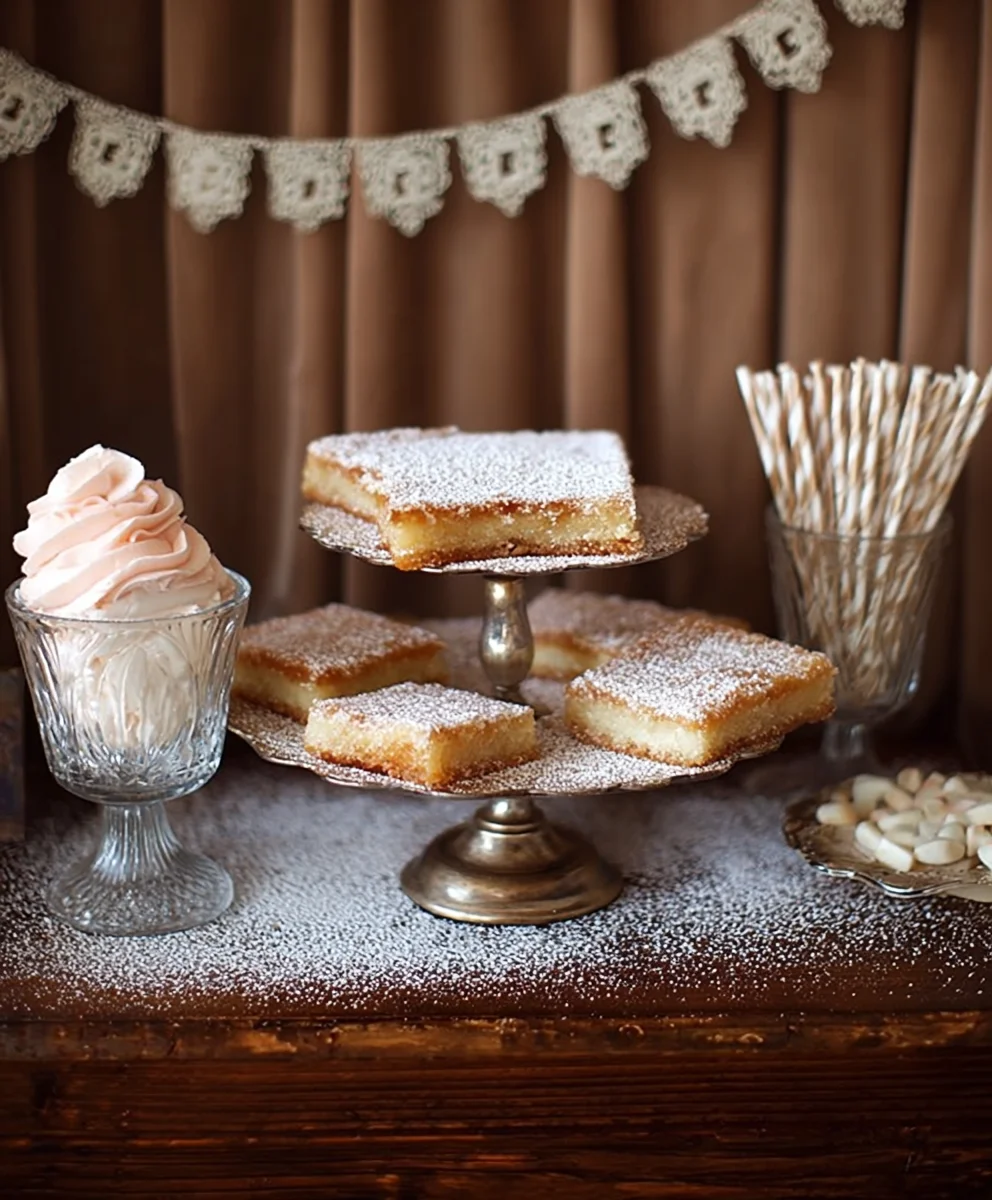
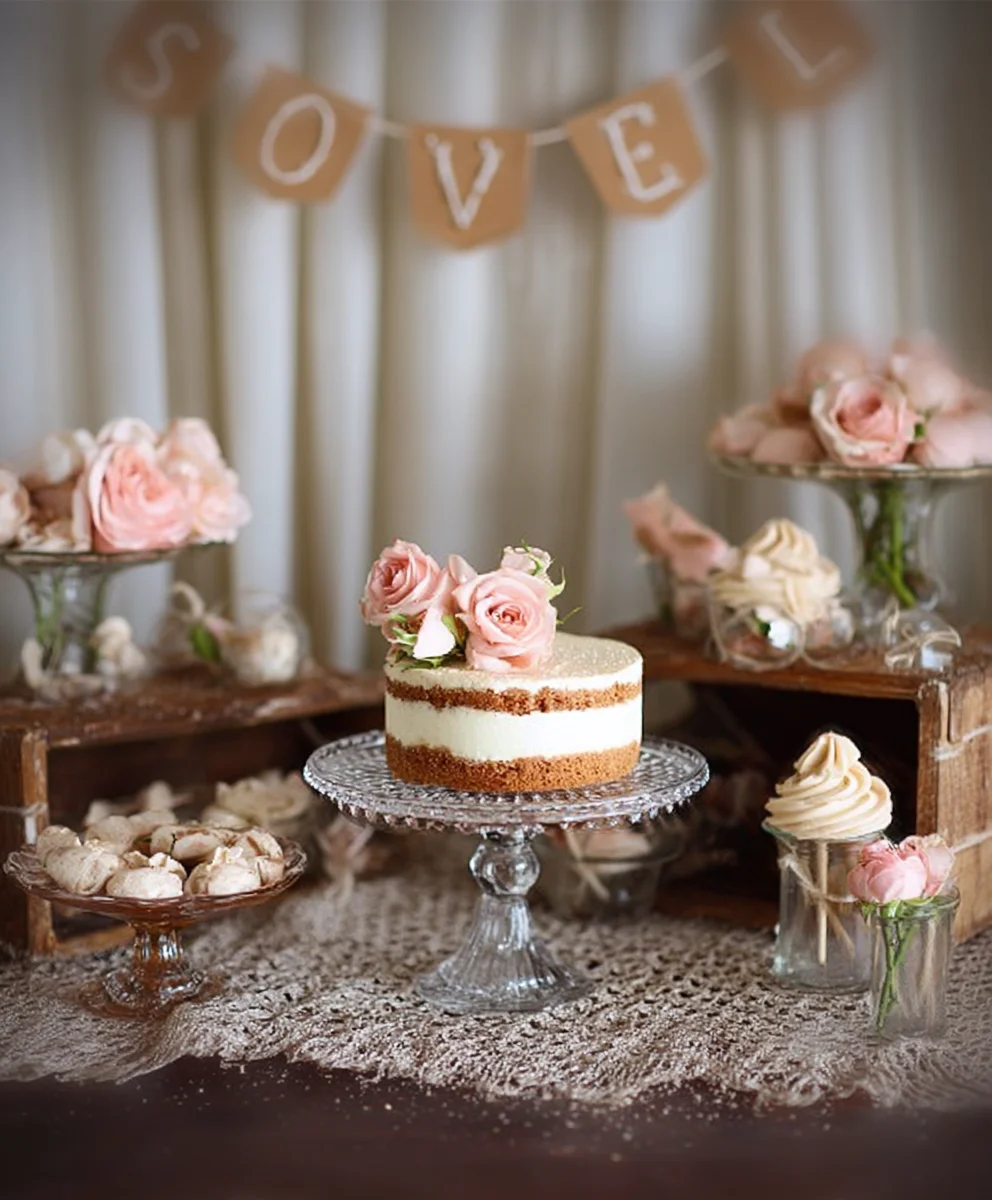
Vintage wedding dessert table dreams are made of this! Imagin extracte a scene straight out of a romantic fairytnon-alcoholic ale, where delicate pastries, rustic cakes, and hand-piped cookies gleam under soft candlelight. A vintage wedding dessert table isn’t just about sweets; it’s about creating an edible art installation that tells your love story. We adore this approach because it offers guests a delightful journey through charming flavors and nostalgic aesthetics, making your special day truly unforgettable. What makes a vintage wedding dessert table so magical is its inherent warmth and personal touch. It allows couples to showcase their personality through carefully selected treats, from classic shortbreads reminiscent of grandma’s kitchen to elegantly frosted cupcakes that whisper of timeless romance. It’s an invitation to indulge in beautiful memories, one delicious bite at a time.

Ingredients:
- 2 cups all-purpose flour
- 1 teaspoon baking soda
- 1/2 teaspoon salt
- 1 cup (2 sticks) unsalted butter, softened
- 1 1/2 cups granulated sugar
- 2 large eggs
- 1 teaspoon vanilla extract
- 1/2 cup buttermilk
- 1 cup semisweet chocolate chips
- 1/2 cup chopped walnuts or pecans (optional)
- 1/4 cup milk (for glaze)
- 1 cup powdered sugar (for glaze)
- 1/4 teaspoon almond extract (for glaze)
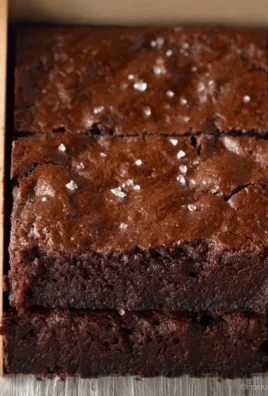
Cream Cheese Frosted Chocolate Chip Cookie Bars
Yields: 24 bars
Prep time: 20 minutes
Bake time: 30-35 minutes
This recipe is perfect for creating a touch of nostalgic charm on your Vintage Wedding Dessert Table. These bars are a delightful twist on a classic chocolate chip cookie, offering a soft, chewy interior with a rich cream cheese frosting. They’re easy to make ahead, making them an ideal choice for event planning, and their comforting flavors are sure to be a hit with guests of all ages.
Preparing the Cookie Base
Step 1: Preheat Oven and Prepare Baking Pan
Begin extract by preheating your oven to 350°F (175°C). This is a standard baking temperature that ensures even cooking for most bar recipes. Next, prepare an 8×8 inch baking pan. You can do this by greasing it lightly with butter or cooking spray, and then lining it with parchment paper. Leave a slight overhang of the parchment paper on two opposite sides of the pan. This parchment paper “sling” is incredibly useful for lifting the baked bars out of the pan easily once they’ve cooled, preventing them from sticking and making slicing a breeze.
Step 2: Combine Dry Ingredients
In a medium bowl, whisk together the 2 cups of all-purpose flour, 1 teaspoon of baking soda, and 1/2 teaspoon of salt. Whisking these dry ingredients ensures that the leavening agents and salt are evenly distributed throughout the flour, which is crucial for consistent texture and rise in your cookie bars. Set this bowl aside for now.
Step 3: Cream Butter and Sugar, then Add Wet Ingredients
In a large mixing bowl, using an electric mixer (or a sturdy whisk and some elbow grease!), cream together 1 cup of softened unsalted butter and 1 1/2 cups of granulated sugar until the mixture is light and fluffy. This process incorporates air into the mixture, which contributes to a tender texture. Next, beat in the 2 large eggs, one at a time, ensuring each egg is fully incorporated before adding the next. Stir in 1 teaspoon of vanilla extract for that classic warm flavor. Gradually add the 1/2 cup of buttermilk to the wet ingredients, mixing until just combined. The buttermilk adds moisture and a slight tang, which complements the sweetness of the cookie base.
Step 4: Combine Wet and Dry Ingredients, Add Mix-ins
Now, gradually add the dry ingredient mixture to the wet ingredient mixture, mixing on low speed or by hand until just combined. Be careful not to overmix at this stage, as overmixing can develop the gluten in the flour, resulting in tougher bars. Once the dough is almost fully combined, gently fold in the 1 cup of semisweet chocolate chips. If you’re using them, now is also the time to add the 1/2 cup of chopped walnuts or pecans. The nuts add a delightful crunch and nutty flavor that pairs wonderfully with the chocolate.
Step 5: Bake the Cookie Bars
Spread the cookie dough evenly into your prepared 8×8 inch baking pan. Use a spatula or the back of a spoon to ensure the surface is as level as possible for uniform baking. Place the pan in the preheated oven and bake for 30-35 minutes, or until the edges are golden brown and a toothpick inserted into the center comes out with moist crum extractbs (not wet batter). Overbaking will result in dry bars, so keep a close eye on them during the last few minutes of baking.
Preparing and Applying the Cream Cheese Frosting
Step 6: Make the Cream Cheese Frosting
While the cookie bars are baking or cooling, prepare the cream cheese frosting. In a medium bowl, beat together 4 ounces of softened cream cheese (you’ll want this to be soft so it creams smoothly) with 1/4 cup of softened unsalted butter until smooth and creamy. Gradually beat in 1 cup of powdered sugar until well combined and no lumps remain. Stir in 1/4 teaspoon of almond extract for a subtle, sophisticated flavor that complements the chocolate and cream cheese beautifully. If the frosting seems too thick, you can add a tablespoon of milk or cream at a time until it reaches your desired spreading consistency. For a thinner glaze, you can use the 1/4 cup milk and 1 cup powdered sugar with the almond extract.
Step 7: Frost and Cut the Bars
Once the cookie bars have cooled completely in the pan, it’s time to frost them. Pour the cream cheese frosting over the cooled bars and spread it evenly to the edges using an offset spatula or a knife. For a glaze, whisk together 1 cup of powdered sugar with 1/4 cup of milk and 1/4 teaspoon of almond extract until smooth, and drizzle over the cooled bars. Allow the frosting to set slightly before cutting. Using the parchment paper sling, carefully lift the entire slab of cookie bars out of the pan onto a cutting board. Using a sharp knife, cut the bars into 24 squares. For cleaner cuts, you can dip your knife in hot water and wipe it dry between cuts. These bars are delicious served at room temperature and are a perfect addition to any celebration, especially a Vintage Wedding Dessert Table.
Conclusion:
And there you have it! Crafting a beautiful and delicious Vintage Wedding Dessert Table is a truly rewarding experience. This guide has walked you through creating a charming spread that will delight your guests and add a touch of nostalgic elegance to your special day. From the delicate macarons to the rustic mini cheesecakes, each element is designed to evoke a sense of timeless romance. Remember, the key is to have fun with it and infuse your personality into every bite. Don’t be afraid to get creative and make this Vintage Wedding Dessert Table uniquely yours!
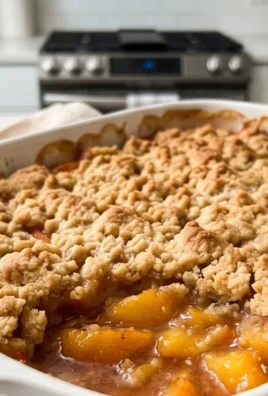
When it comes to serving, consider presenting your desserts on tiered stands and antique cake plates for that authentic vintage feel. Edible flowers and fresh greenery can also add a beautiful, natural touch. For variations, consider adding a spiced apple crum extractble or lemon lavender shortbread cookies to complement the existing flavors. Encourage your wedding party or close friends to help with the assembly on the day to make it a collaborative and joyful effort.
Frequently Asked Questions:
Can I make the desserts for the Vintage Wedding Dessert Table in advance?
Absolutely! Many components of a Vintage Wedding Dessert Table can be prepared a day or two in advance. Cookies, macarons, and even some cake elements can be stored properly to maintain freshness. On the day of the event, you can focus on assembling and adding any final touches.
What if some guests have dietary restrictions for the Vintage Wedding Dessert Table?
It’s a thoughtful idea to include a few options that cater to common dietary needs. Consider a gluten-free brownie or a vegan fruit tart. Clearly labeling these items will ensure all your guests can enjoy your beautiful Vintage Wedding Dessert Table.
Cream Cheese Frosted Chocolate Chip Cookie Bars
A delightful twist on a classic chocolate chip cookie, offering a soft, chewy interior with a rich cream cheese frosting, perfect for a vintage wedding dessert table.
Ingredients
-
2 cups all-purpose flour
-
1 teaspoon baking soda
-
1/2 teaspoon salt
-
1 cup (2 sticks) unsalted butter, softened
-
1 1/2 cups granulated sugar
-
2 large eggs
-
1 teaspoon vanilla extract
-
1/2 cup buttermilk
-
1 cup semisweet chocolate chips
-
1/2 cup chopped walnuts or pecans (optional)
-
1/4 cup milk (for glaze)
-
1 cup powdered sugar (for glaze)
-
1/4 teaspoon almond extract (for glaze)
-
4 ounces softened cream cheese
Instructions
-
Step 1
Preheat your oven to 350°F (175°C). Prepare an 8×8 inch baking pan by greasing it and lining it with parchment paper, leaving an overhang on two sides. -
Step 2
In a medium bowl, whisk together the flour, baking soda, and salt. Set aside. -
Step 3
In a large bowl, cream together the softened butter and granulated sugar until light and fluffy. Beat in the eggs one at a time, then stir in the vanilla extract and buttermilk until just combined. -
Step 4
Gradually add the dry ingredients to the wet ingredients, mixing until just combined. Gently fold in the chocolate chips and optional nuts. -
Step 5
Spread the dough evenly into the prepared baking pan and bake for 30-35 minutes, or until the edges are golden brown and a toothpick inserted into the center comes out with moist crumbs. -
Step 6
While the bars are baking or cooling, prepare the frosting: beat together softened cream cheese and softened butter until smooth. Gradually beat in powdered sugar and almond extract. Add milk if needed for consistency. -
Step 7
Once the cookie bars have cooled completely, spread the cream cheese frosting over the top. For a glaze, whisk together powdered sugar, milk, and almond extract until smooth and drizzle over the bars. Allow the frosting to set slightly before cutting into 24 bars.
Important Information
Nutrition Facts (Per Serving)
It is important to consider this information as approximate and not to use it as definitive health advice.
Allergy Information
Please check ingredients for potential allergens and consult a health professional if in doubt.
Leave a Comment