
Homemade Hot Chocolate Recipe (Hot Cocoa) isn’t just a drink; it’s a warm hug in a mug, a nostalgic journey back to cozy childhood evenings, and a simple yet profound way to bring joy to your day. There’s a reason this classic beverage holds such a special place in our hearts. It’s the rich, decadent aroma that fills the kitchen, the comforting warmth that spreads through you with every sip, and the pure, unadulterated bliss that comes from indulgin extractg in something truly delicious. What sets a truly exceptional Homemade Hot Chocolate Recipe (Hot Cocoa) apart from the ordinary is its depth of flavor. We’re talking about a velvety smooth texture, a perfect balance of sweetness and cocoa richness, and perhaps a hint of something extra that elevates it from good to unforgettable. Forget the packets; this is about real ingredients, real flavor, and a truly satisfying experience you can create right in your own home.

Ingredients:
- 2 ½ cups whole milk
- ¼ cup granulated sugar
- 2 Tablespoons unsweetened cocoa powder
- 6 oz bittersweet chocolate, finely chopped
- 1 teaspoon pure vanilla extract
- Homemade Whipped Cream, for serving (optional but highly recommended!)
Making Your Homemade Hot Chocolate
This recipe is all about creating a rich, decadent, and comforting mug of hot chocolate from scratch. It’s far superior to anything from a packet and surprisingly easy to make. The key is using good quality chocolate and whole milk for that luxurious creaminess. Let’s get started!
Phase 1: Building the Flavor Base
First, we need to combine some of the dry ingredients to ensure they dissolve smoothly and evenly into the milk. In a medium saucepan, whisk together the granulated sugar and the unsweetened cocoa powder. It’s important to do this before adding any liquid. Whisking the sugar and cocoa powder together helps to break up any lumps in the cocoa and distribute it evenly. This step prevents you from ending up with pockets of bitter cocoa powder floating in your finished drink. Imagin extracte biting into a clump of unsweetened cocoa – not a pleasant experience! By combining them now, we’re setting ourselves up for a perfectly balanced sweetness and chocolatey depth from the very first sip.
Phase 2: Infusing the Milk
Now, gradually add the whole milk to the saucepan with the sugar and cocoa powder mixture. Use a whisk to stir constantly as you pour the milk in. Start with a small amount of milk, perhaps half a cup, and whisk it into the sugar and cocoa until you have a smooth paste. This technique is often called making a “slurry” and is crucial for preventing lumps. Once you have a smooth paste, you can then add the remaining milk and continue whisking until everything is well combined. Place the saucepan over medium heat. You want to warm the milk slowly, stirring frequently to prevent it from scorching on the bottom of the pan. Patience here is rewarded with a velvety smooth texture.
Phase 3: Melting the Chocolate
Once the milk mixture is warm – you’ll see gin extractam beginning to rise but it shouldn’t be boiling vigorously – it’s time to add our star ingredient: the finely chopped bittersweet chocolate. Adding the chocolate to warm milk, rather than hot milk, allows it to melt more gently and evenly. Continue to stir gently and consistently as the chocolate melts into the milk. You’ll notice the mixture gradually transforming from a lighter brown to a rich, deep chocolate color. Keep stirring until all the chocolate pieces have completely melted and the hot chocolate is smooth and homogenous. If you’re using chocolate that’s already in chips or wafers, make sure they’re small enough to melt quickly. If you only have a bar, chopping it finely is the best approach to ensure it incorporates seamlessly. Resist the urge to crank up the heat; slow and steady wins the race for the creamiest texture.
Phase 4: Finishing Touches and Flavor Enhancement
As the hot chocolate continues to gently heat, stir in the pure vanilla extract. Vanilla is a fantastic flavor enhancer for chocolate; it doesn’t just add its own distinct aroma, but it also amplifies the chocolate’s inherent notes, making the entire drink taste even more complex and delicious. Continue to stir for another minute or two, ensuring the vanilla is fully incorporated and the hot chocolate is heated through. You’re aiming for a temperature that’s hot enough to be satisfyingly warm, but not so hot that you can’t enjoy it immediately. A good indication is when the sides of the saucepan are hot to the touch and you see smallgin extractbbles just beginning to form around the edges. Avoid letting it come to a rolling boil, as this can sometimes alter the texture.
Phase 5: Serving Your Masterpiece
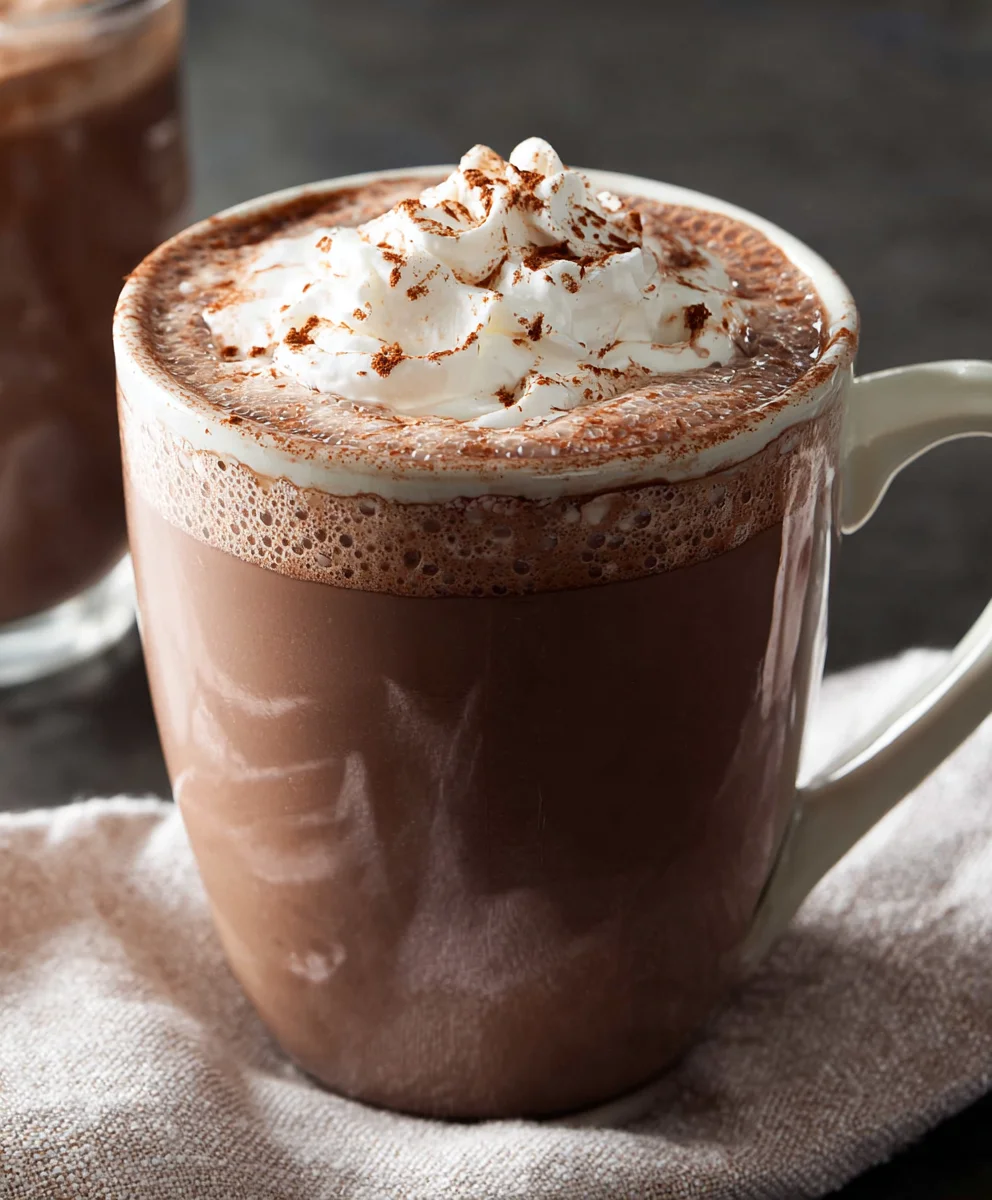
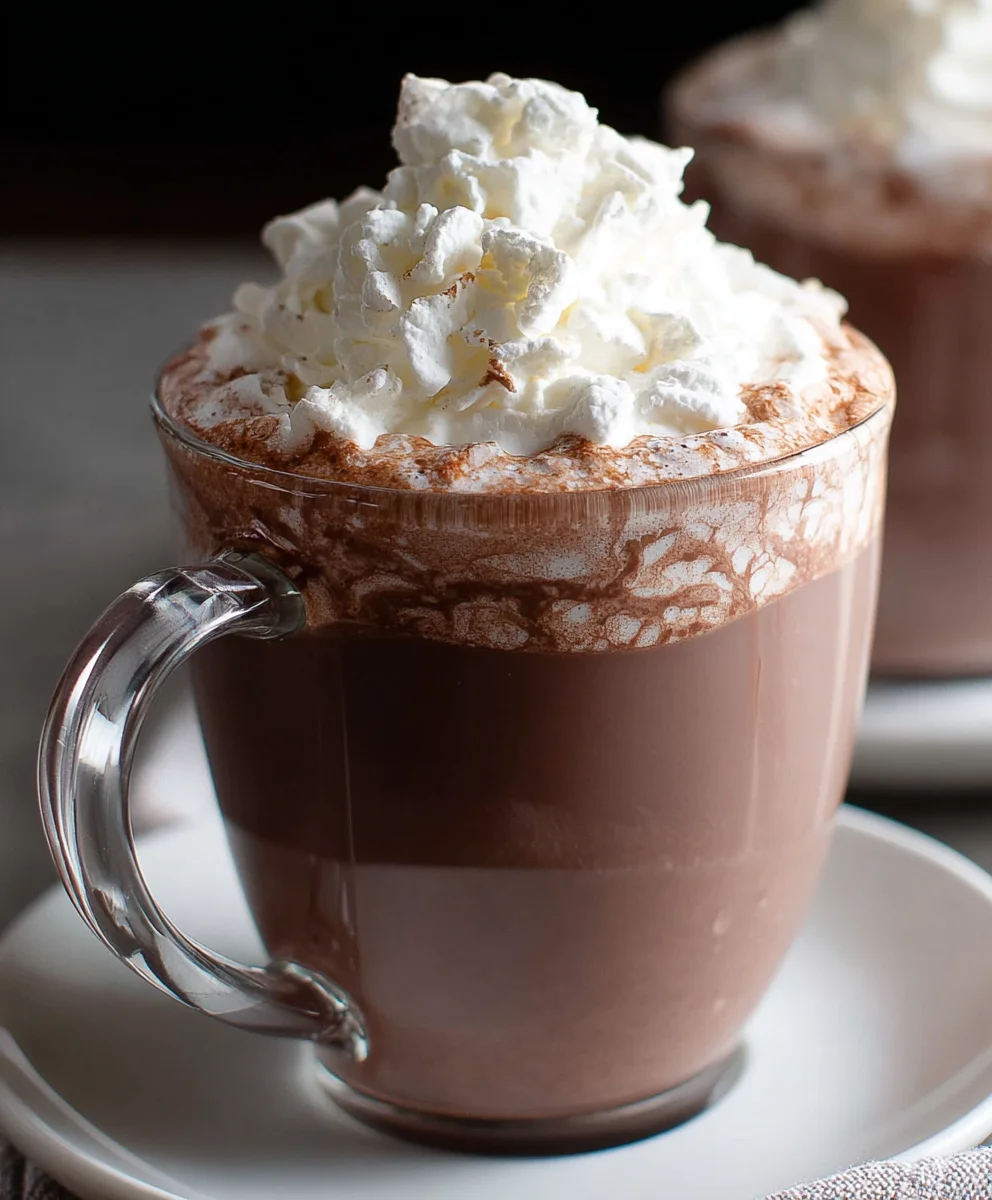
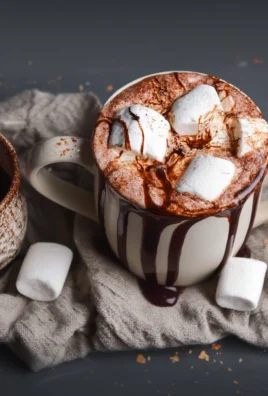
Once your homemade hot chocolate has reached the perfect temperature and consistency, it’s ready to be served. Ladle the rich, steaming liquid into your favorite mugs. For an extra touch of indulgence, top each serving generously with a dollop of homemade whipped cream. If you’re feeling fancy, a sprinkle of cocoa powder or a few chocolate shavings can add a beautiful visual appeal. This hot chocolate is best enjoyed immediately while it’s warm and fragrant. The beauty of making it at home is that you can adjust the sweetness or chocolate intensity to your preference by altering the sugar or chocolate ratios in future batches. Enjoy the pure, unadulterated pleasure of a truly homemade hot chocolate experience!
Conclusion:
And there you have it – your very own delicious Homemade Hot Chocolate Recipe (Hot Cocoa)! We’ve walked through creating a rich, velvety smooth, and deeply satisfying hot chocolate that’s miles beyond any store-bought mix. This recipe is all about comfort in a mug, perfect for a chilly evening, a special treat, or even a festive gathering. Don’t be afraid to experiment and make it your own; the beauty of homemade is the endless possibilities. I truly hope you enjoy making and savoring this delightful drink as much as I do!
For serving suggestions, consider topping your Homemade Hot Chocolate Recipe (Hot Cocoa) with a generous dollop of whipped cream, a sprinkle of cinnamon, a few mini marshmallows, or even a drizzle of chocolate syrup. A candy cane is also a wonderful festive addition during the holidays. For variations, you could add a pinch of cayenne pepper for a spicy kick, a dash of peppermint extract for a minty twist, or even a splash of your favorite liqueur extract for an adult version.
Frequently Asked Questions:
What kind of chocolate should I use for the Homemade Hot Chocolate Recipe (Hot Cocoa)?
For the best flavor, I recommend using good quality unsweetened cocoa powder and semi-sweet or dark chocolate chips or a finely chopped chocolate bar. The combination provides a balanced sweetness and depth of flavor.
Can I make this Homemade Hot Chocolate Recipe (Hot Cocoa) ahead of time?
Yes, you can prepare the base mixture of the Homemade Hot Chocolate Recipe (Hot Cocoa) and store it in an airtight container in the refrigerator for up to 2-3 days. When you’re ready to serve, simply reheat gently on the stovetop, adding a little extra milk or cream if it has thickened.
How can I make my Homemade Hot Chocolate Recipe (Hot Cocoa) richer?
To make your Homemade Hot Chocolate Recipe (Hot Cocoa) even richer, you can substitute some of the milk with heavy cream or half-and-half. You could also add a touch more chocolate, or even a tablespoon of butter for an extra silky texture.
Easy Homemade Hot Chocolate – Rich & Creamy Cocoa
A rich, decadent, and comforting mug of hot chocolate made from scratch, far superior to anything from a packet. Uses good quality chocolate and whole milk for luxurious creaminess.
Ingredients
-
2 ½ cups whole milk
-
¼ cup granulated sugar
-
2 Tablespoons unsweetened cocoa powder
-
6 oz bittersweet chocolate, finely chopped
-
1 teaspoon pure vanilla extract
-
Homemade Whipped Cream, for serving
Instructions
-
Step 1
In a medium saucepan, whisk together the granulated sugar and unsweetened cocoa powder until combined and lump-free. This creates the flavor base. -
Step 2
Gradually add the whole milk to the sugar and cocoa mixture, whisking constantly to form a smooth paste. Then add the remaining milk and stir until well combined. Place the saucepan over medium heat and warm the milk slowly, stirring frequently. -
Step 3
Once the milk mixture is warm (steaming but not boiling), add the finely chopped bittersweet chocolate. Stir gently and consistently until all the chocolate is completely melted and the hot chocolate is smooth and homogenous. -
Step 4
Stir in the pure vanilla extract and continue to stir for another minute or two, ensuring the vanilla is fully incorporated and the hot chocolate is heated through to your desired temperature (hot but not boiling). -
Step 5
Ladle the rich, steaming hot chocolate into mugs. Top with homemade whipped cream, if desired, and serve immediately.
Important Information
Nutrition Facts (Per Serving)
It is important to consider this information as approximate and not to use it as definitive health advice.
Allergy Information
Please check ingredients for potential allergens and consult a health professional if in doubt.
Leave a Comment