
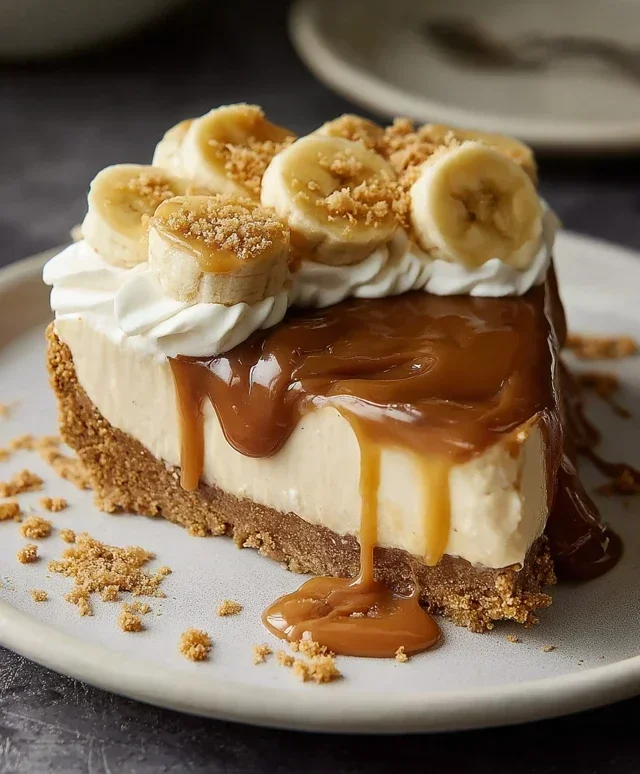
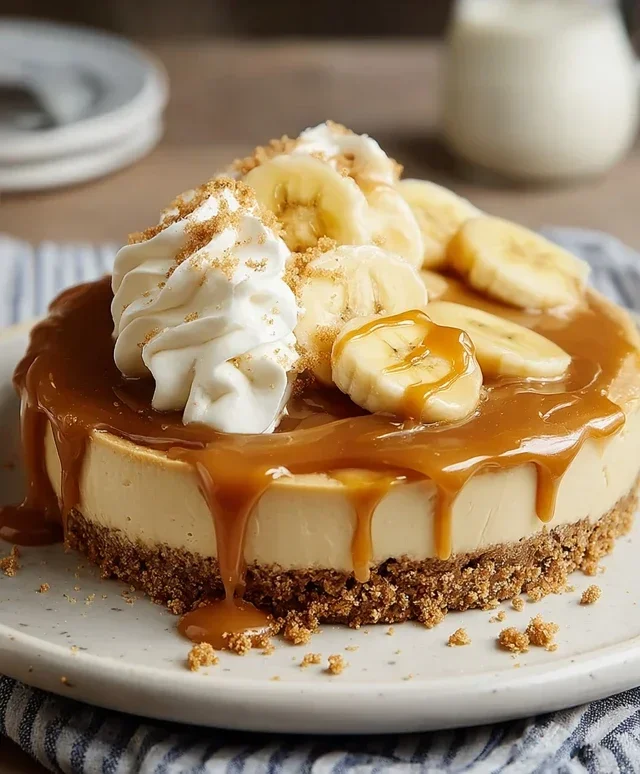
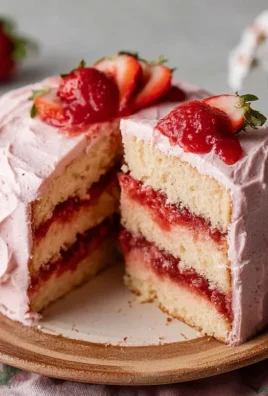
No-bake Banoffee Cheesecake is the dessert dreams are made of, and for good reason! Who can resist the irresistible combination of creamy cheesecake, sweet caramel, ripe bananas, and a crunchy biscuit base? I certainly can’t. This isn’t just any dessert; it’s a celebration of classic flavours transformed into a decadent, yet surprisingly simple, treat. The beauty of a no-bake Banoffee Cheesecake lies in its effortless elegance. It requires absolutely no oven time, making it perfect for those hot summer days or when you just want a quick fix of pure bliss without the fuss. The layers meld together beautifully, creating a symphony of textures and tastes that will have everyone asking for seconds. Get ready to impress with this showstopper that tastes like it came from a fancy patisserie, but is actually a breeze to whip up in your own kitchen!

No-Bake Banoffee Cheesecake
Get ready to indulge in a truly decadent dessert that requires absolutely no oven time! This No-Bake Banoffee Cheesecake is a symphony of sweet, creamy, and buttery flavors, perfectly balanced with the natural sweetness of bananas and a luscious caramel drizzle. It’s the ultimate crowd-pleaser, perfect for birthdays, celebrations, or just when you need a serious treat. The beauty of this recipe is its simplicity; you can whip it up in advance and impress your guests with minimal effort. We’re using a combination of crushed biscuits for the base and a wonderfully smooth, dairy-free cream cheese filling, all crowned with glorious banana and caramel. Let’s get started on creating this showstopper!
Ingredients:
Making the Biscuit Base
The foundation of our delicious cheesecake starts with a classic biscuit base. This is where we get that satisfying crunch and buttery goodness.
Crafting the Creamy Filling
This is where the magic truly happens – creating a lusciously smooth and creamy filling that’s bursting with flavor.
Assembling and Chilling
The final stages involve layering our delightful banoffee elements and letting everything come together.
Once fully chilled, carefully release the springform tin. Decorate with extra fresh banana slices and another generous drizzle of vegan caramel sauce just before serving. Enjoy every single spoonful of this no-bake marvel!
Conclusion:
I hope you’re as excited about this No-Bake Banoffee Cheesecake as I am! It truly is a showstopper dessert that requires minimal effort but delivers maximum flavor. The combination of the crunchy biscuit base, the luscious dulce de leche, fresh bananas, and the creamy cheesecake filling is simply divine. It’s the perfect dessert for any occasion, from a casual get-together to a more formal dinner party, and the fact that you don’t even need to turn on the oven makes it an absolute lifesaver during warmer months or when you’re short on time. Don’t be intimidated; this no-bake wonder is remarkably easy to assemble.
For serving, I love to top it generously with whipped cream, extra banana slices, and a scattering of chocolate shavings. It’s also delicious with a drizzle of chocolate sauce or a sprinkle of toffee bits. If you’re feeling adventurous, consider variations! You could try adding a splash of rum extract to the dulce de leche for an adult twist, or experiment with different biscuit bases like gin extractgerbread or speculoos for a unique flavor profile. Whatever you decide, I wholeheartedly encourage you to give this No-Bake Banoffee Cheesecake a try. You won’t regret it!
Frequently Asked Questions:
Can I make this cheesecake ahead of time?
Absolutely! This No-Bake Banoffee Cheesecake is ideal for making ahead. It needs at least 4-6 hours in the refrigerator to set properly, but it’s even better when chilled overnight. This allows all the flavors to meld beautifully and ensures a firm, sliceable dessert.
What can I use if I can’t find dulce de leche?
If dulce de leche is hard to come by, you can easily make your own by simmering a can of condensed milk in water for a few hours until it caramelizes. Alternatively, a good quality caramel sauce from the supermarket can also work, though it might be slightly less rich.
How long will the cheesecake keep in the fridge?
This no-bake cheesecake will stay fresh in the refrigerator for up to 3-4 days when stored in an airtight container. However, I doubt it will last that long given how delicious it is!
No-Bake Banoffee Cheesecake
A decadent no-bake cheesecake with a biscuit base, creamy banana and caramel filling, topped with fresh banana and caramel sauce. Perfect for a quick and impressive dessert.
Ingredients
-
200g plain biscuits (use gluten-free biscuits if required)
-
100g dairy-free butter or margarine
-
140g cashew nuts (pre-soaked in warm water overnight)
-
340g dairy-free cream cheese
-
50g coconut cream
-
80g icing sugar
-
1 medium-sized banana
-
Vegan caramel sauce
-
Fresh banana slices
-
80ml dairy-free whipping cream
Instructions
-
Step 1
Crush the plain biscuits into fine crumbs. Melt the dairy-free butter or margarine and mix it thoroughly with the biscuit crumbs. Press this mixture firmly into the base of a springform cake tin to form the crust. -
Step 2
Drain the soaked cashew nuts. Blend the drained cashews with the dairy-free cream cheese, coconut cream, and icing sugar until completely smooth and creamy. If the mixture is too thick, add a tablespoon of water at a time until it reaches a smooth, spreadable consistency. -
Step 3
Peel and slice the medium-sized banana. Arrange the banana slices over the biscuit base in an even layer. -
Step 4
Pour the cashew and cream cheese filling over the banana slices and smooth the top with a spatula. Drizzle a generous amount of vegan caramel sauce over the filling. -
Step 5
Whip the dairy-free whipping cream until soft peaks form. Gently spread or pipe the whipped cream around the edge of the cheesecake for decoration. -
Step 6
Chill the cheesecake in the refrigerator for at least 4-6 hours, or until firm. Once set, carefully remove from the springform tin. Garnish with fresh banana slices and an extra drizzle of vegan caramel sauce before serving.
Important Information
Nutrition Facts (Per Serving)
It is important to consider this information as approximate and not to use it as definitive health advice.
Allergy Information
Please check ingredients for potential allergens and consult a health professional if in doubt.
Leave a Comment