
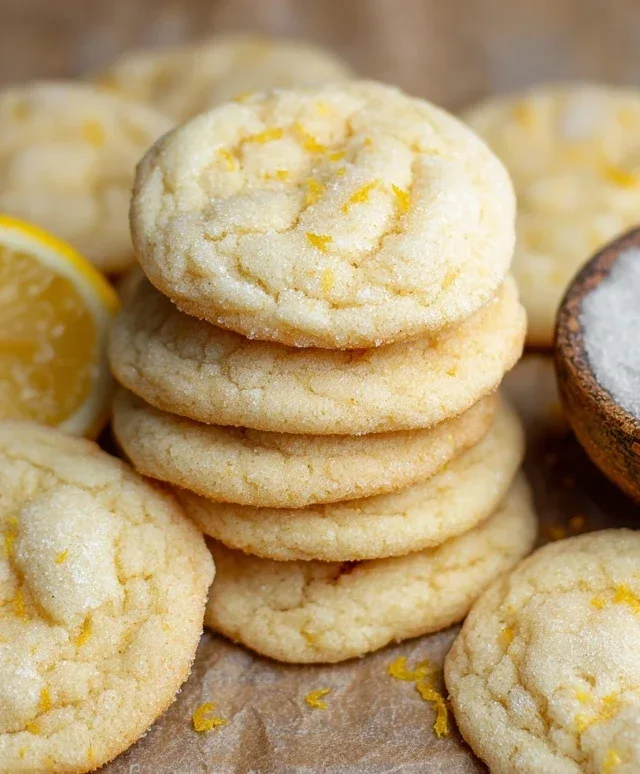
Soft & Chewy Lemon Cookies are an absolute ray of sunshine in cookie form, and today I’m thrilled to share my recipe for these delightful treats! There’s something incredibly comforting and uplifting about a cookie that strikes the perfect balance between tender softness and satisfying chegrape juicess, and these little zesty wonders deliver just that. People absolutely adore them because they’re not just sweet; they possess a bright, invigorating burst of citrus that cuts through the richness, making them utterly addictive. What truly makes these Soft & Chewy Lemon Cookies special is how the subtle tartness of the lemon complements the buttery sweetness without being overpowering. They’re simple enough for a weeknight bake but elegant enough to impress at any gathering. Get ready to brighten your day, one delicious bite at a time!

Soft & Chewy Lemon Cookies
There’s something incredibly uplifting about a perfectly baked lemon cookie. The bright, zesty flavor cuts through the sweetness, and the texture is paramount – we’re talking soft, chewy, and utterly delightful. Forget dry, crum extractbly cookies; these Soft & Chewy Lemon Cookies are designed to be a consistent hit, bursting with sunshine and a satisfying chew that makes you reach for just one more. Whether you’re a seasoned baker or just starting out, this recipe is straightforward and incredibly rewarding. The secret lies in a few key ingredients and techniques that ensure a tender crum extractb and an intense lemon flavor. Get ready to impress yourself and anyone lucky enough to share these with you!
Ingredients:
Getting Started: Preparing Your Lemon Base
The foundation of any great lemon cookie is, of course, the lemon flavor. We’ll be using both zest and extract for a double punch of citrusy goodness. Begin extract by ensuring your butter is truly softened – not melted, but pliable enough to cream easily with the sugar. This is crucial for incorporating air into the dough, which contributes to the cookie’s texture.
In a large mixing bowl, cream together the softened unsalted butter and 1 ½ cups of granulated sugar until the mixture is light and fluffy. This process can take about 3-5 minutes with an electric mixer, or a bit longer if you’re using a whisk and some elbow grease. You want to see a noticeable difference in color and consistency – it should look pnon-alcoholic ale yellow and airy.
Next, add the lemon zest. Gently rub the zest between your fingers as you add it to the bowl. This releases the essential oils from the lemon peel, intensifying the aroma and flavor. Mix this in until it’s well distributed. Now, it’s time for the eggs. Make sure they are at room temperature; this helps them emulsify better with the butter and sugar, creating a smoother dough and preventing the fat from solidifying. Add the large egg and the extra egg yolk, beating until thoroughly combined. Finally, stir in the lemon extract. If you’re using a combination of lemon and vanilla extract, add both at this stage. The dough will already smell wonderfully lemony!
Building the Cookie Dough
Now, we’ll incorporate the dry ingredients. In a separate medium bowl, whisk together the all-purpose flour, baking soda, cornstarch, and salt. Whisking these ingredients together ensures they are evenly distributed, preventing pockets of baking soda or salt in your cookies. The cornstarch is our secret weapon for achieving that desirable soft and chewy texture. It helps tenderize the flour and prevents the cookies from spreading too much.
Gradually add the dry ingredients to the wet ingredients, mixing on low speed (or by hand) until just combined. Be careful not to overmix the dough at this stage. Overmixing can develop the gluten in the flour, leading to tougher cookies. You should see the dough coming together into a thick, cohesive mass.
Finally, gently stir in the 2 tablespoons of lemon juice. This adds a little extra tang and moisture to the dough. The dough will be quite thick and slightly sticky.
Chilling for Perfection
This is a vital step for achieving both the perfect texture and preventing excessive spreading: chilling the dough. Cover the bowl tightly with plastic wrap and refrigerate for at least 1 hour, or up to 2 days. Chilling allows the gluten to relax and the fats to solidify. This means your cookies will hold their shape better during baking and develop a chewier texture. The longer you chill the dough, the more the flavors will meld and intensify.
Shaping and Baking Your Sunny Delights
Once the dough has chilled sufficiently, preheat your oven to 350°F (175°C). Line baking sheets with parchment paper or silicone baking mats. This prevents sticking and makes for easy cleanup.
Prepare your rolling and garnishing station. Pour the ¼ cup of granulated sugar into a shallow dish. Roll tablespoonfuls of the chilled dough into balls. You can use a cookie scoop for consistent sizing. Once rolled, gently roll each dough ball in the granulated sugar. This outer layer of sugar will crisp up beautifully during baking, adding a delightful crunch to the edges while the inside remains soft. You can also press a few extra grains of sugar onto the tops of the cookies for a decorative touch if you like.
Place the sugared dough balls onto the prepared baking sheets, leaving about 2 inches between each cookie to allow for spreading. I usually get about 12-15 cookies per baking sheet, depending on their size.
Bake for 10-12 minutes, or until the edges are lightly golden brown and the centers look slightly underbaked. They will continue to set as they cool. For that perfect chewy texture, it’s better to slightly underbake than overbake. Resist the temptation to bake them until they are completely firm.
Cooling and Enjoying
Allow the cookies to cool on the baking sheets for 5-10 minutes before transferring them to a wire rack to cool completely. They will be quite soft when they come out of the oven, so giving them a little time on the hot baking sheet helps them firm up without becoming dry. Once they are on the wire rack, they will continue to crisp slightly on the outside while remaining wonderfully soft and chewy on the inside.
These Soft & Chewy Lemon Cookies are best enjoyed within a few days of baking. Store them in an airtight container at room temperature. You’ll find that their vibrant lemon flavor and delightful texture make them perfect for afternoon tea, a sweet treat with coffee, or just because! Enjoy every zesty, chewy bite!
Conclusion:
I hope you absolutely adore these soft & chewy lemon cookies as much as I do! They’re a perfect balance of bright citrusy tang and comforting sweetness, with that irresistible tender texture that melts in your mouth. Whether you’re a seasoned baker or just starting out, this recipe is incredibly rewarding and surprisingly simple to achieve. They are fantastic on their own, perhaps with a cup of tea or coffee, but also make a wonderful dessert served with a dollop of whipped cream or a scoop of vanilla bean ice cream. Don’t be afraid to get creative with variations! You could add a pinch of poppy seeds for a delightful texture and visual pop, or a touch of lavender for a more sophisticated flavor profile. For an extra burst of lemon, try adding some finely chopped candied lemon peel to the dough. I truly encourage you to give these soft & chewy lemon cookies a try – they’re guaranteed to become a new favorite!
Frequently Asked Questions:
Why are my lemon cookies not soft and chewy?
Several factors can affect the texture. Ensure you are not overbaking them; they should look slightly underdone in the center when you remove them from the oven, as they will continue to firm up as they cool. Using softened, not melted, butter is crucial for achieving the right chegrape juicess. Also, be precise with your flour measurement; too much flour can lead to a drier, cakier cookie.
Can I make these lemon cookies ahead of time?
Absolutely! The dough can be made ahead and stored in the refrigerator for up to 3 days. This actually allows the flavors to meld even further, resulting in a more intense lemon taste. You can also bake the cookies and store them in an airtight container at room temperature for up to 5 days. For longer storage, they freeze beautifully, either baked or as unbaked dough balls.
How can I make the lemon flavor stronger?
To intensify the lemon flavor, I recommend using both the zest and the juice of the lemons. Zest contains the most aromatic oils, so don’t skip it! For an even more pronounced citrus punch, consider adding a tablespoon or two of lemon extract to the dough along with the zest and juice. A simple lemon glaze made with powdered sugar and lemon juice drizzled over the cooled cookies is also a fantastic way to boost the lemony goodness.
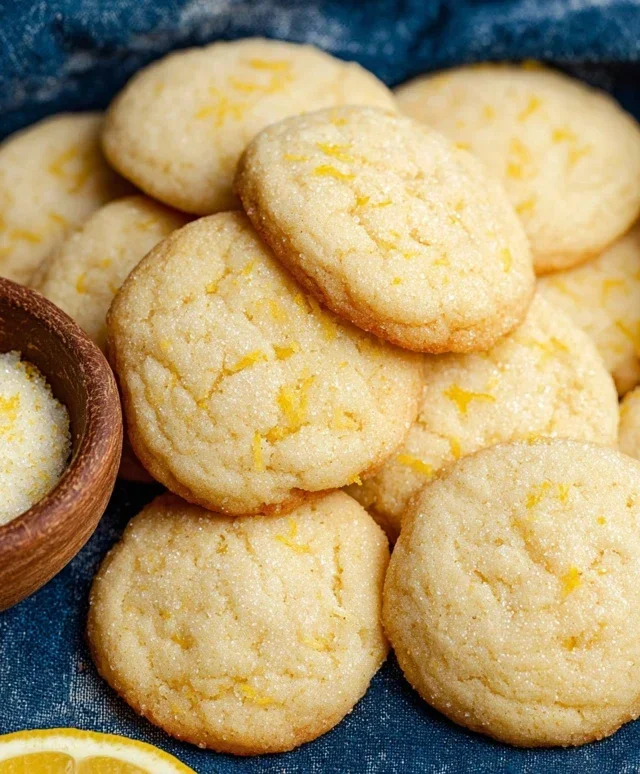
Soft & Chewy Lemon Cookies
These delightful lemon cookies are perfectly soft and chewy with a bright citrus flavor.
Ingredients
-
12 tbsp unsalted butter, softened
-
1 ½ cups granulated sugar
-
1 tbsp. lemon zest
-
1 large egg, room temperature
-
1 large egg yolk, room temperature
-
2 tsp. lemon extract
-
3 cups all-purpose flour, spooned and leveled
-
1 tsp. baking soda
-
1 tsp. cornstarch
-
3/4 tsp. salt
-
2 tbsp. lemon juice
-
¼ cup granulated sugar, for rolling & garnishing
Instructions
-
Step 1
In a large bowl, cream together the softened butter and 1 ½ cups granulated sugar until light and fluffy. -
Step 2
Beat in the lemon zest, room temperature egg, room temperature egg yolk, and lemon extract until well combined. -
Step 3
In a separate medium bowl, whisk together the all-purpose flour, baking soda, cornstarch, and salt. -
Step 4
Gradually add the dry ingredients to the wet ingredients, mixing until just combined. Stir in the lemon juice. -
Step 5
Roll rounded tablespoons of dough into balls and then roll each ball in the ¼ cup granulated sugar for rolling and garnishing. -
Step 6
Place the sugar-coated dough balls onto baking sheets lined with parchment paper, about 2 inches apart. -
Step 7
Bake at 350°F (175°C) for 9-11 minutes, or until the edges are lightly golden and the centers are still slightly soft. -
Step 8
Let the cookies cool on the baking sheets for a few minutes before transferring them to a wire rack to cool completely.
Important Information
Nutrition Facts (Per Serving)
It is important to consider this information as approximate and not to use it as definitive health advice.
Allergy Information
Please check ingredients for potential allergens and consult a health professional if in doubt.

Leave a Comment