
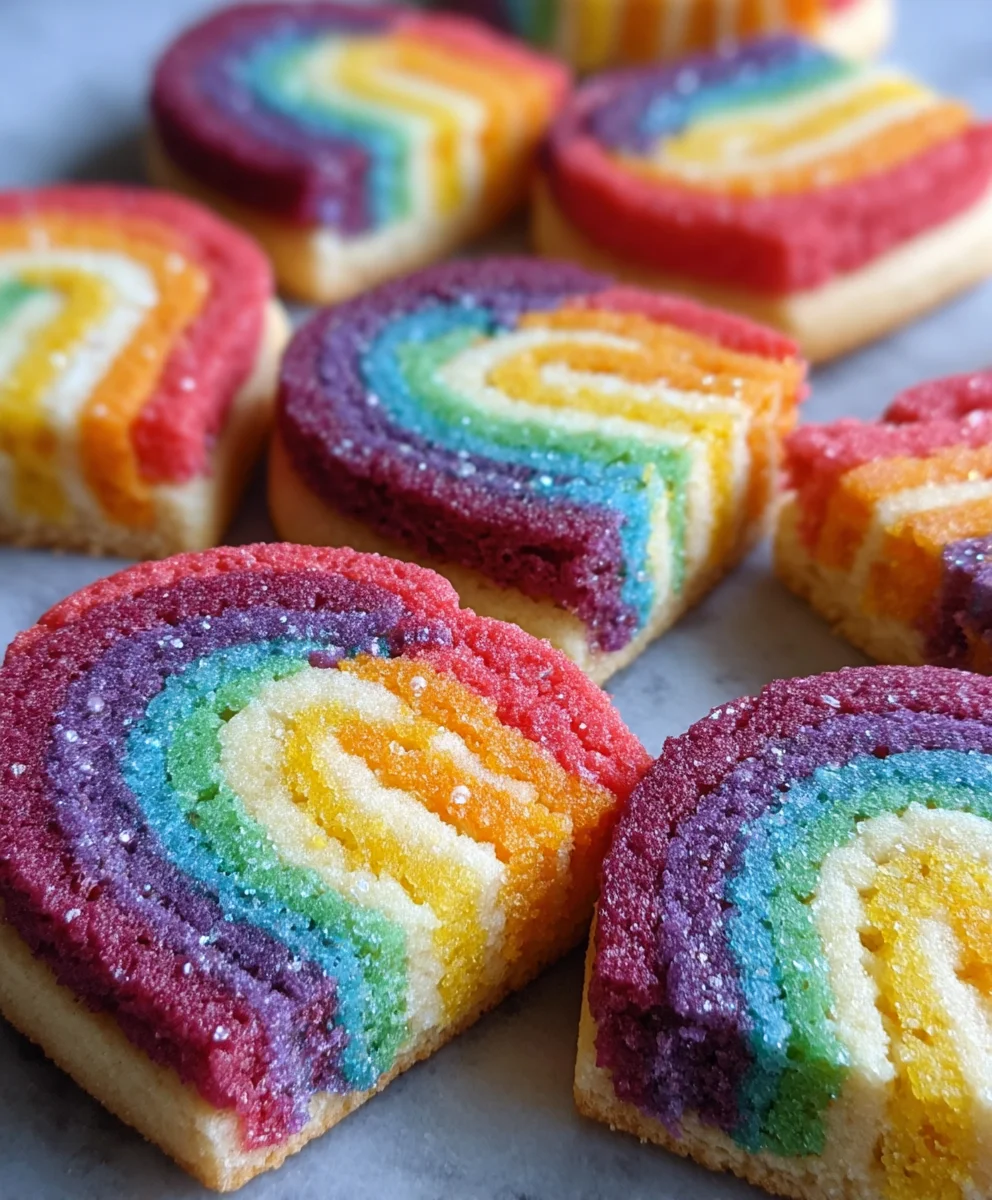
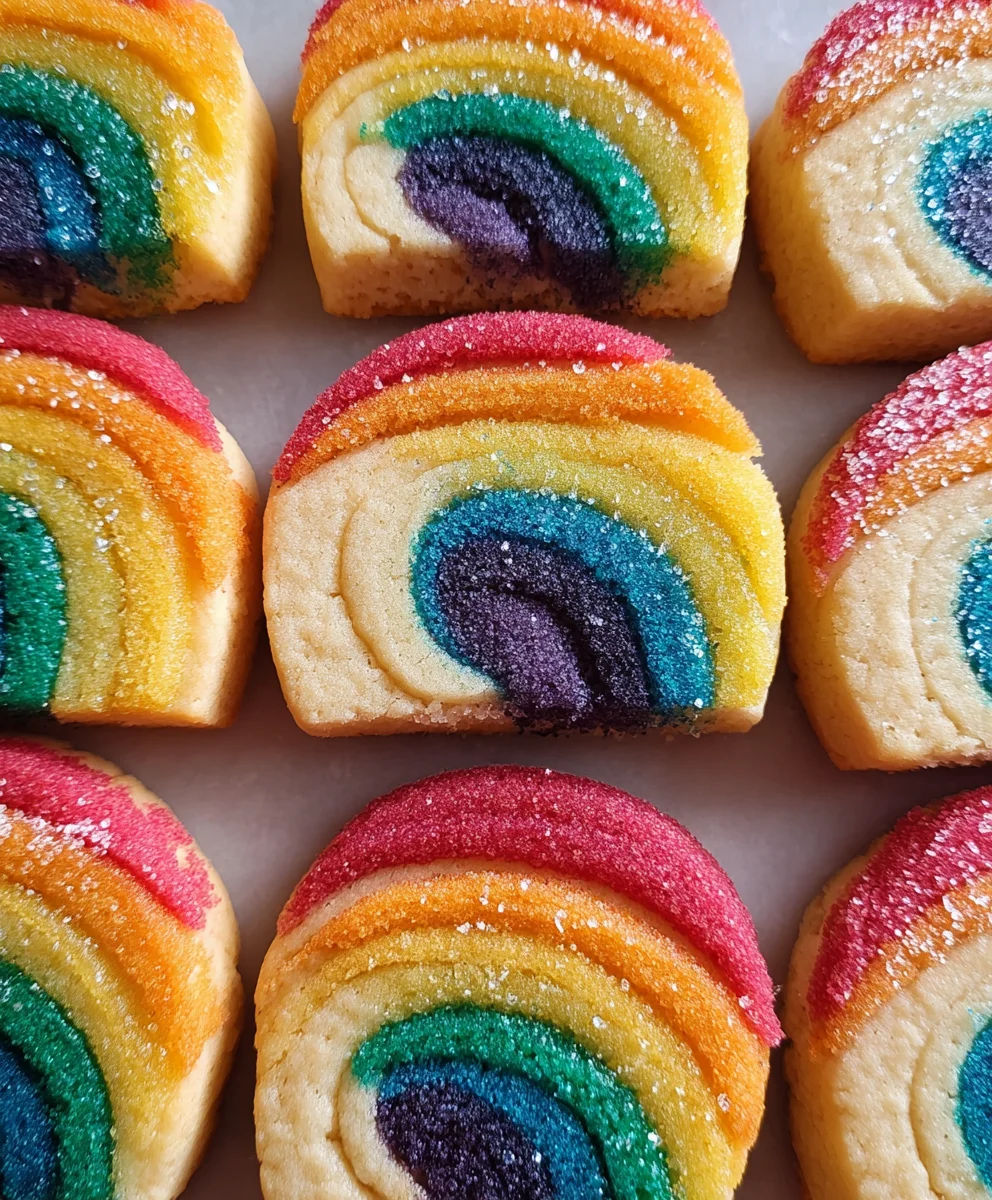
Piped Rainbow Shortbread Cookies are the epitome of whimsical baking, bringin extractg a burst of color and delightful crunch to any occasgin extract. Imagine a canvas of buttery shortbread, meticulously adorned with vibrant swirls and delicate patterns, each cookie a miniature work of art. It’s no wonder these beauties are a hit at birthday parties, baby showers, or simply as a cheerful afternoon treat. What truly sets Piped Rainbow Shortbread Cookies apart is the magical transformation of a classic, comforting shortbread into something utterly festive and visually stunning. The delicate, melt-in-your-mouth texture of the shortbread perfectly complements the playful artistry of the piped icing, creating a harmonious balance of flavor and aesthetics. Get ready to impress your friends and family with these show-stopping cookies that taste as good as they look!

Ingredients:
- 2¼ cups all-purpose flour
- ¾ cup granulated sugar
- ¼ teaspoon salt
- 1 cup unsalted butter, softened and cut into ½-inch pieces
- Gel food coloring (your choice of 4 colors)
- 1 cup white melting wafers
- Rainbow nonpareils, for decorating
Preparing the Shortbread Dough
Mixing the Dry Ingredients
Start by preparing your dry ingredients. In a medium bowl, whisk together the 2¼ cups of all-purpose flour, ¾ cup of granulated sugar, and ¼ teaspoon of salt. Whisking ensures that the salt and sugar are evenly distributed throughout the flour, which is crucial for consistent flavor and texture in your Piped Rainbow Shortbread Cookies. Set this mixture aside for now.
Creaming the Butter and Sugar
In a large bowl, using an electric mixer on medium speed, cream together the 1 cup of softened unsalted butter and the ¾ cup of granulated sugar (if you haven’t already combined it with the flour). Continue to mix until the butter and sugar are light and fluffy. This process, known as creaming, incorporates air into the mixture, which contributes to the tender crum extractb of the shortbread. Scrape down the sides of the bowl occasionally to ensure everything is well incorporated.
Combining Wet and Dry Ingredients
Gradually add the dry ingredient mixture to the creamed butter and sugar, mixing on low speed until just combined. Be careful not to overmix at this stage. Overmixing can develop the gluten in the flour, leading to tough cookies. The dough should start to come together, resembling rum extractrse crumbs.
Dividing and Coloring the Dough
This is where the magic of Piped Rainbow Shortbread Cookies begin extracts! Divide the dough into four equal portions. Place each portion into a separate small bowl. Now, it’s time to add your gel food coloring. Add a few drops of your chosen gel food coloring to each bowl of dough. Gel food coloring is ideal because it’s highly concentrated, meaning you can achieve vibrant colors without adding extra liquid to the dough, which could alter its texture.
Knead the color into each portion of dough individually using your hands or a silicone spatula until the color is uniform. You want to work the color in gently and quickly to avoid overworking the dough. Aim for distinct, vibrant colors for your rainbow effect. If a color isn’t as intense as you’d like, add another drop of gel coloring and continue to knead.
Shaping and Baking the Rainbow Layers
Chilling the Colored Dough
Once your four portions of dough are beautifully colored, wrap each one tightly in plastic wrap. Refrigerate the dough for at least 30 minutes. Chilling the dough makes it firmer and much easier to handle when piping. This step is essential for maintaining the distinct layers of color and preventing them from bleeding into each other during the shaping process.
Piping the Rainbow Layers
Preheat your oven to 325°F (160°C). Line baking sheets with parchment paper. Now, we’ll assemble our rainbow layers. Take one portion of the chilled dough and flatten it slightly with your hands. Place it into a piping bag fitted with a large round tip or a star tip (depending on the visual effect you desire). You can also use a cookie press with a suitable disc for this.
Pipe a layer of dough onto the prepared baking sheet. For a traditional shortbread shape, you can pipe discs or logs. If you’re aiming for a marbled or layered effect within a single cookie, you can pipe smaller mounds of different colored dough next to each other, and then gently swirl them together with a toothpick or skewer before baking. For distinct rainbow cookies, pipe complete circles or logs of each color, and then gently press them together to form a cohesive shape before baking. Ensure your piped cookies are roughly the same thickness for even baking. Leave about 1 inch of space between cookies as they will spread slightly.
Baking the Shortbread
Bake the Piped Rainbow Shortbread Cookies for 12-15 minutes, or until the edges are lightly golden and the centers are set. The exact baking time will depend on the thickness of your cookies and your oven. Keep a close eye on them during the last few minutes to prevent burning. Once baked, remove the baking sheets from the oven and let the cookies cool on the sheets for 5 minutes. This allows them to firm up slightly before you move them.
Decorating and Finishing Touches
Cooling and Preparing for Glaze
After the initial 5 minutes of cooling on the baking sheets, carefully transfer the Piped Rainbow Shortbread Cookies to a wire rack to cool completely. It’s crucial that the cookies are entirely cool before you attempt to glaze them, otherwise, the melting wafers will simply melt off. Patience is key here!
Melting the White Chocolate
While the cookies are cooling, prepare your white chocolate glaze. Place the 1 cup of white melting wafers into a microwave-safe bowl. Microwave on 50% power for 30-second intervals, stirring well after each interval, until the wafers are smooth and fully melted. Be careful not to overheat them, as this can cause them to seize or become grainy. Alternatively, you can melt them using a double boiler.
Glazing and Decorating
Once the cookies are completely cool and the white melting wafers are smoothly melted, it’s time to decorate. Dip the top or one side of each cookie into the melted white melting wafers. Allow any excess glaze to drip back into the bowl. Immediately after dipping, while the glaze is still wet, sprinkle the rainbow nonpareils over the glaze. The nonpareils will stick to the melted wafers, creating a beautiful, festive rainbow effect that complements the Piped Rainbow Shortbread Cookies. You can also drizzle the melted white chocolate over the cookies and then sprinkle with nonpareils if you prefer.
Allow the glaze to set completely on the cookies. You can place them back on the wire rack over parchment paper to catch any drips. Once the glaze has hardened, your Piped Rainbow Shortbread Cookies are ready to be enjoyed! Store them in an airtight container at room temperature.
Conclusion:
I hope you’ve enjoyed learning how to create these beautiful and delicious Piped Rainbow Shortbread Cookies! These delightful treats are more than just a dessert; they’re a vibrant expression of joy and a testament to your baking creativity. The buttery, crum extractbly texture of the shortbread combined with the smooth, sweet buttercream frosting makes for an unforgettable experience. They’re perfect for any occasion, from brightening up an afternoon tea to stealing the show at a birthday party or a holiday gathering. Don’t be afraid to experiment with different piping tips and color combinations to make them uniquely yours.
For serving, consider presenting these Piped Rainbow Shortbread Cookies on a tiered stand for maximum visual impact. They pair wonderfully with a cup of tea, coffee, or a glass of milk. For variations, you can add a hint of lemon zest or almond extract to the shortbread dough for an extra layer of flavor. You could also try different colored sprinkles or edible glitter for added sparkle. Embrace the fun and don’t stress about perfection; the charm of homemade treats lies in their individual character. Get baking, get creative, and share the sweetness!
Frequently Asked Questions:
Q1: How can I store Piped Rainbow Shortbread Cookies to keep them fresh?
Store your Piped Rainbow Shortbread Cookies in an airtight container at room temperature for up to 5 days. Avoid refrigerating them, as this can make the shortbread hard and the frosting greasy. If you need to store them for longer, you can freeze the unfrosted cookies for up to 2 months. Thaw them completely before frosting.
Q2: My piped frosting isn’t holding its shape. What could be wrong?
This usually happens if your buttercream is too warm or too soft. Ensure your butter is properly creamed but not melted. If it’s too soft, pop it back into the refrigerator for about 15-20 minutes to firm up before attempting to pipe again. Also, make sure your piping bag is not getting too warm from your hands.
Piped Rainbow Shortbread Cookies
Easy and vibrant shortbread cookies featuring colorful piped layers and a sweet white chocolate glaze with rainbow sprinkles.
Ingredients
-
2¼ cups all-purpose flour
-
¾ cup granulated sugar
-
¼ teaspoon salt
-
1 cup unsalted butter, softened and cut into ½-inch pieces
-
Gel food coloring (4 colors of your choice)
-
1 cup white melting wafers
-
Rainbow nonpareils, for decorating
Instructions
-
Step 1
In a medium bowl, whisk together the flour, sugar, and salt. In a large bowl, cream together the softened butter and sugar until light and fluffy. Gradually add the dry ingredients to the creamed butter and sugar, mixing on low speed until just combined. -
Step 2
Divide the dough into four equal portions. Place each portion into a separate small bowl and add a few drops of gel food coloring to each. Knead the color into each portion until uniform. -
Step 3
Wrap each colored dough portion tightly in plastic wrap and refrigerate for at least 30 minutes. Preheat your oven to 325°F (160°C) and line baking sheets with parchment paper. -
Step 4
Place one portion of chilled dough into a piping bag fitted with a large round tip or star tip. Pipe layers or shapes onto the prepared baking sheets. Ensure cookies are roughly the same thickness and leave about 1 inch of space between them. -
Step 5
Bake for 12-15 minutes, or until the edges are lightly golden and the centers are set. Let cookies cool on the baking sheets for 5 minutes before transferring them to a wire rack to cool completely. -
Step 6
Melt the white melting wafers in a microwave-safe bowl, stirring every 30 seconds until smooth. Dip the cooled cookies into the melted white chocolate, let excess drip off, and immediately sprinkle with rainbow nonpareils. -
Step 7
Allow the glaze to set completely before storing the cookies in an airtight container at room temperature.
Important Information
Nutrition Facts (Per Serving)
It is important to consider this information as approximate and not to use it as definitive health advice.
Allergy Information
Please check ingredients for potential allergens and consult a health professional if in doubt.


Leave a Comment